CheckCentral integrates with several RMMs, PSAs, and ticketing software, including Autotask, helping you consolidate service ticket issues.
To integrate Autotask with CheckCentral, begin by logging into your CheckCentral account.
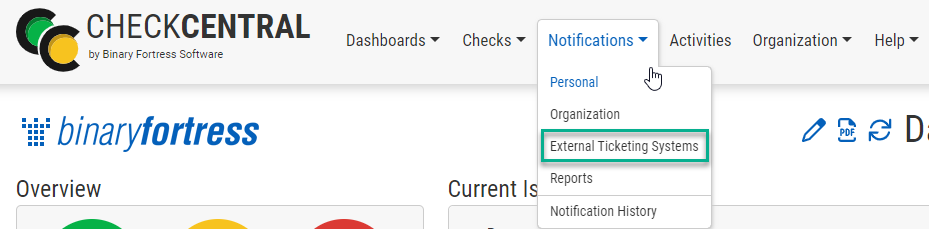
From the main menu, click Notifications, then External Ticketing Systems.
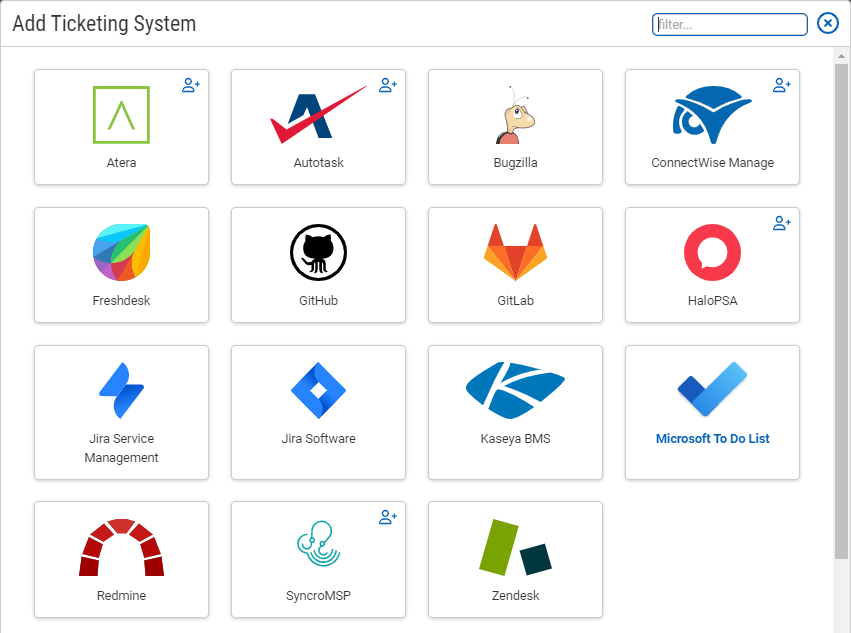
Click Add Ticketing System and choose Autotask.
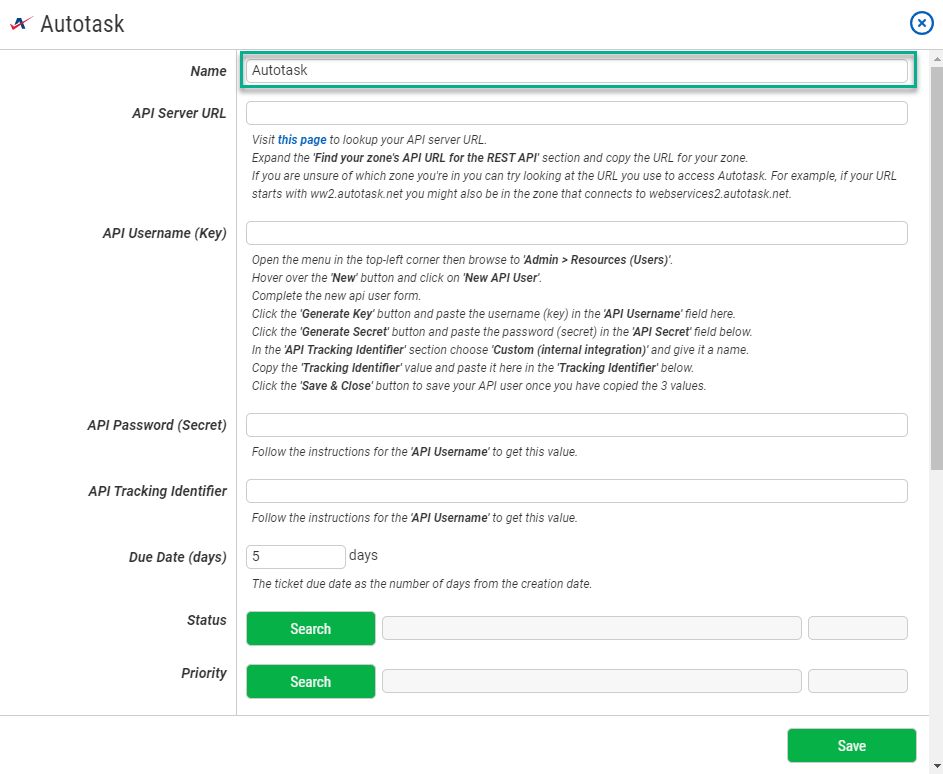
This will bring up the configuration options required for CheckCentral to communicate with Autotask servers via the API.
You can name this configuration anything you'd like.
The other details require you to log into your Autotask account.
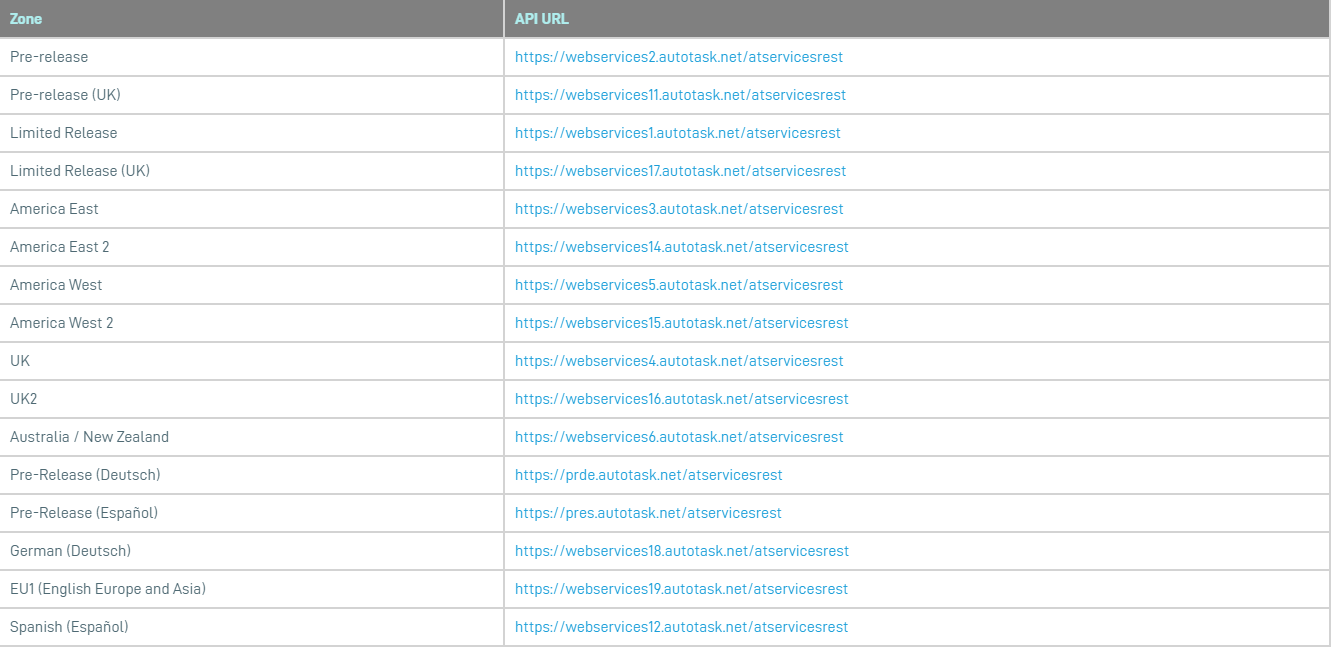
Visit the
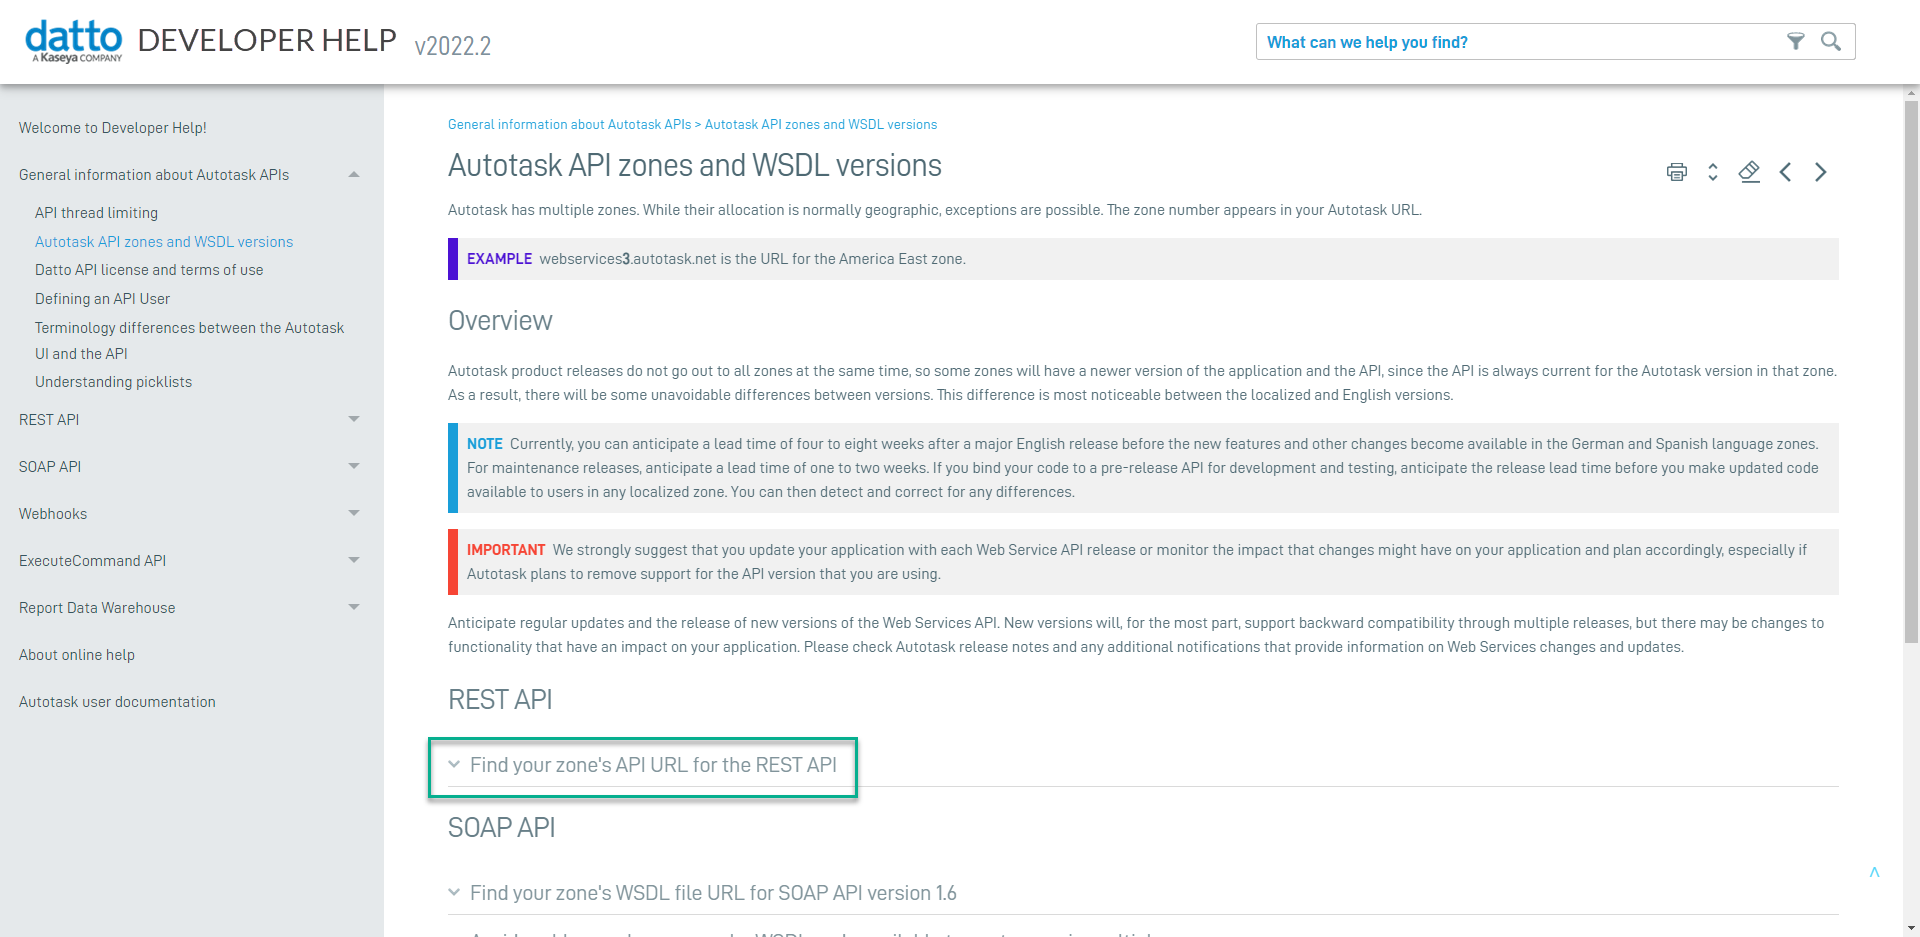
Autotask API Zones page to lookup your API server URL.
Expand the 'Find your zone's API URL for the REST API' section.
If you are unsure of which zone you're in you can try looking at the URL you use to access Autotask. For example, if your URL starts with ww2.autotask.net you might also be in the zone that connects to webservices2.autotask.net.
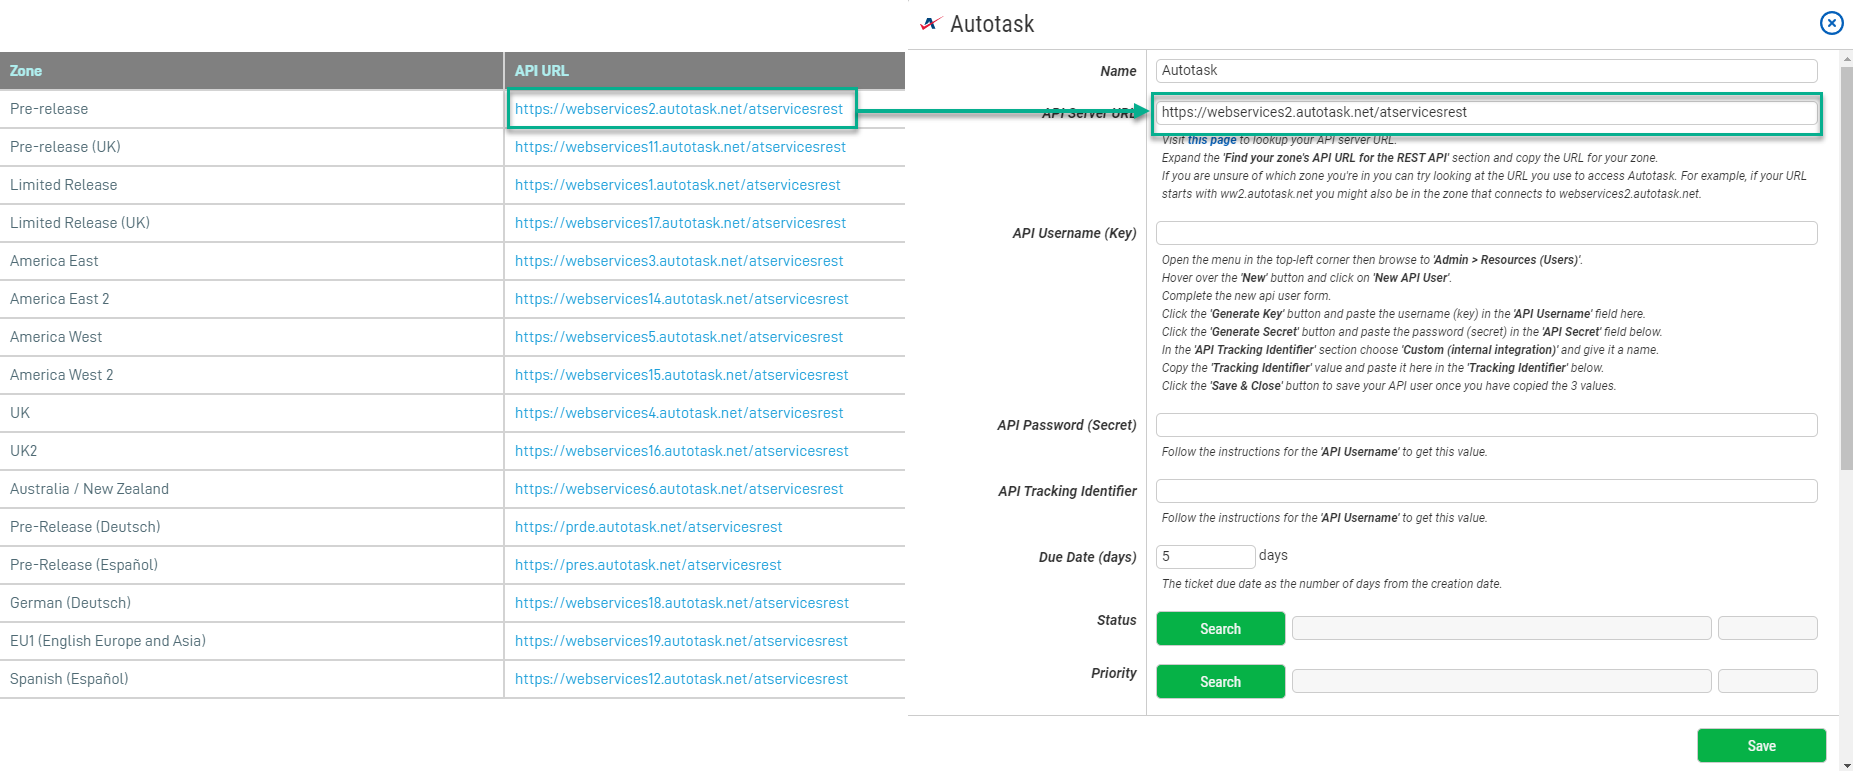
Copy the URL for your zone.
Paste the URL into the API Server URL field.
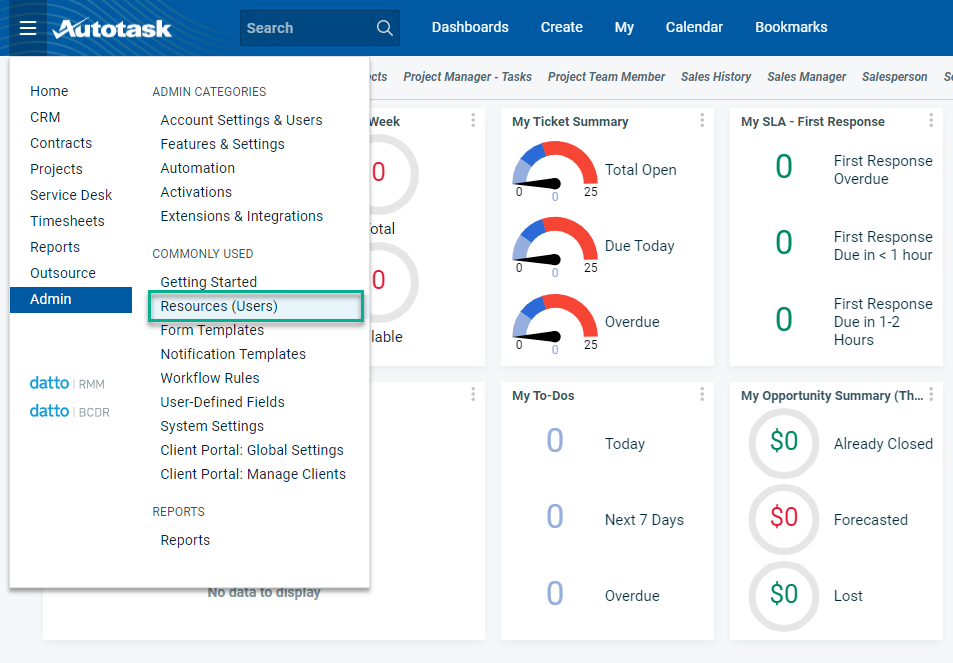
The remaining information is in Autotask's Resources area.
From the Autotask portal main menu, click Admin > Resources (Users).
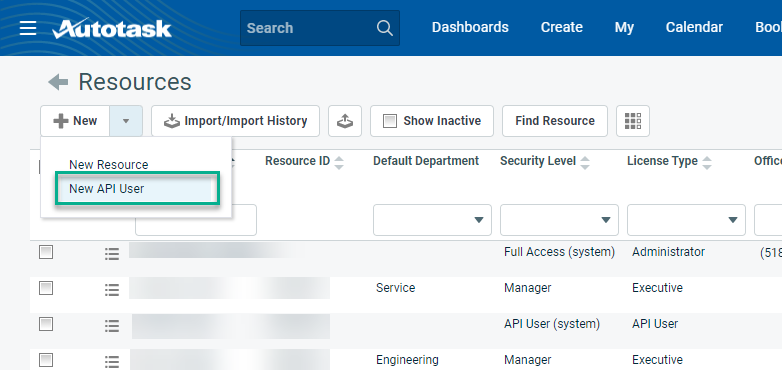
Hover on the arrow by "+ New" and click "New API User."
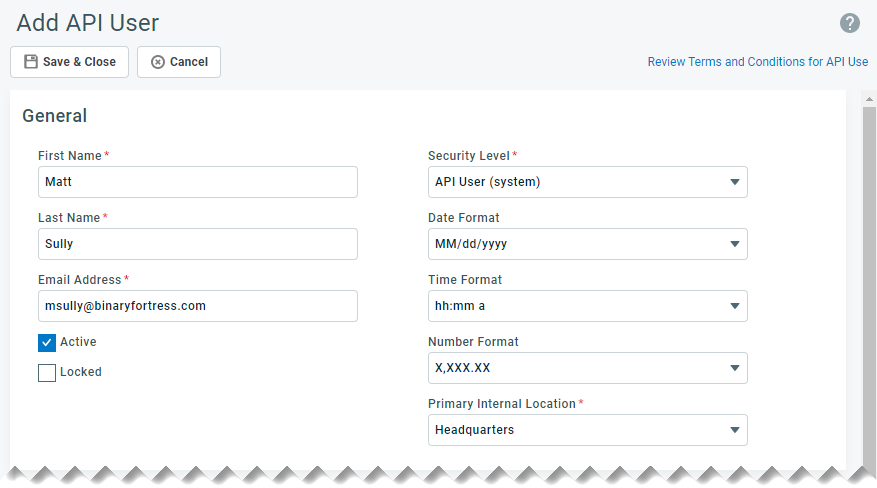
In the Add API User prompt, fill in the General section.
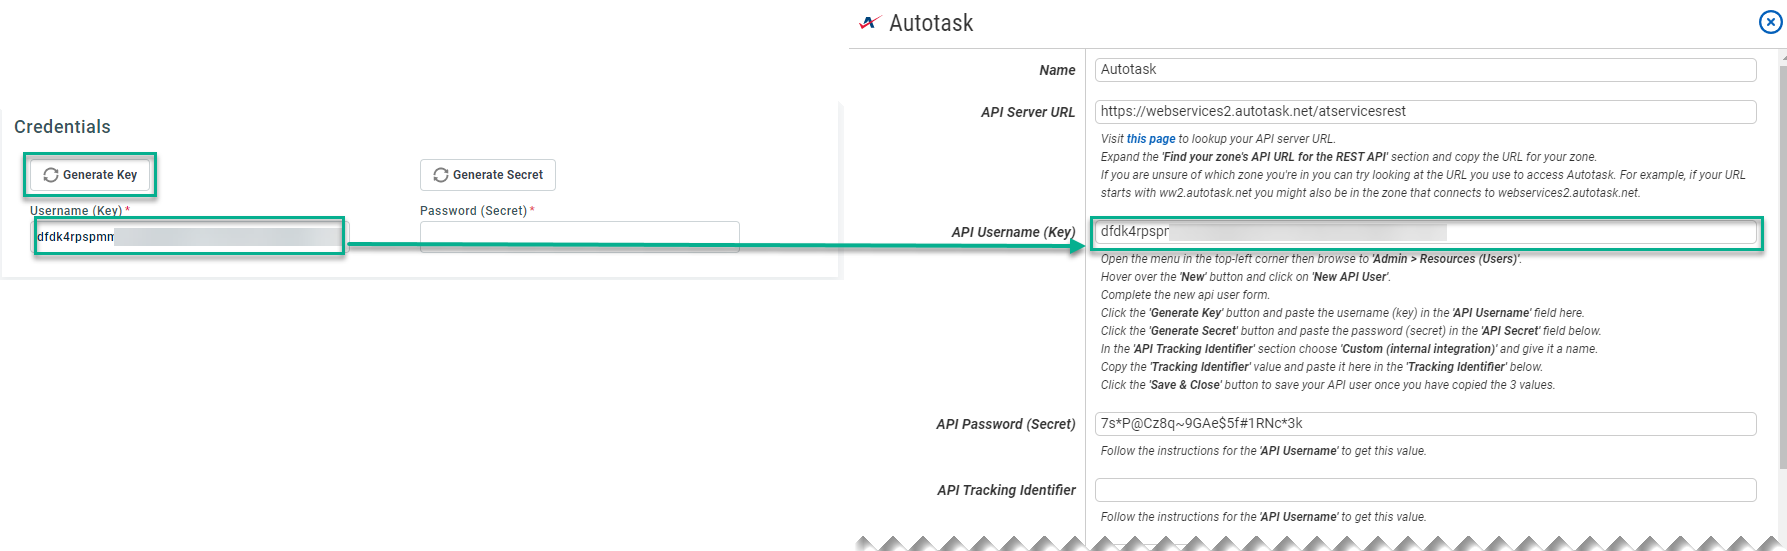
In Autotask, click the "Generate Key" button and paste the "Username (Key)" in CheckCentral's "API Username (Key)" field.
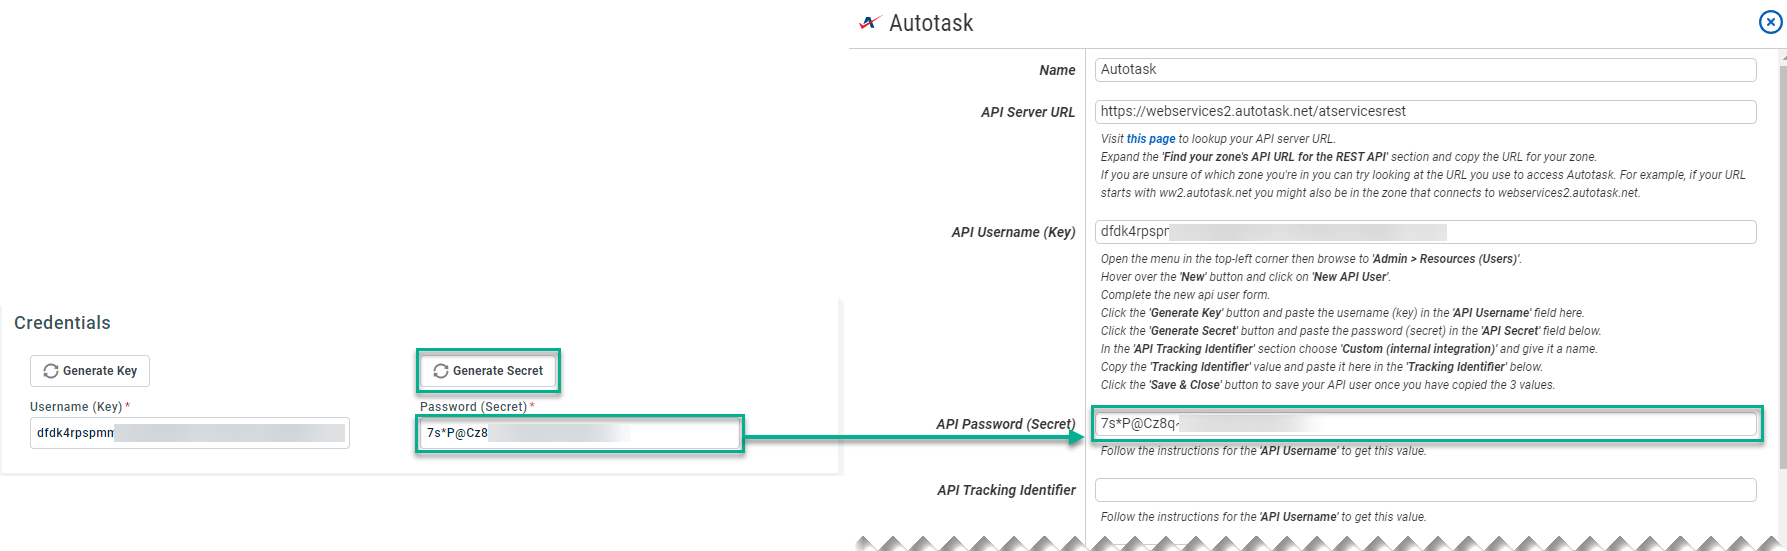
Click the "Generate Secret" button and paste the "Password (Secret)" in CheckCentral's "API Password (Secret)" field.
In the API Tracking Identifier section, select "Custom (Internal Integration)." Enter a name for the identifier in the "Internal Integration Name" field. Copy the Tracking Identifier and paste it into CheckCentral's "API Tracking Identifier" field.
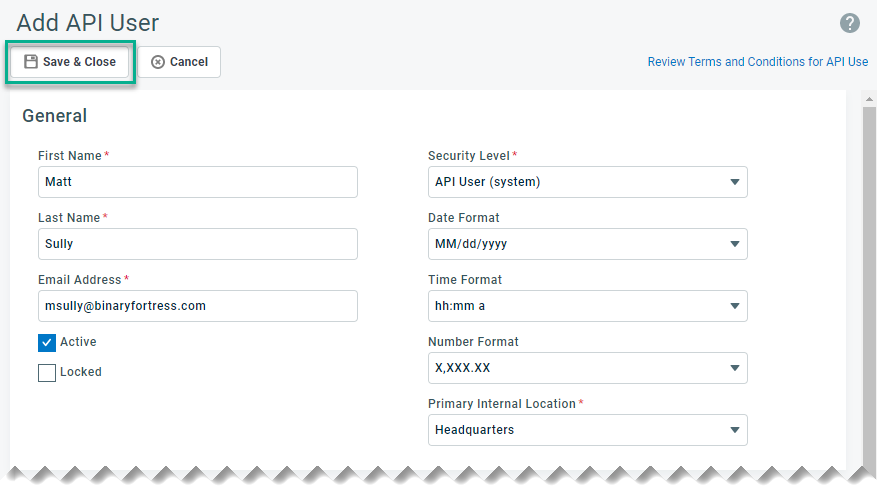
Click "Save & Close" on Autotask's Add API User prompt.
Return to the CheckCentral configuration window to finish.
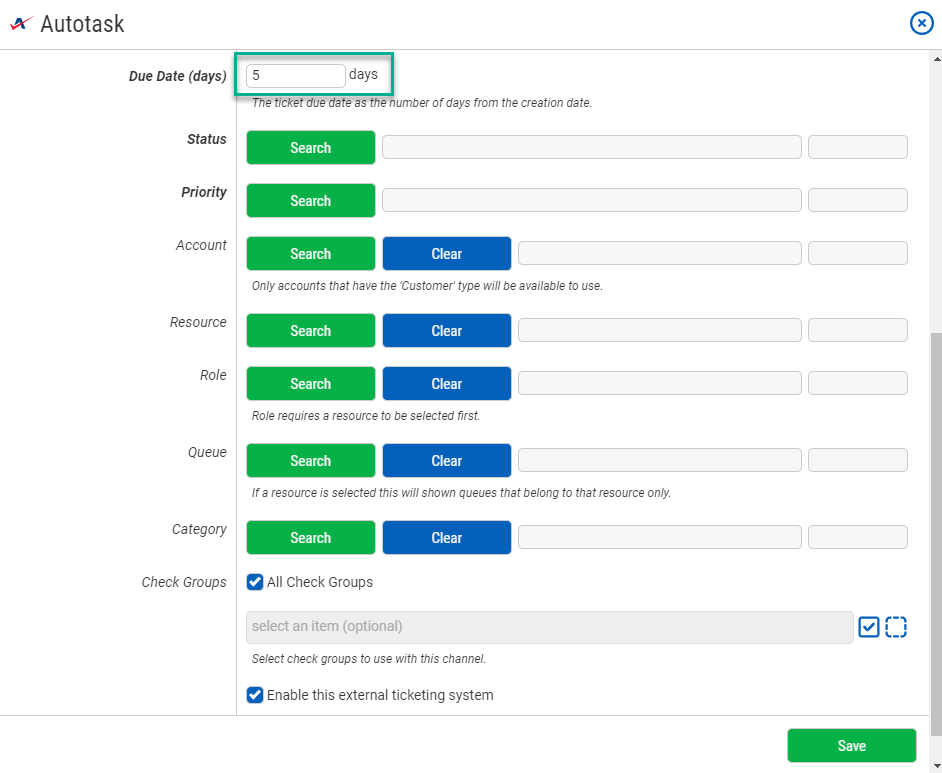
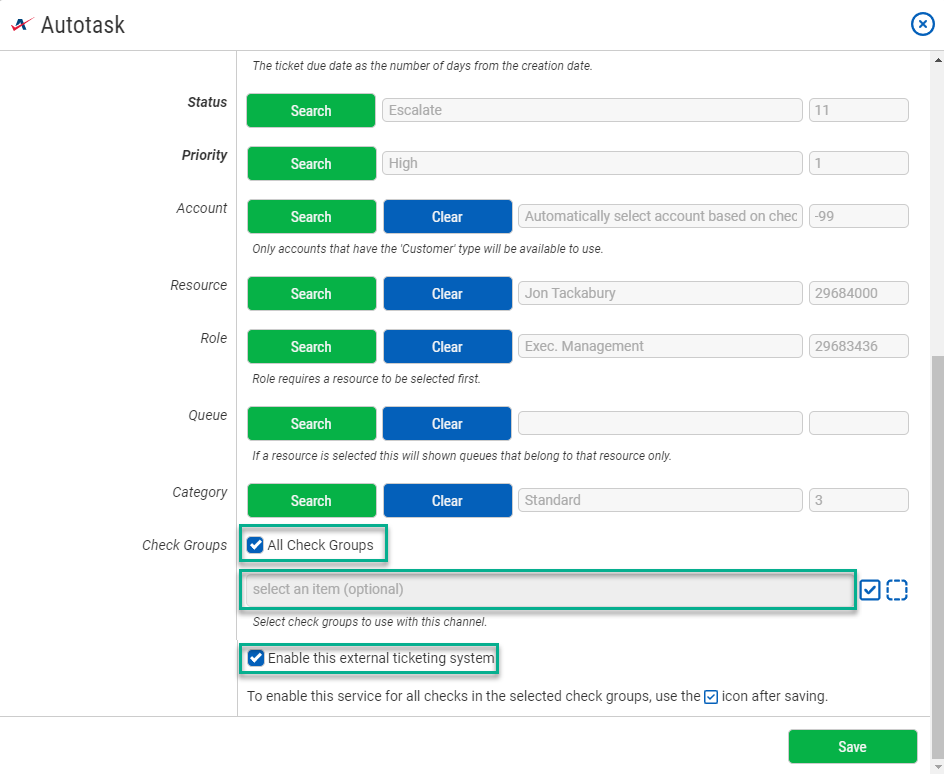
Enter a number of days for the due date applied to newly created tickets.
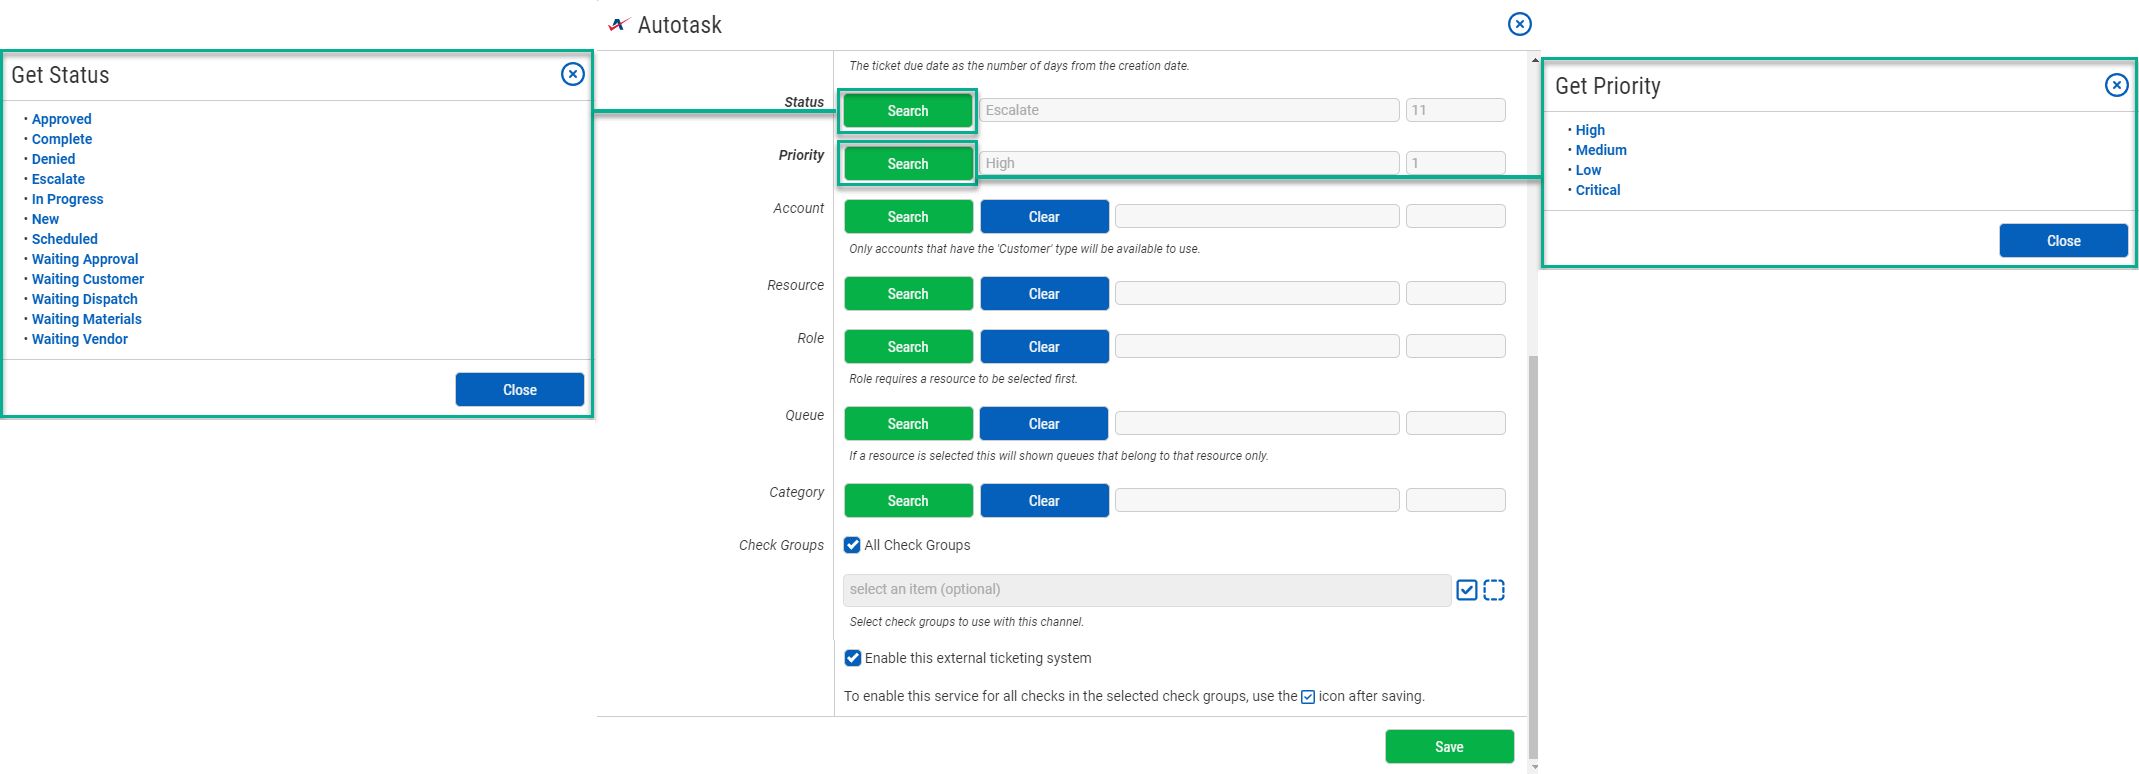
Select the ticket Status, and Priority that will be associated with newly created tickets in Autotask. Click on the Search button to bring up relevant lists and choose one from each list.
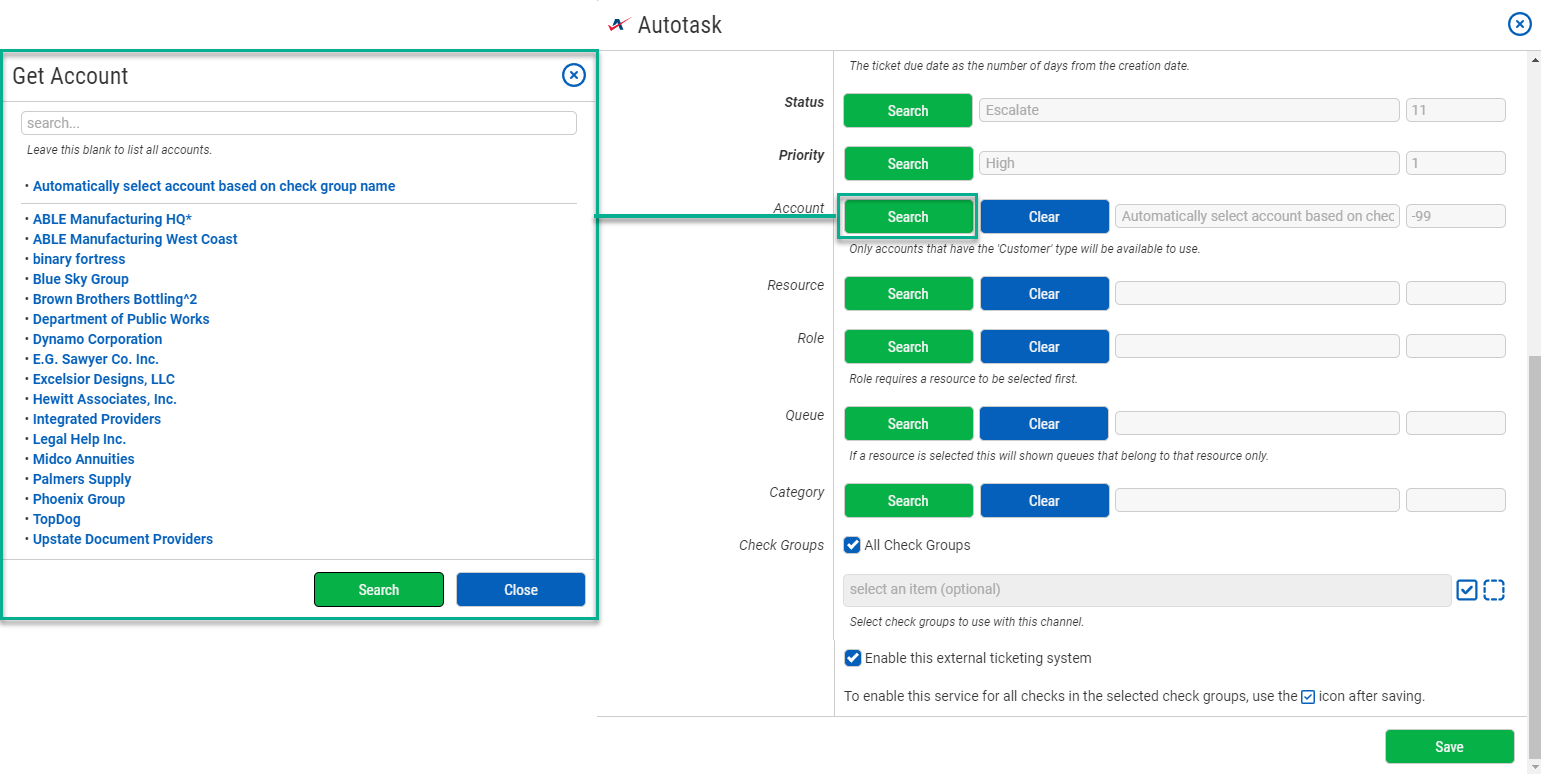
For accounts/customers, you can select a specific account from the list or set the channel to automatically select the account based on the Check Group name.
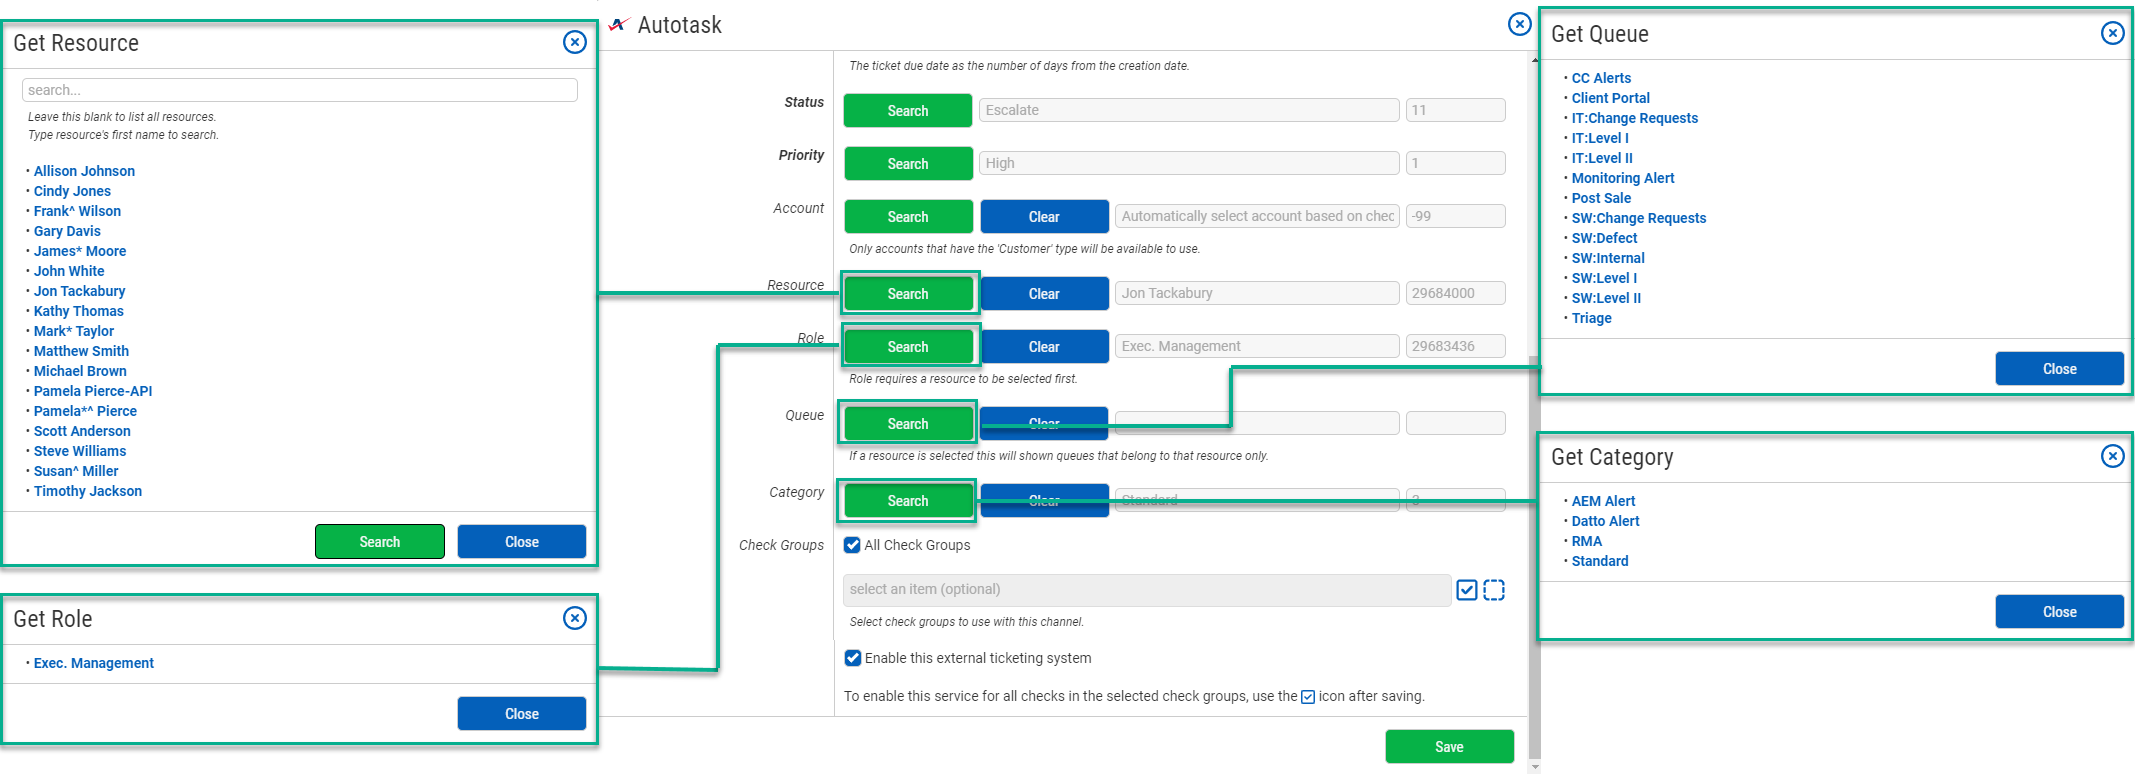
Select the Resource, Role, Queue, and Category to be used with the Autotask tickets.
Finally, choose which Check Groups will use this Autotask ticketing channel. By default, all check groups are selected. To be more selective, disable the All Check Groups checkbox then use the multi-select dropdown field below. Once you've selected your check groups, ensure the 'Enable this external ticketing system' checkbox is enabled, and click Save.
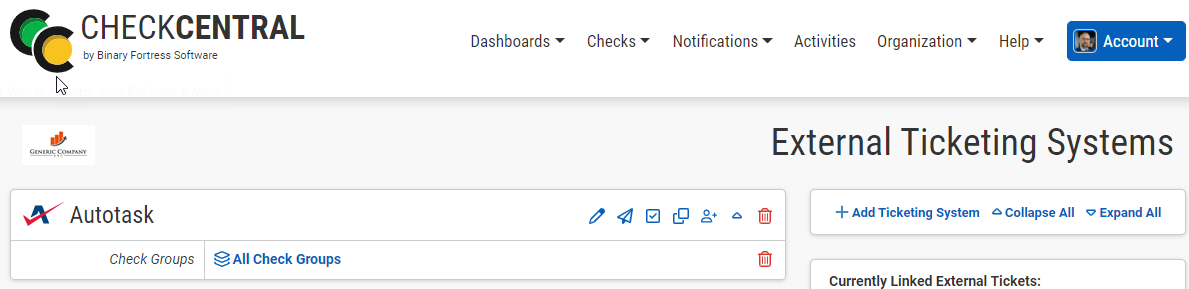
This External Ticketing System channel will now be available for use with any check under your Check Central account.
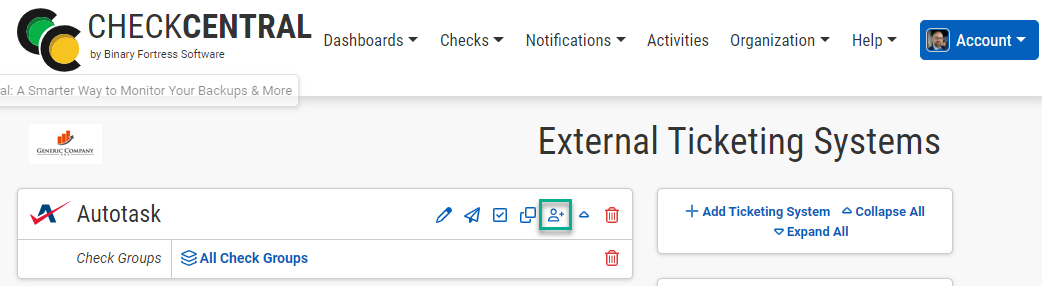
To create and match account-centric check groups, we'll use this new API connection to import accounts directly from Autotask.
From the External Ticketing Systems page, click on the Account Import icon above your newly-created channel.
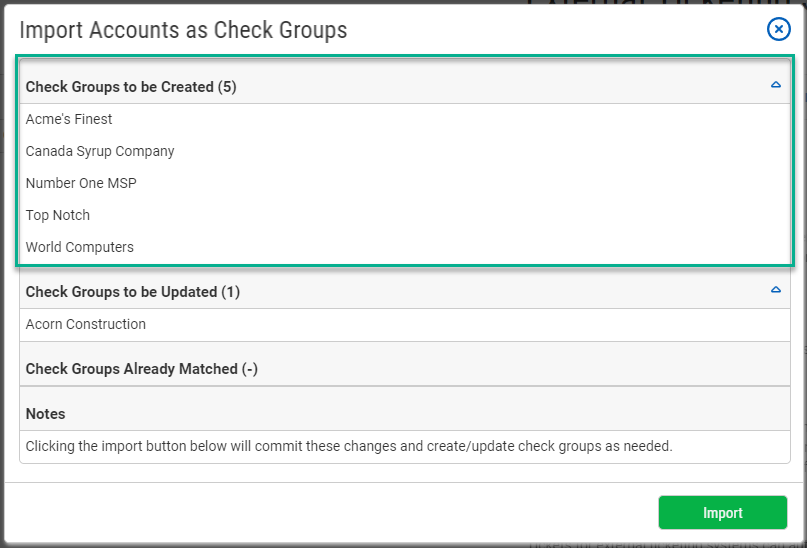
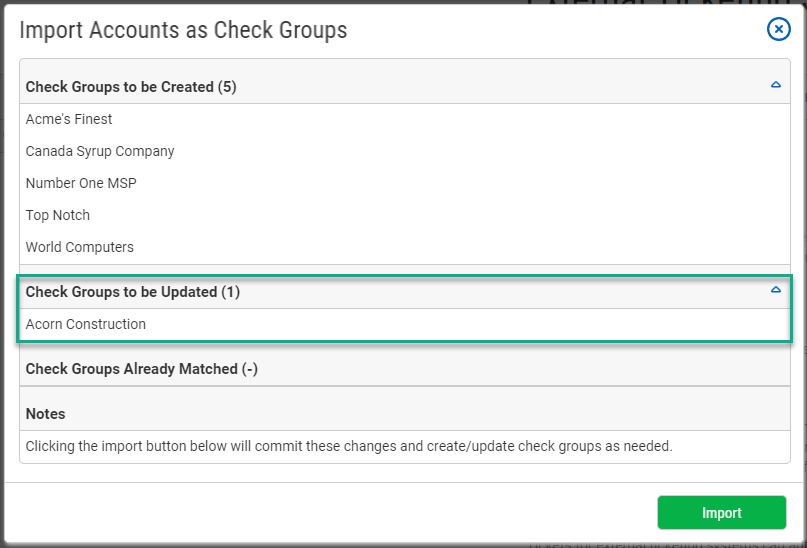
If no similar check groups exist, your accounts will be listed under Check Groups to be Created.
If you've already created Check Groups using account/customer names, they will display in the Check Groups to be Updated section, ensuring they match with Autotask.
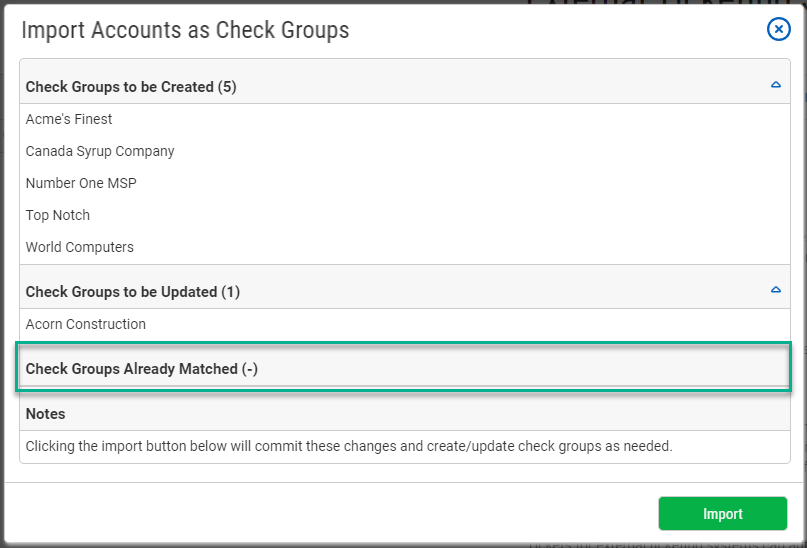
Existing Groups Already Matched with Autotask will be skipped.
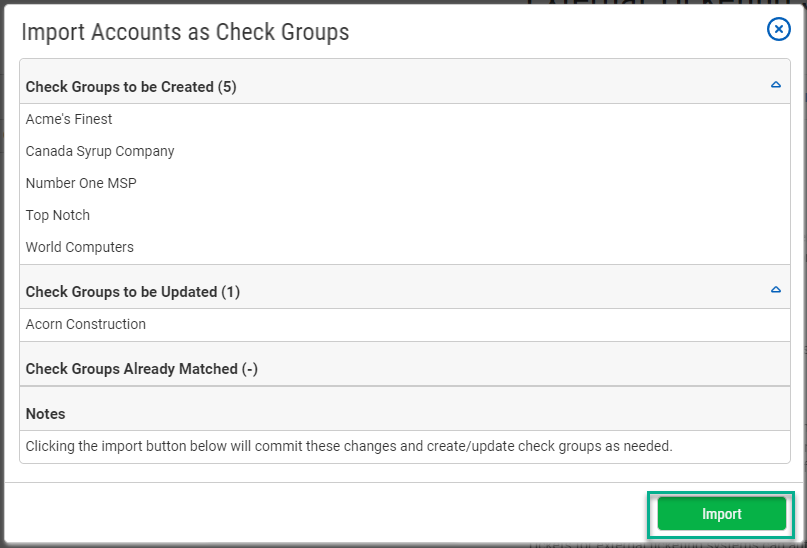
Now click Import to complete the import.
CheckCentral Monitoring consolidates and simplifies backup, system, and software email updates into a clean, graphical dashboard, bringing peace of mind to IT administrators of SMBs, Enterprises, and MSPs.
To learn more about CheckCentral, visit:
https://www.checkcentral.ccBinary Fortress has spent 19 years in pursuit of one goal: create software to make life easier. Our software ranges from display management and system enhancement utilities to monitoring tools and digital signage. IT administrators, professional gamers, coffee-shop owners, and MSPs all rely on Binary Fortress to make their days better, and their lives easier.
Copyright © 2007-2026 Binary Fortress Software, all rights reserved.
The Binary Fortress logo is a trademark of Binary Fortress Software.
The CheckCentral logo is a trademark of Binary Fortress Software.
Binary Fortress Software
1000 Innovation Drive, Suite 500
Kanata, Ontario, Canada
K2K3E7
https://www.binaryfortress.com