CheckCentral integrates with several RMMs, PSAs, and ticketing software, including ConnectWise Manage, helping you consolidate service ticket issues.
To integrate ConnectWise with CheckCentral, begin by logging into your CheckCentral account.
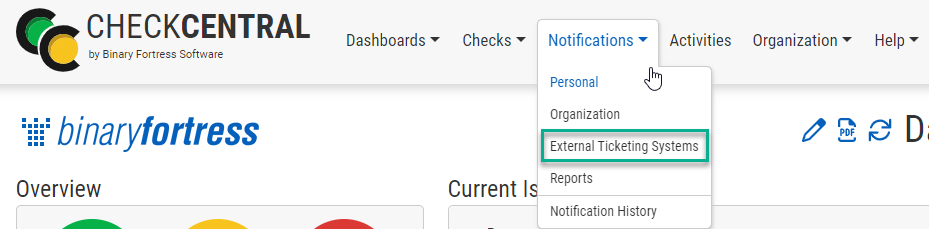
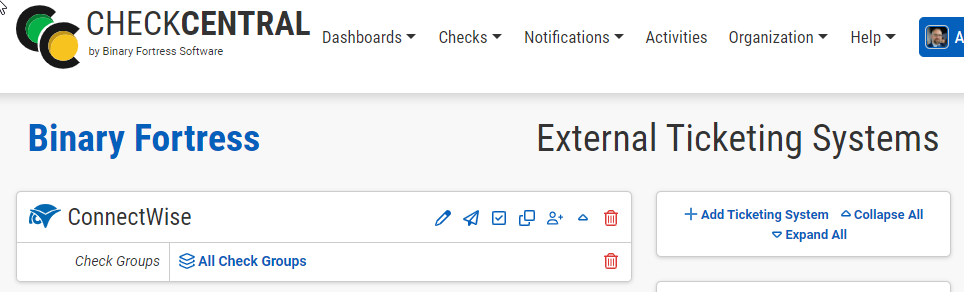
From the main menu, click Notifications, then External Ticketing Systems.
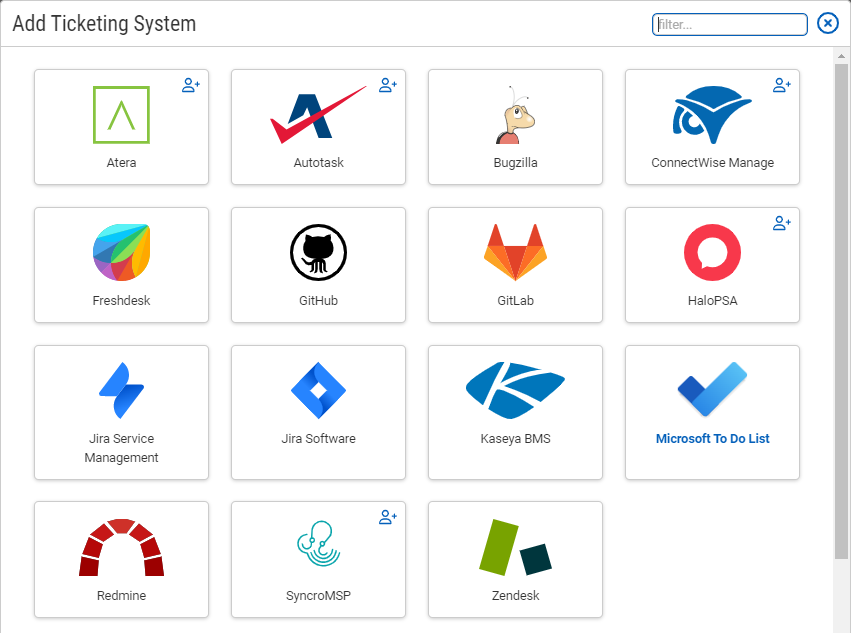
Click Add Ticketing System and choose ConnectWise Manage.
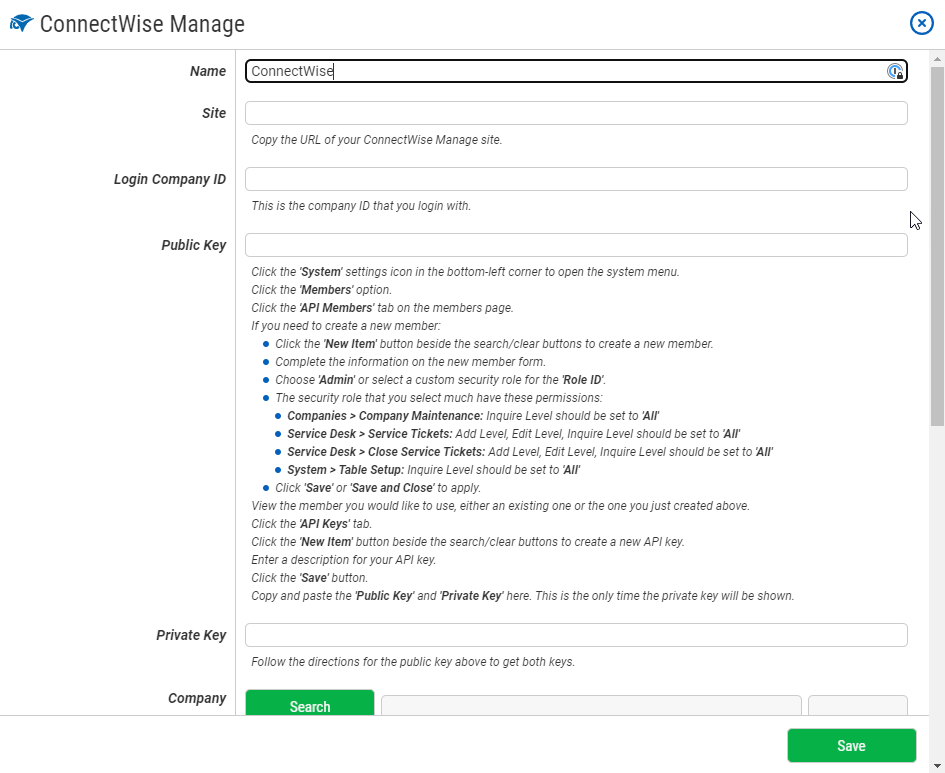
This will bring up the configuration options required for CheckCentral to communicate with ConnectWise servers via the API.
You can name this configuration anything you'd like.
The other details require you to visit your ConncectWise Manage site.
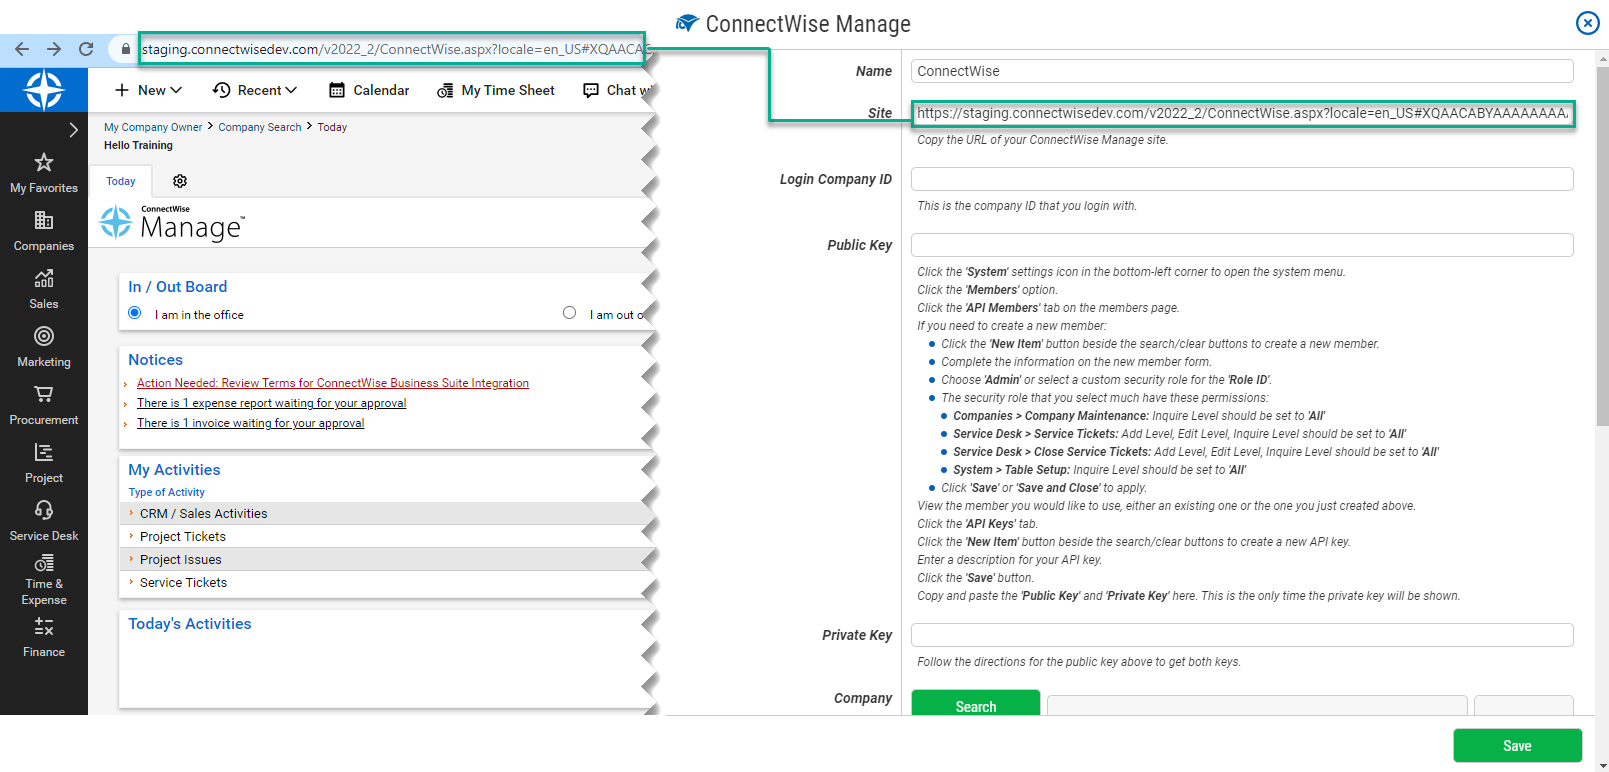
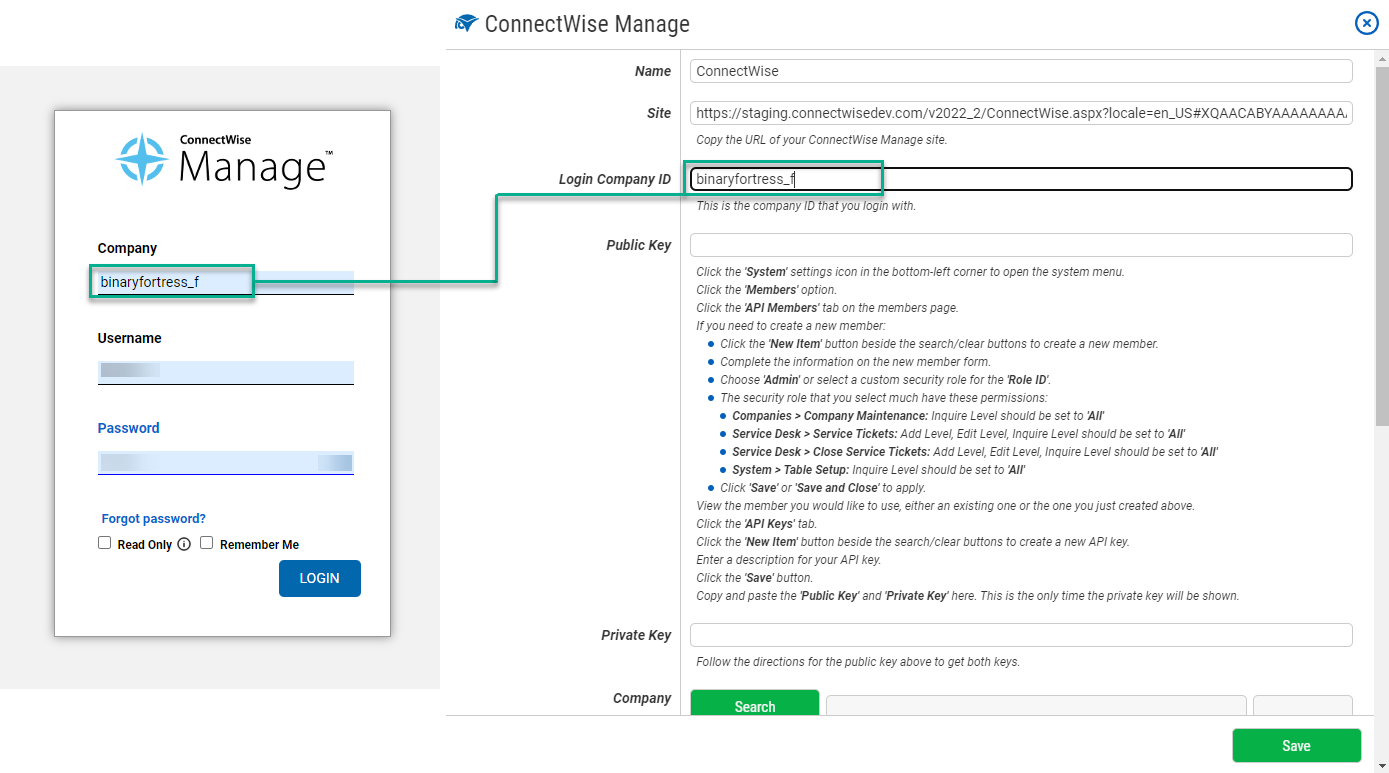
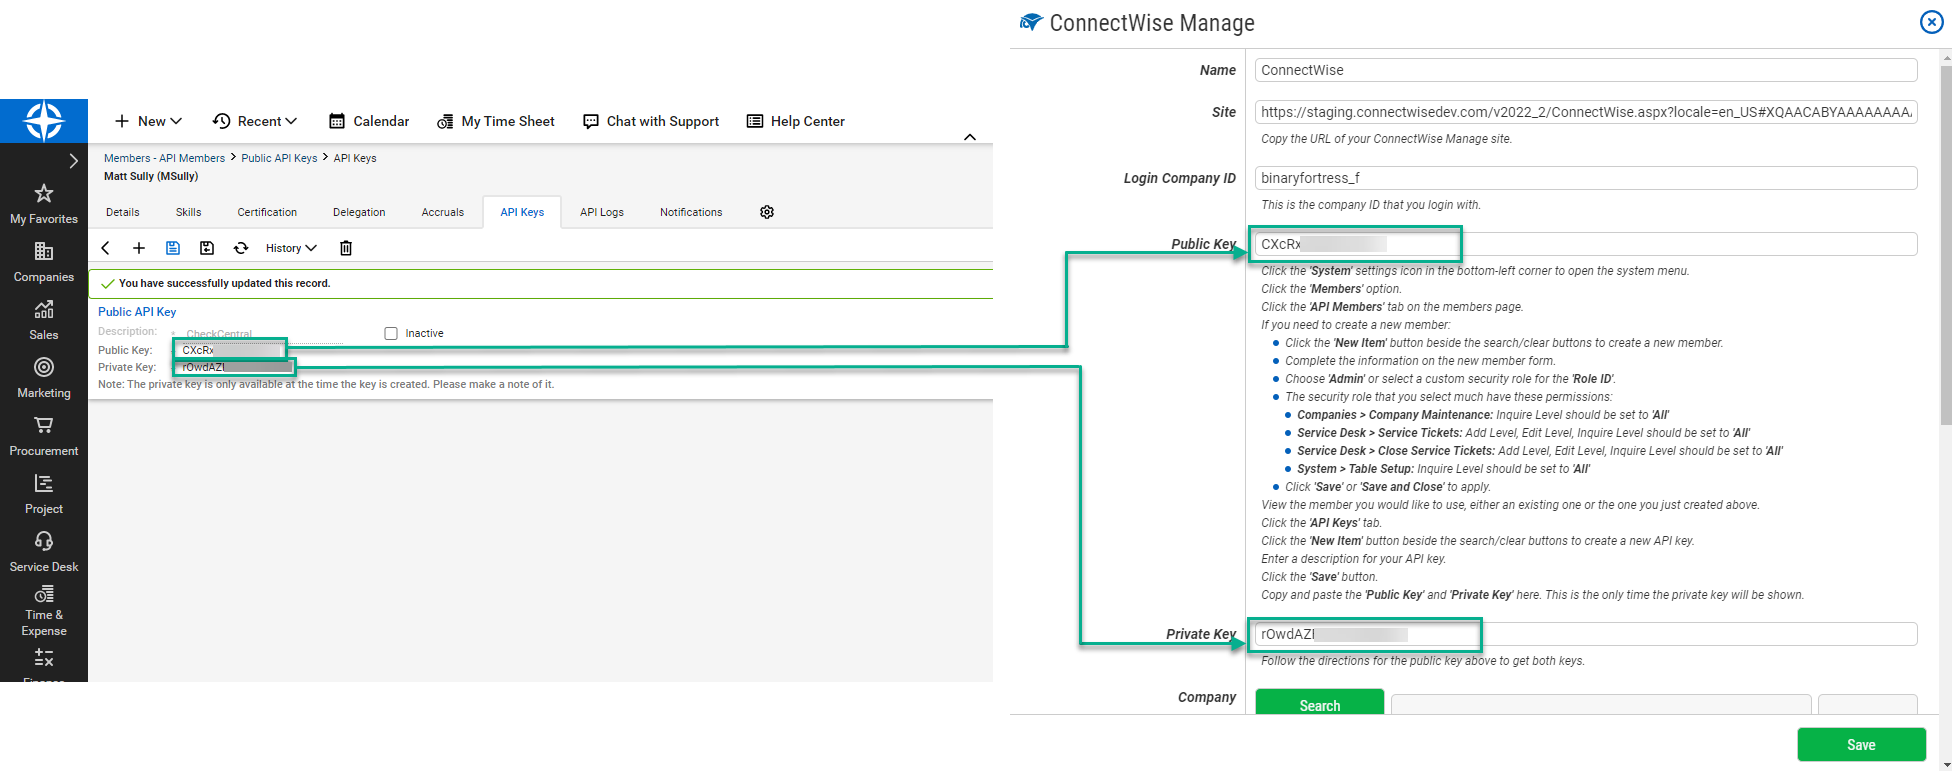
Open your ConnectWise Manage site in a browser. Copy the URL for your portal and paste it into the Site field of CheckCentral's integration prompt.
Copy your ConnectWise Manage Company ID and paste it into the Login Company ID field in CheckCentral.
Complete your login to the ConnectWise Manage.
The ConnectWise Member used for this integration requires a Role ID with specific permissions. This may be the Admin role or a custom role.
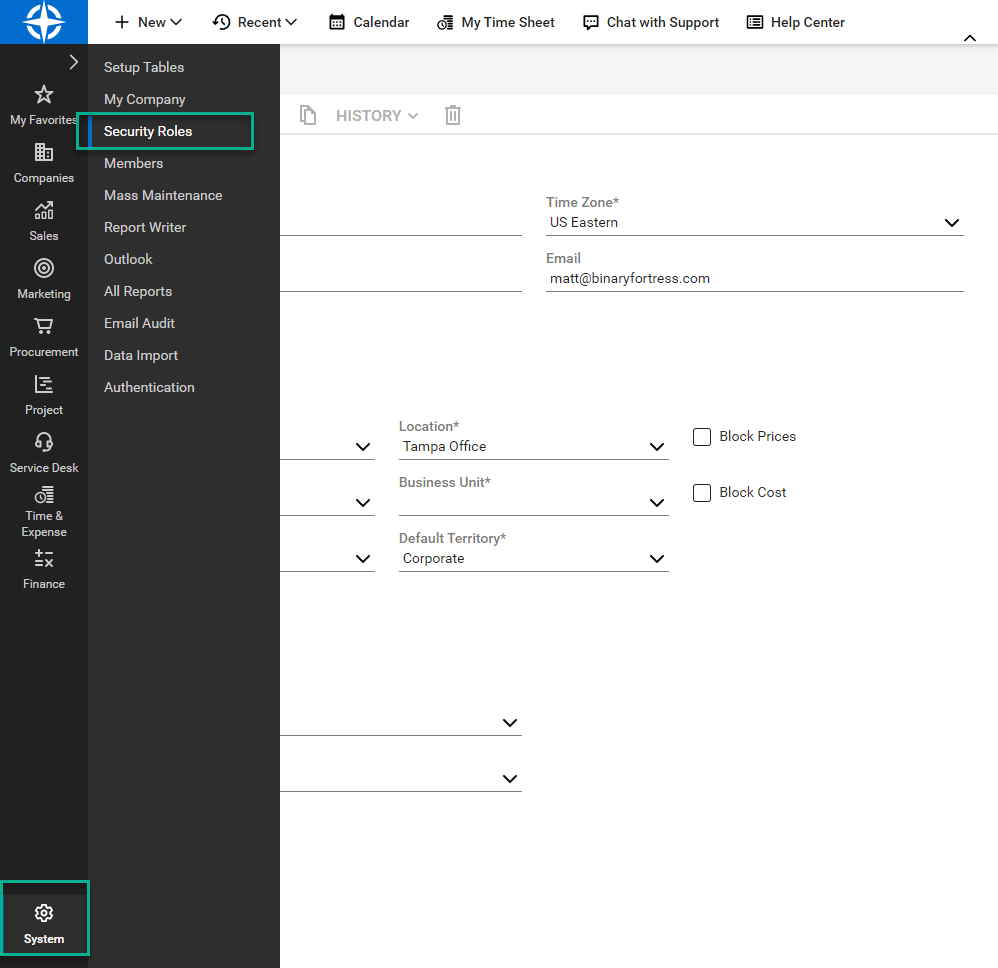
To confirm Role ID permissions, click System in the bottom-left corner. Then click "Security Roles."
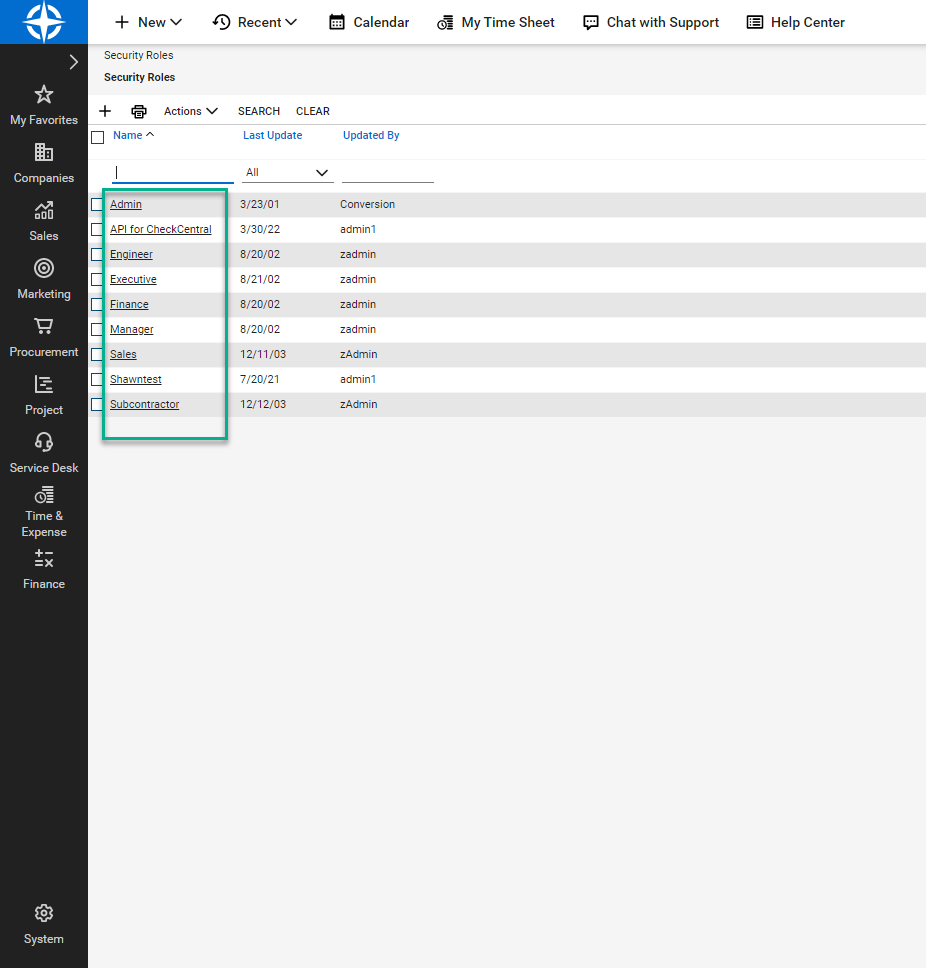
Click Admin or the custom security role to be used. Create a new one if needed.
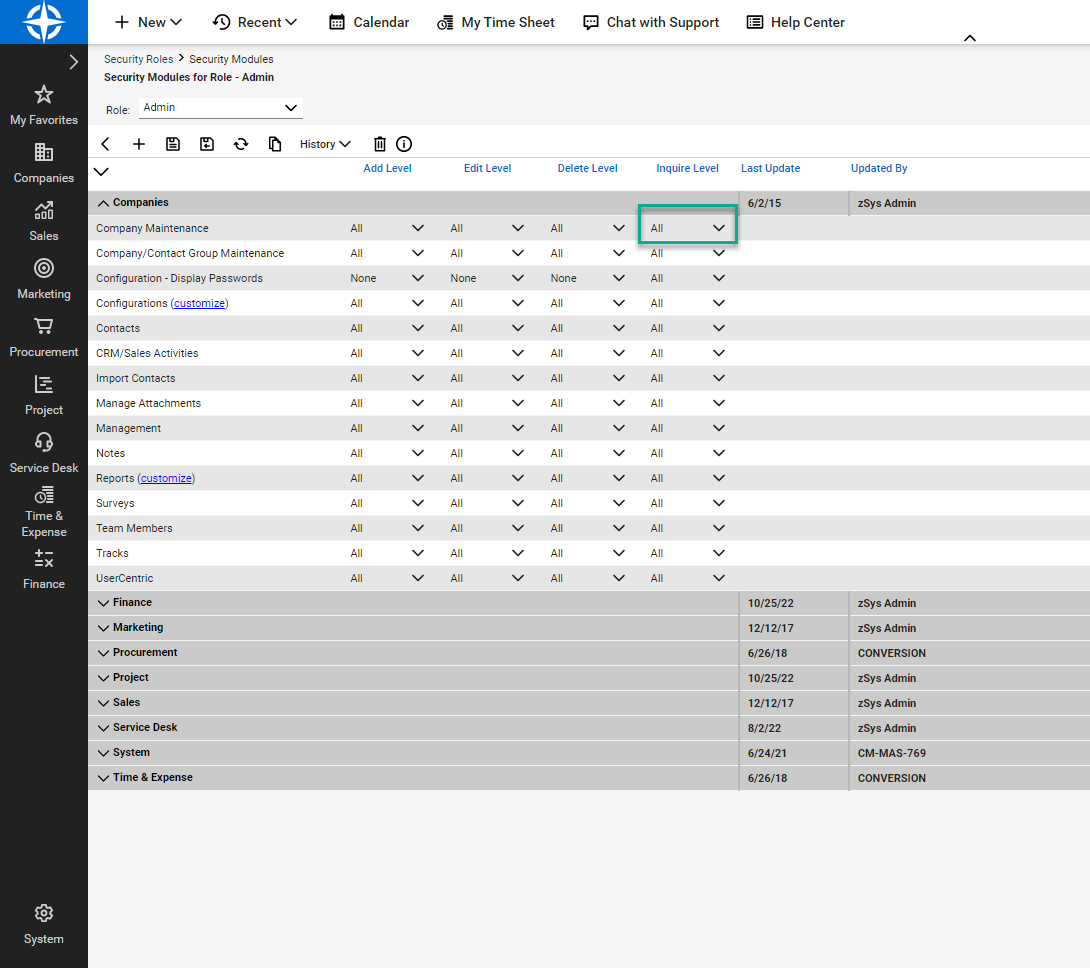
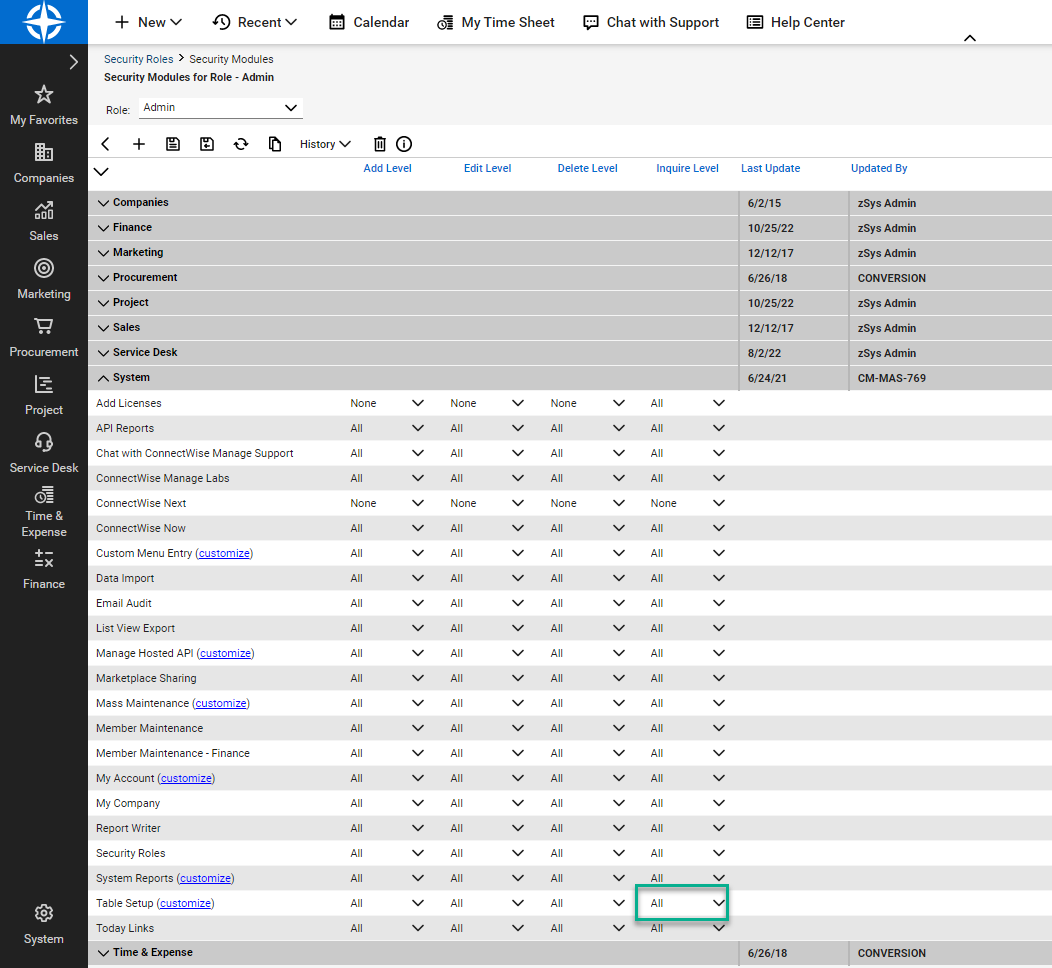
The Role ID must have the following permissions:
- Companies > Company Maintenance - Inquire Level set to All
- Service Desk > Service Tickets - Add, Edit, and Inquire Levels set to All
- Service Desk > Close Service Tickets - Add, Edit, and Inquire Levels set to All
- System > Table Setup - Inquire Level set to All
If changes are made, click "Save."
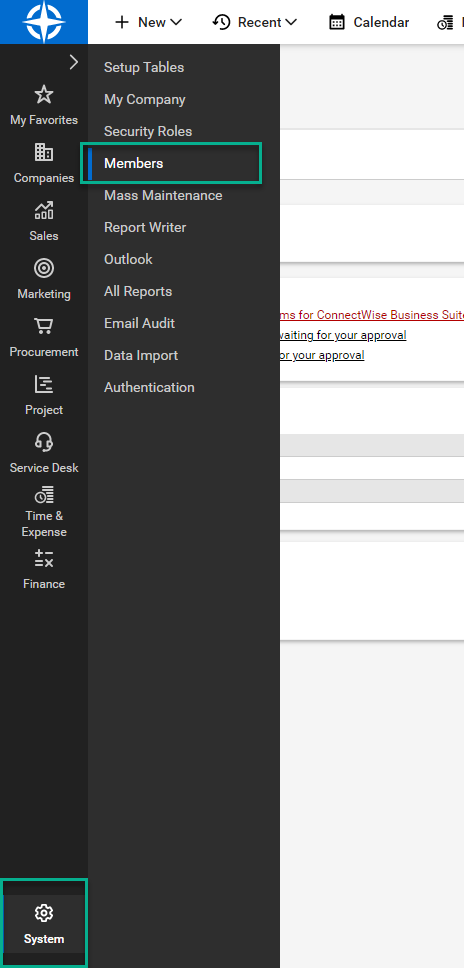
Click System again in the bottom-left corner. Then click "Members."
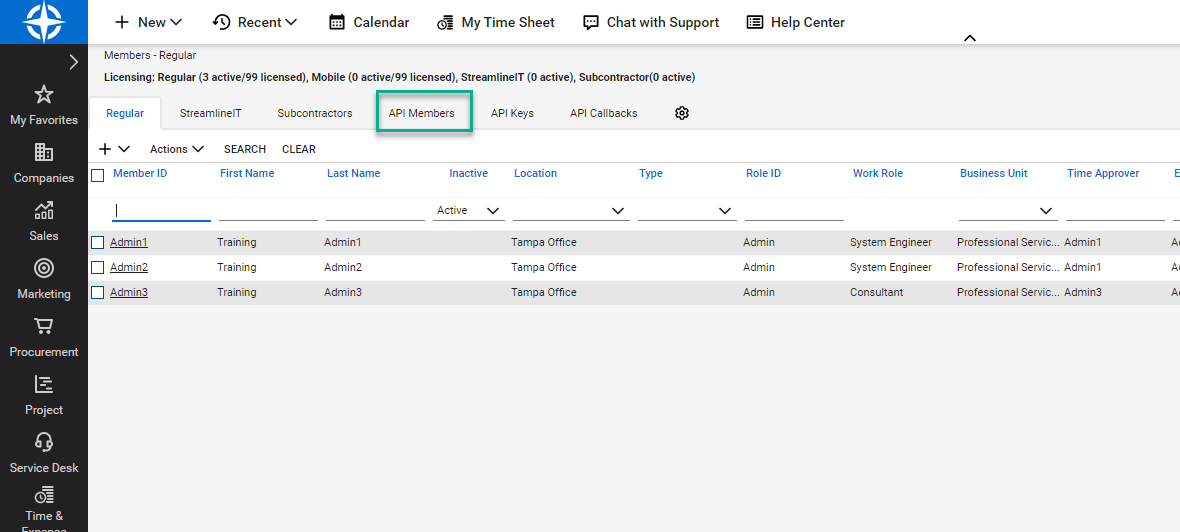
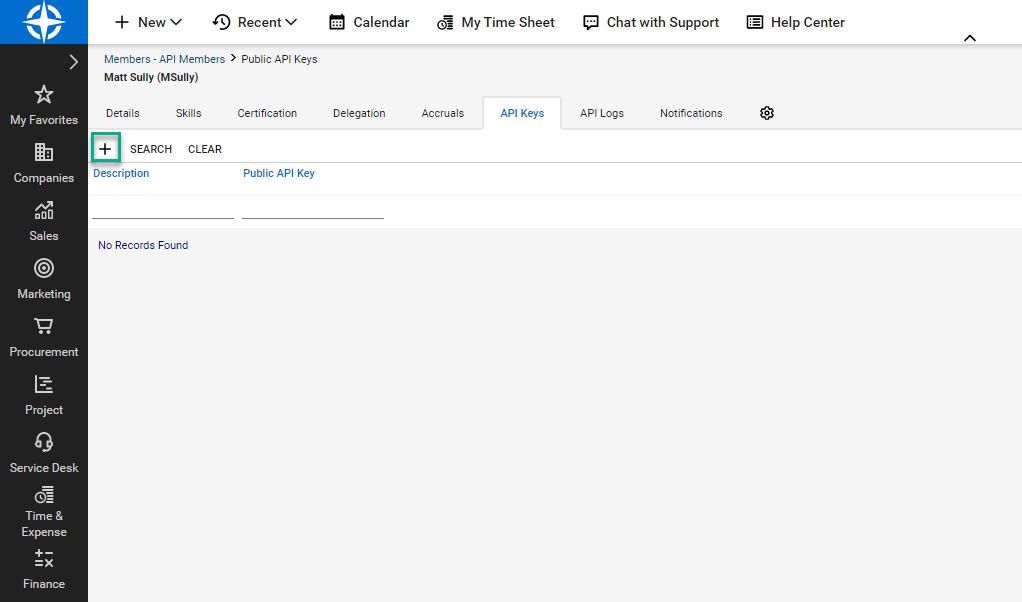
Click the "API Members" tab.
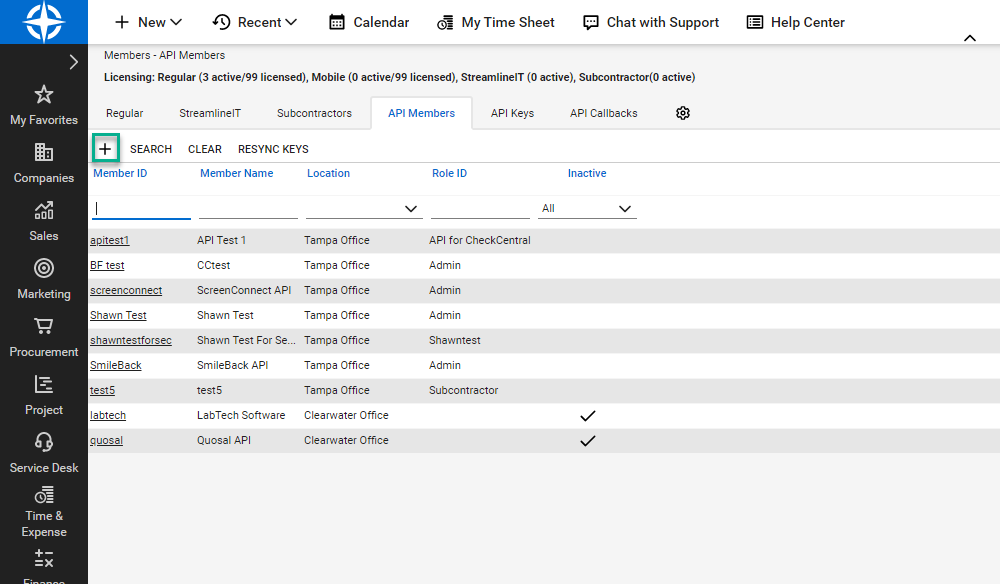
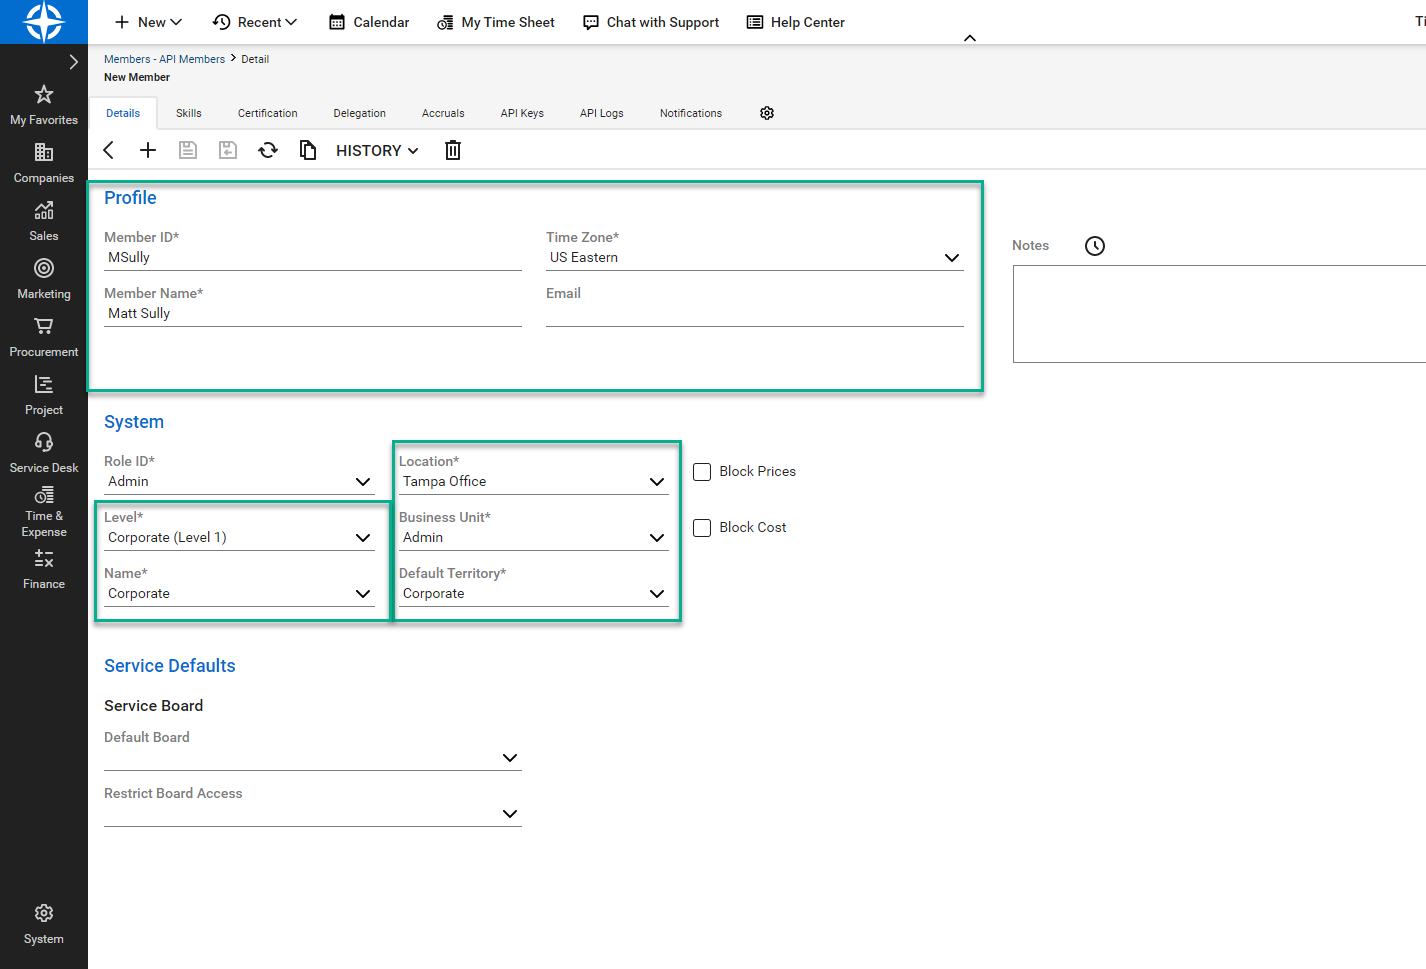
Complete the required information in the new member form.
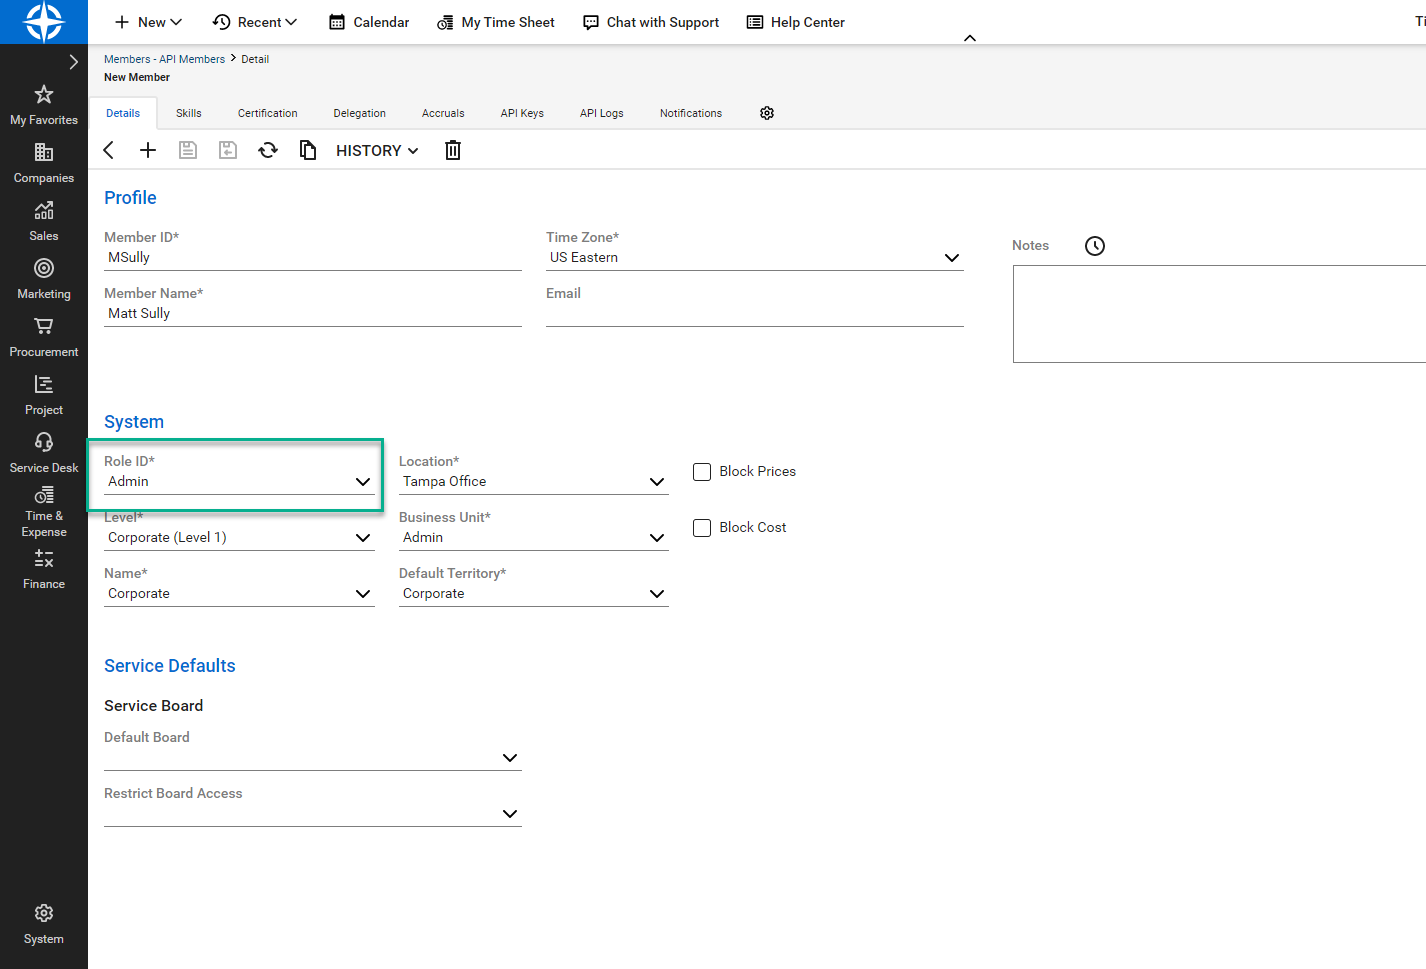
For the Role ID field, choose Admin or a custom role. The chosen role requires certain permissions as confirmed in the previous steps.
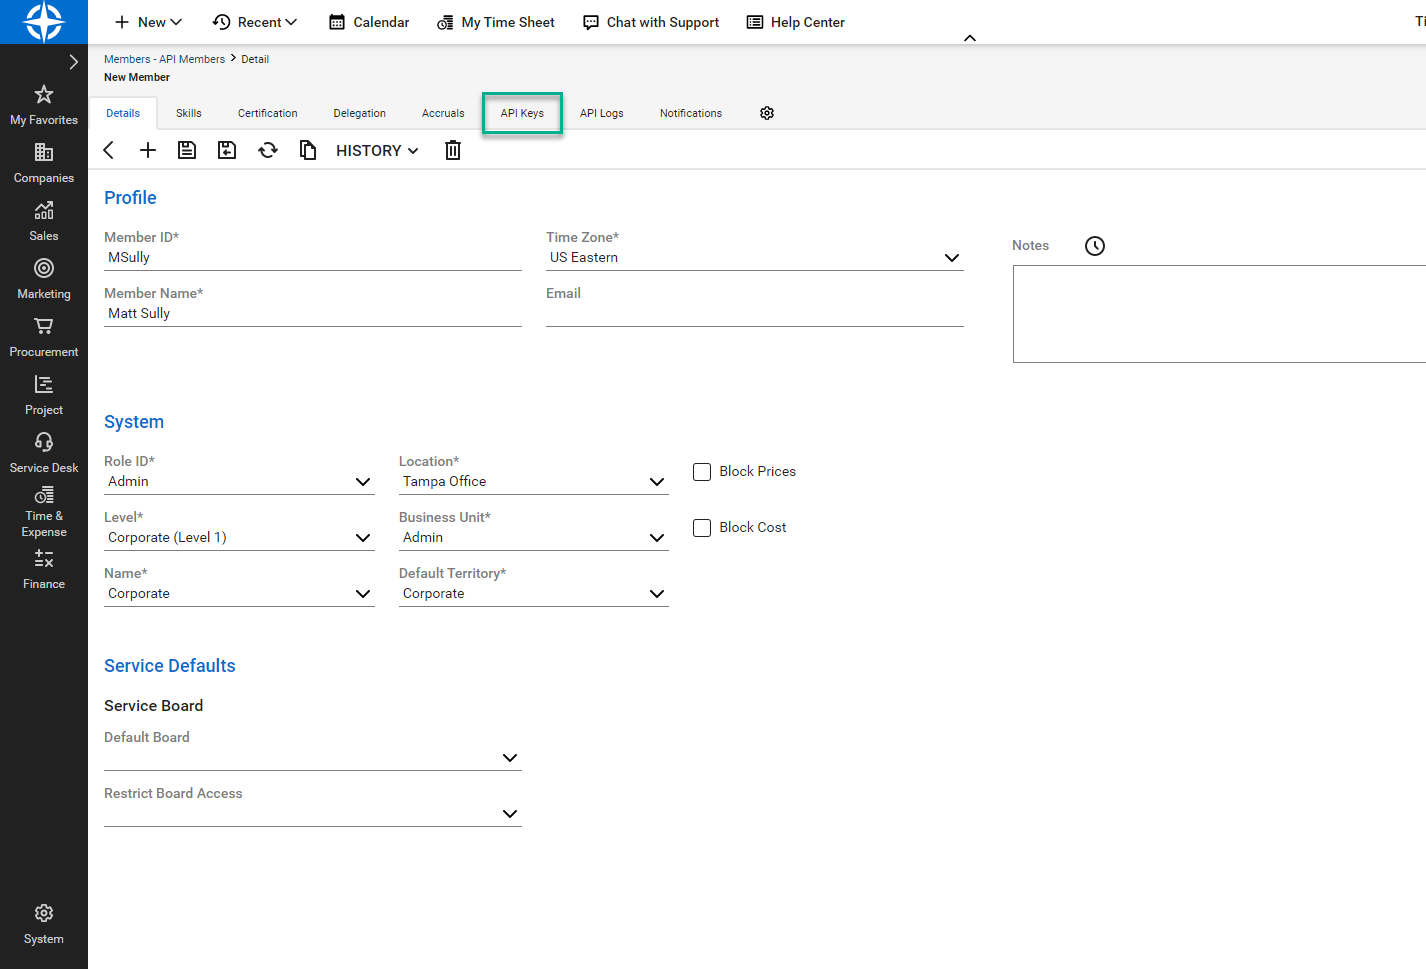
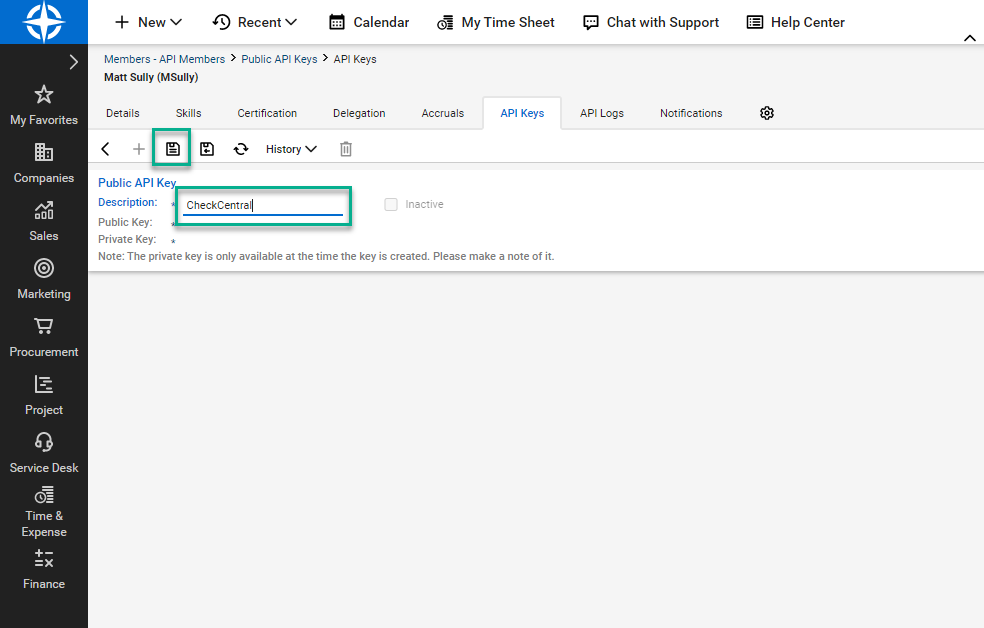
Click the "API Keys" tab.
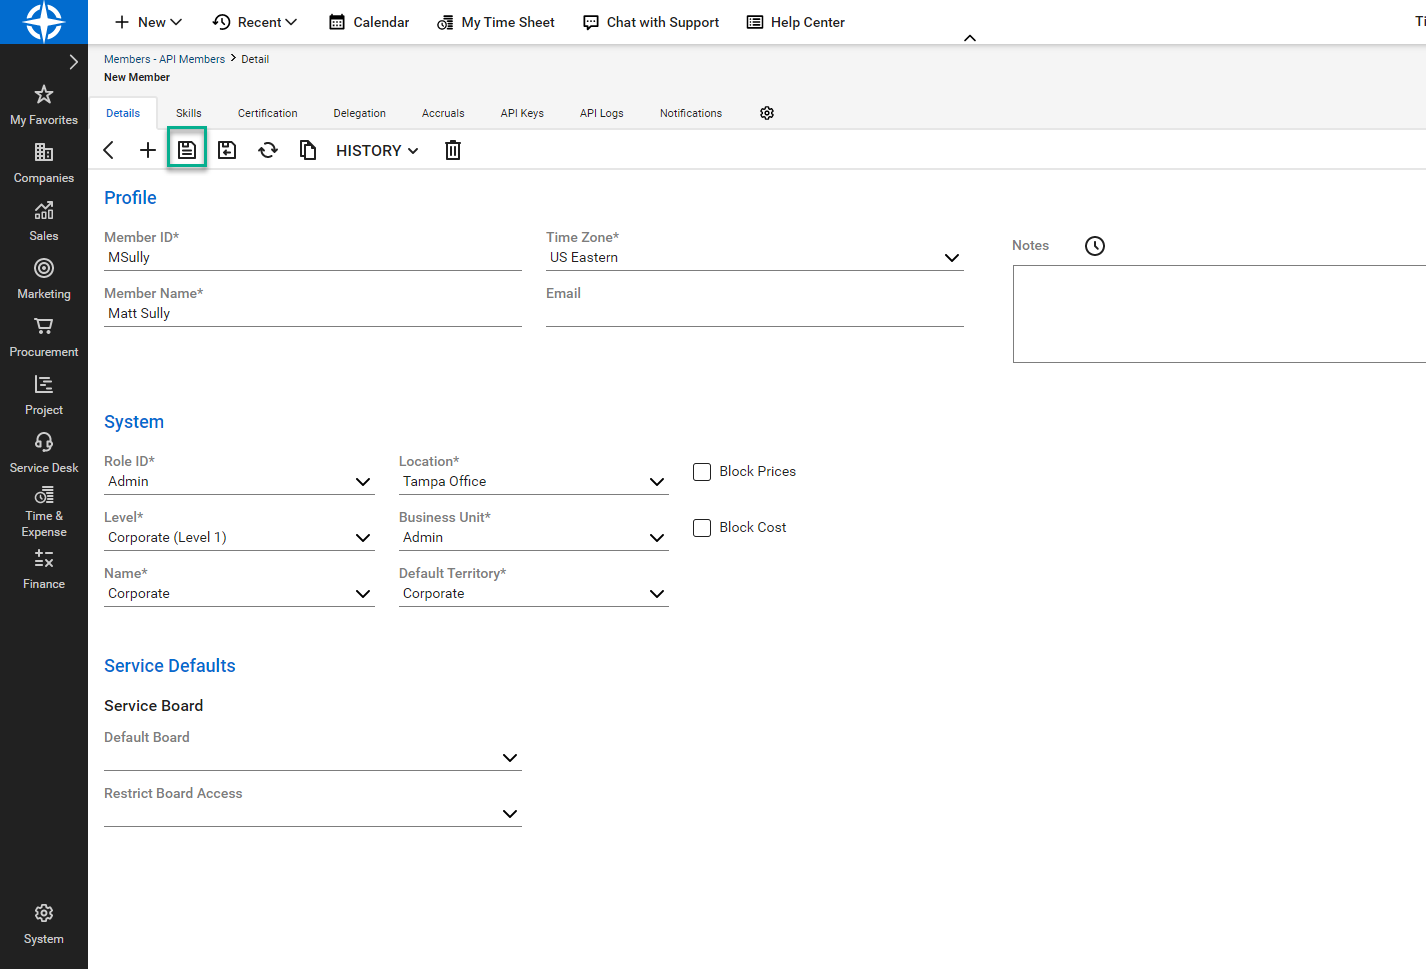
In ConnectWise, give your API key a description and click "Save."
Copy the Public and Private Keys, pasting them into the corresponding fields in CheckCentral.
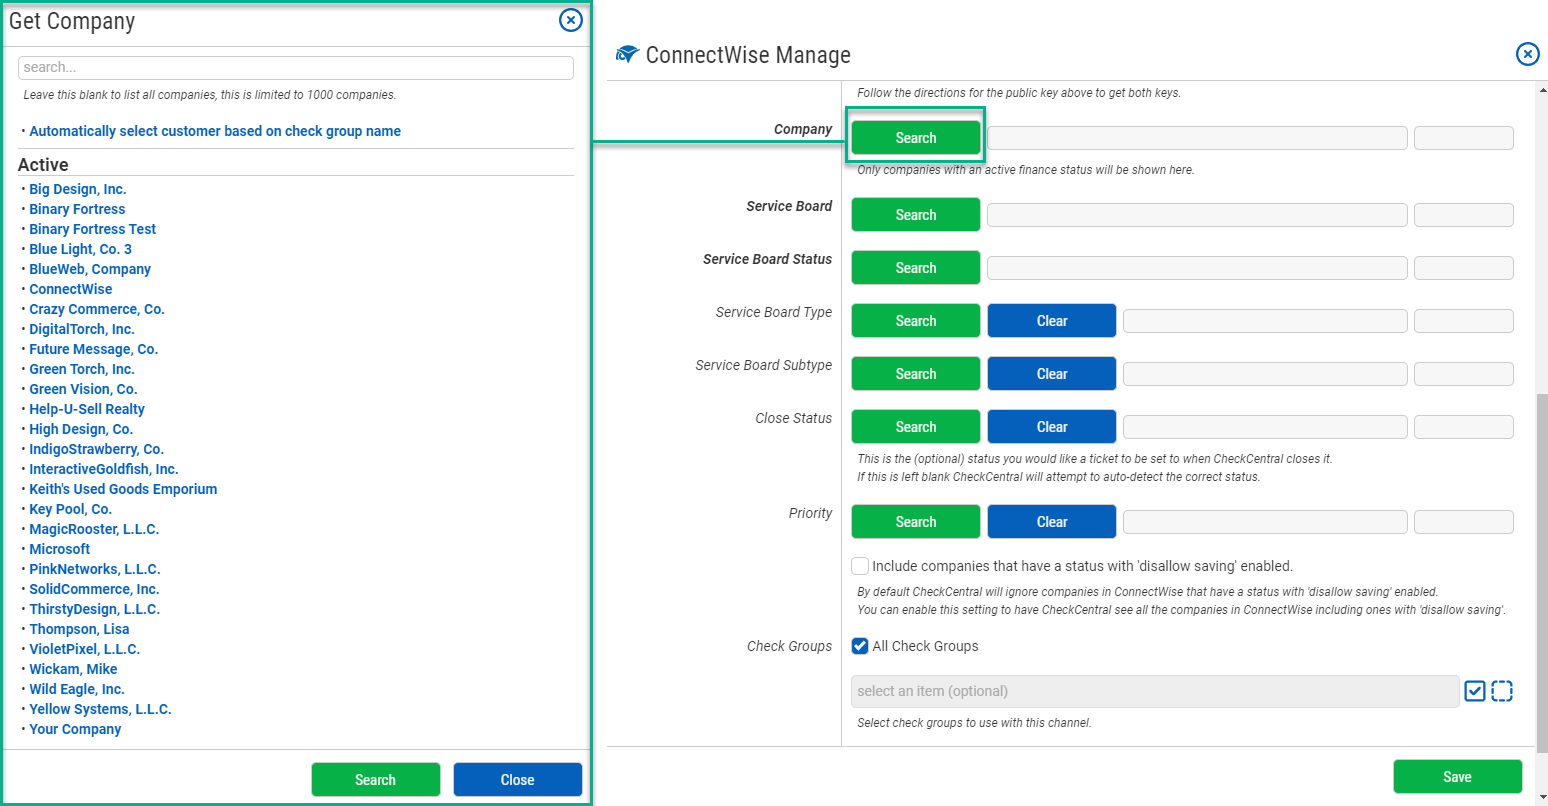
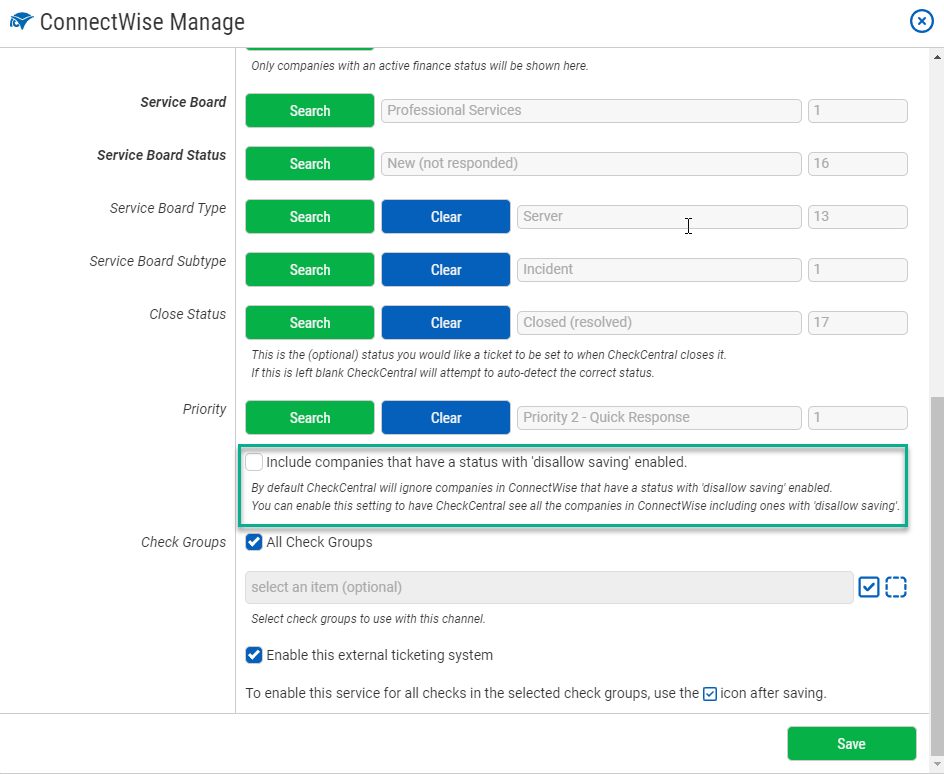
For associating companies with tickets, you can select a specific company from the list or set the channel to automatically select the account based on the Check Group name. Only companies with an active finance status will be shown here.
By default, CheckCentral will ignore companies in ConnectWise with a status of 'disallow saving' enabled.
Enable the checkbox shown here to have CheckCentral disregard that status.
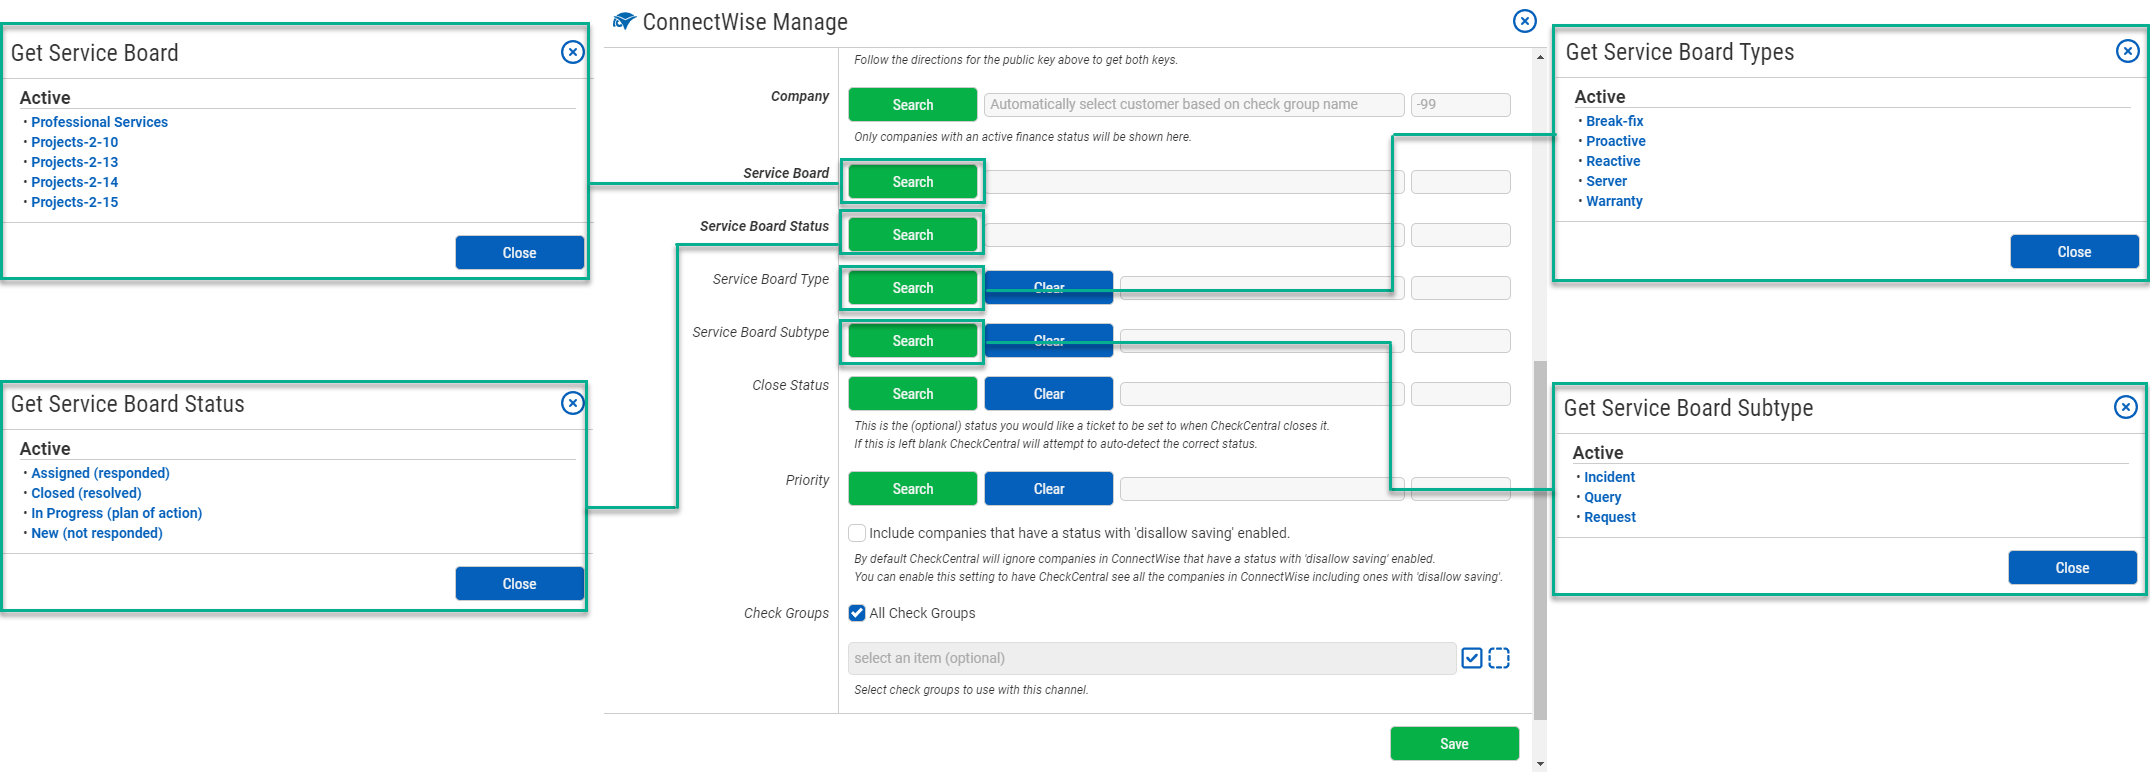
For various Service settings, select from the various lists by clicking "Search." Some lists are dependent on previous Service setting selections.
For Close Status and Priority selections, choose from the available lists.
This is an optional status to be used when CheckCentral closes tickets. If this is left blank, CheckCentral will attempt to auto-detect the correct status.
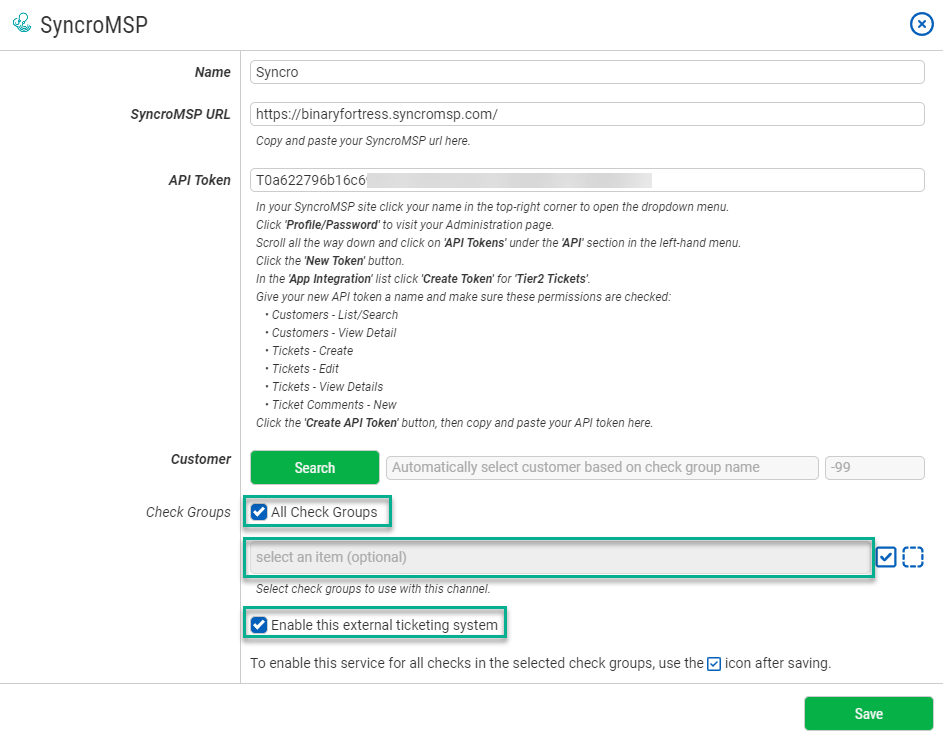
Finally, choose which Check Groups will use this ConnectWise ticketing channel. By default, all check groups are selected. To be more selective, disable the All Check Groups checkbox then use the multi-select dropdown field below.
Once you've selected your check groups, ensure the 'Enable this external ticketing system' checkbox is enabled, and click Save.
This External Ticketing System channel will now be available for use with any check under your Check Central account.
To create and match customer-centric check groups, we'll use this new API connection to import companies/customers directly from ConnectWise Manage.
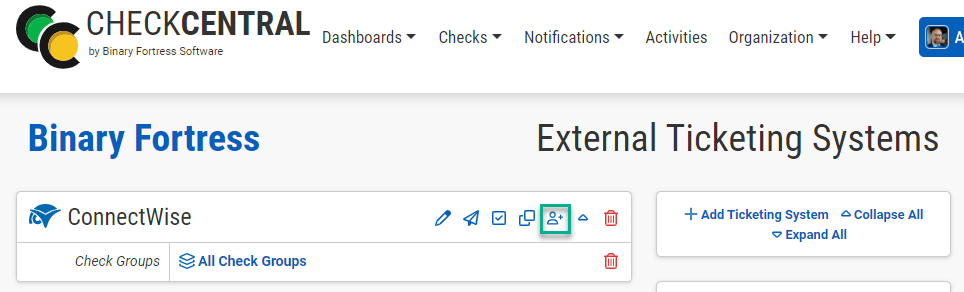
From the External Ticketing Systems page, click on the Customer Import icon above your newly-created channel.
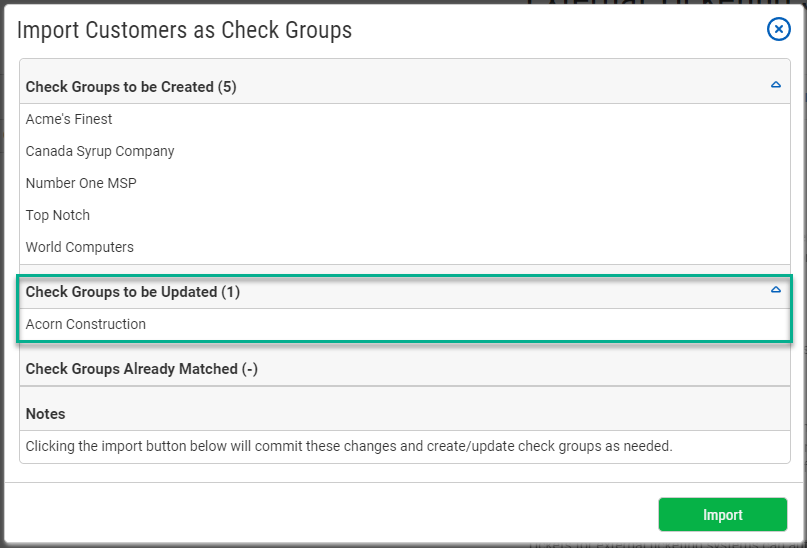
If no similar check groups exist, your customers will be listed under Check Groups to be Created.
If you've already created Check Groups using company/customer names, they will display in the Check Groups to be Updated section, ensuring they match with ConnectWise.
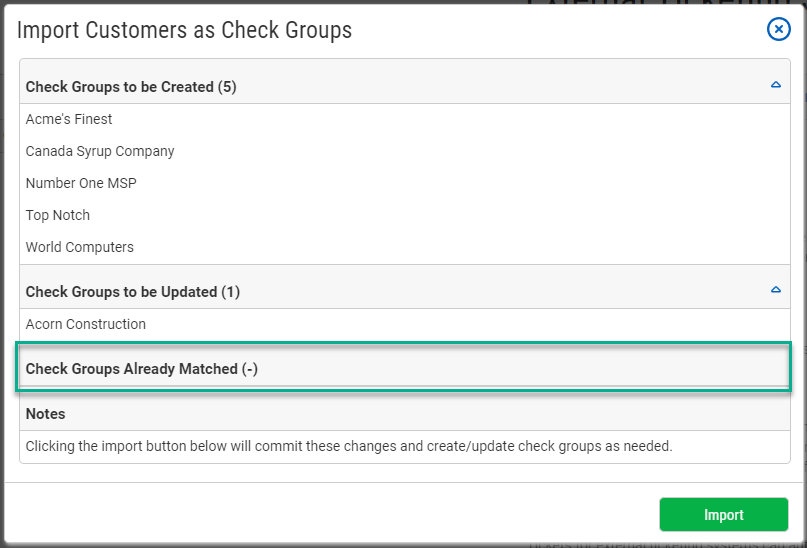
Existing Groups Already Matched with ConnectWise will be skipped.
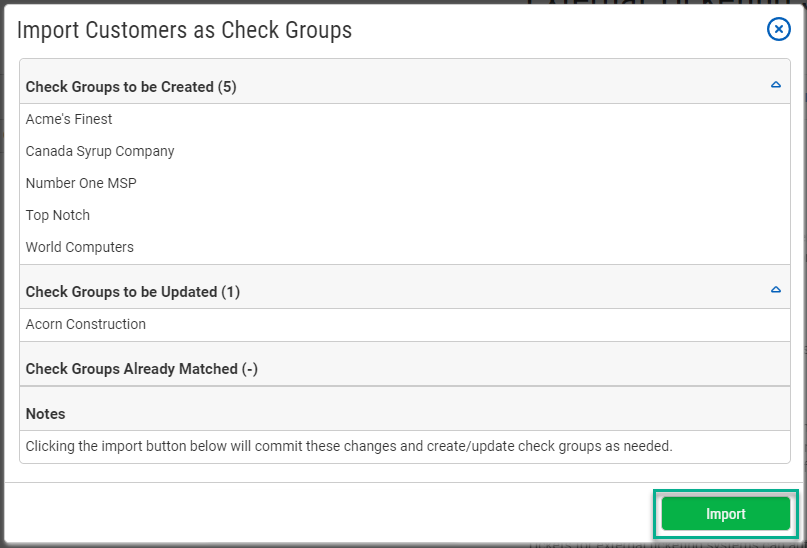
Now click Import to complete the import.
CheckCentral Monitoring consolidates and simplifies backup, system, and software email updates into a clean, graphical dashboard, bringing peace of mind to IT administrators of SMBs, Enterprises, and MSPs.
To learn more about CheckCentral, visit:
https://www.checkcentral.ccBinary Fortress has spent 19 years in pursuit of one goal: create software to make life easier. Our software ranges from display management and system enhancement utilities to monitoring tools and digital signage. IT administrators, professional gamers, coffee-shop owners, and MSPs all rely on Binary Fortress to make their days better, and their lives easier.
Copyright © 2007-2026 Binary Fortress Software, all rights reserved.
The Binary Fortress logo is a trademark of Binary Fortress Software.
The CheckCentral logo is a trademark of Binary Fortress Software.
Binary Fortress Software
1000 Innovation Drive, Suite 500
Kanata, Ontario, Canada
K2K3E7
https://www.binaryfortress.com