Windows Server Backup doesn't have an option to email results of backup jobs. Using the
Get-WBSummary Windows Server Backup PowerShell command, this script gets the last successful backup date and confirms it's within a specified period. It also counts the number of warning and error events in the "Microsoft/Windows/Backup" Event Logs, and sends the results to CheckCentral.
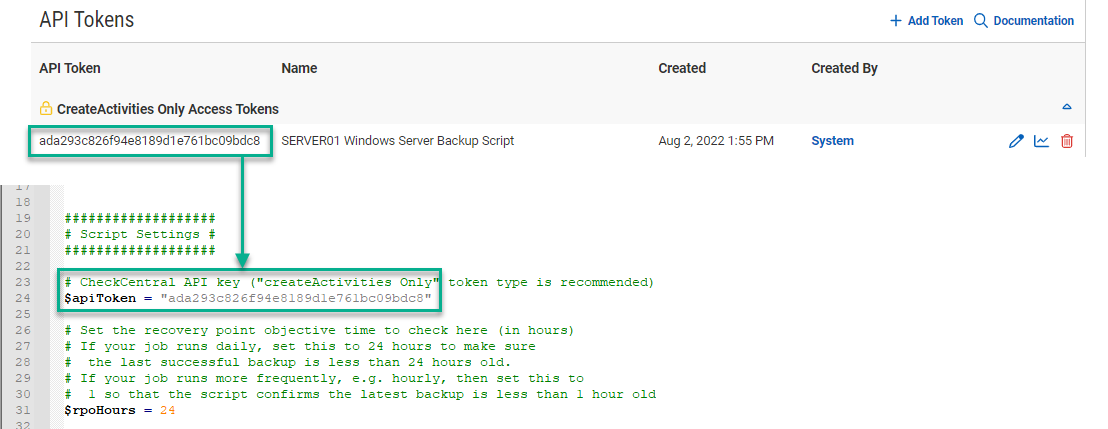
Copy the token, and paste it in the
variable of the script.
For multiple instances, consider using unique API keys. If at a later date one needs to be revoked, it will then only impact a single instance.
- Configure this script to run on a machine somewhere as a regularly scheduled task. (Daily in this example)
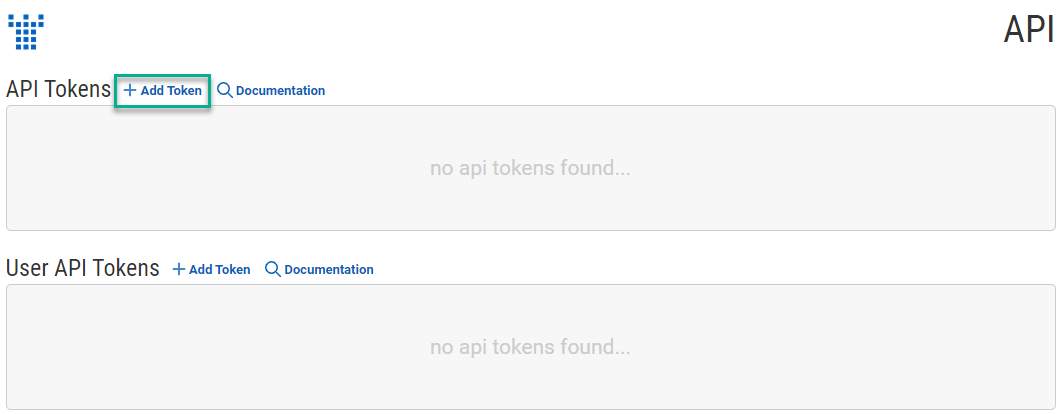
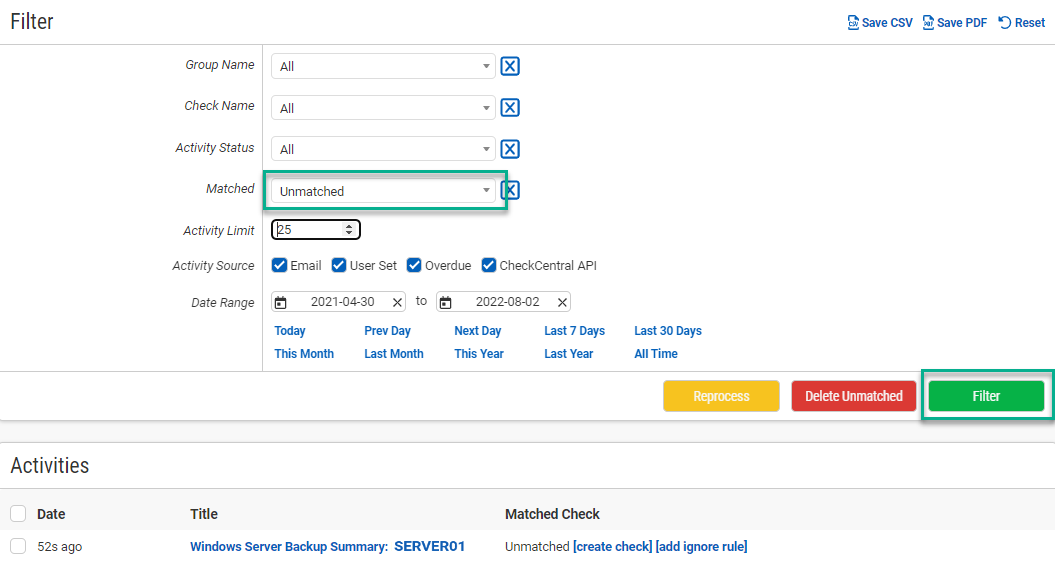
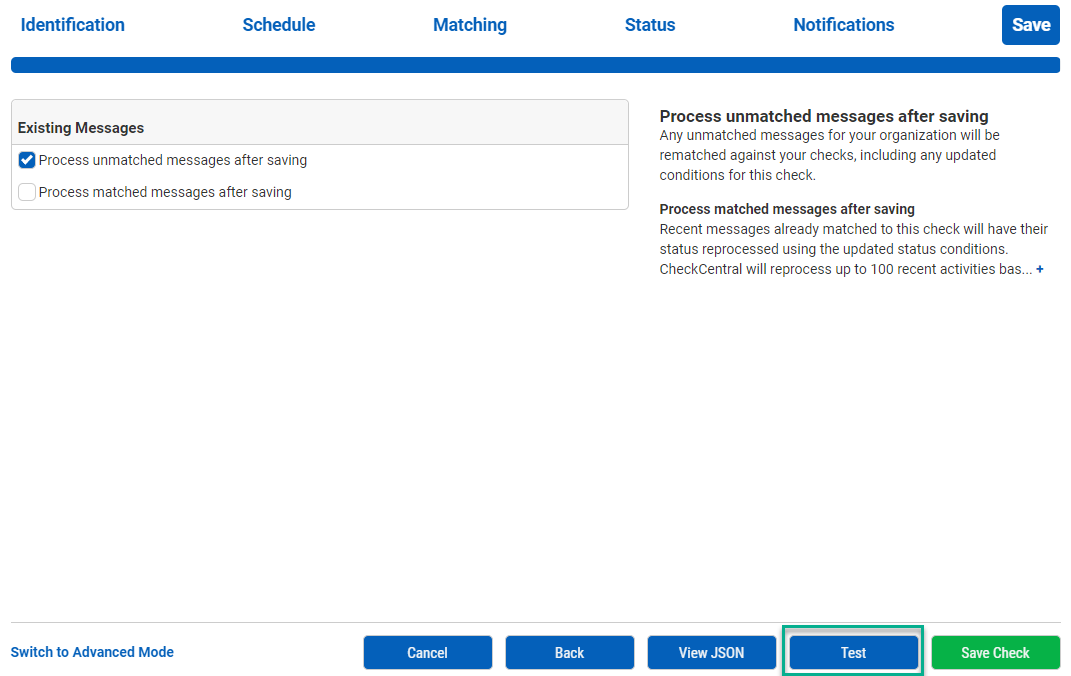
The results will show below.
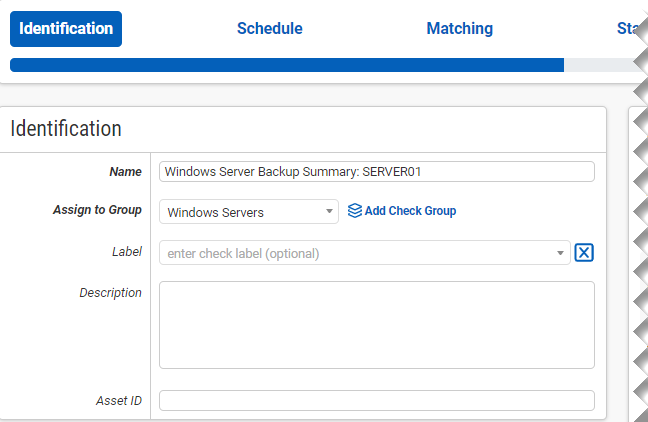
Leave the Name as is.
Select an existing Check Group or create a new one by clicking "
Add Check Group
".
Select an existing Label or create a new one by typing the name in the text field of the dropdown (optional).
Add a description (optional).
The Asset ID is used exclusively with certain ticketing systems and is not required for Checks. Asset ID details and ticketing systems are more fully covered by other documents (e.g.
Halo Integration (asset ID).)
Leave the Asset ID blank.
Your Check so far will look something like this:
Navigate to the next step in CheckCentral by clicking the "Next" button or the tab name.
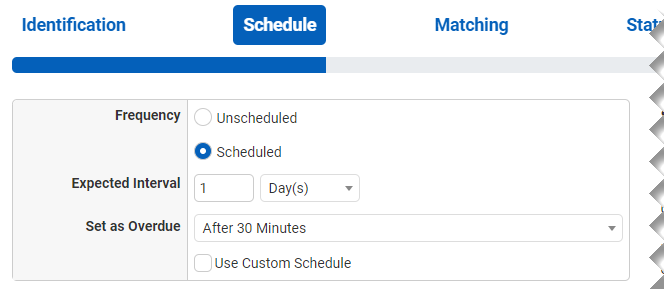
Leave "Scheduled" selected as we will be running the script regularly.
Assuming you'll run the script daily, leave the Expected Interval on "1" "Day(s)." If you plan to run the script on another interval, adjust accordingly.
The initial expectation time is set by the first email message that is received and processed by its Check. (For example, if a notification email arrives at noon and its Check is set for every half hour, it will expect another notification email at 12:30.)
Leave the Set as Overdue setting at "After 30 Minutes." If the script notification email is not received after this amount of time has been exceeded, the Check will be marked as a failure.
Leave Custom Schedule de-selected.
The Matching step is what matches a notification email to its specific Check. It's also where you'll set the notification's CheckCentral destination email. For email-based notifications, this email can be used for quick matching. Because this is an API-created activity, other Matching Rules are needed.
A Matching Rule is created by default with the Subject of the message crafted by the earlier test run of the script. The "Subject" "Is Exactly" dropdowns and the text
Windows Server Backup Summary:
are displayed, appended with the Computer Name of the computer running the script.
The email address will appear different based on your organization name and the name you specified for your check.
The previous Matching step identifies the incoming message to the Check. The Status step looks for indicators of what type of notification you're receiving (e.g. The job was successfully run, it failed, or there were some issues.)
The activity the script creates will include a summary line like this:
Recent: True, Errors: 0, Warnings: 0
in the body, so you'll configure the check status conditions to parse that line.
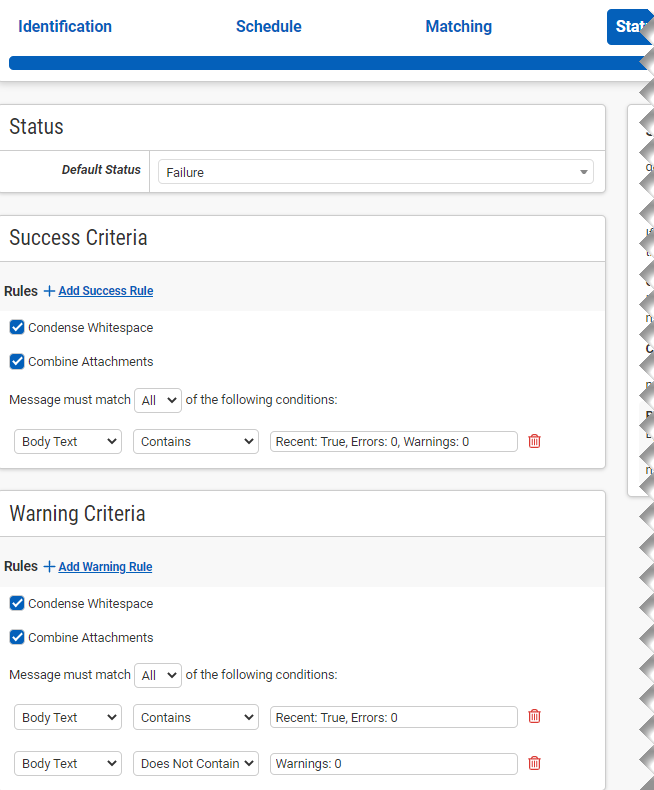
Leave the Default Status on "Failure."
The "Success Criteria" section is where you'll set the criteria that will mark an activity as successful.
Set the rule to "Body Text" "Contains"
Recent: True, Errors: 0, Warnings: 0
.
The "Warning Criteria" section is where you'll set the criteria that will mark an activity with a warning.
Set the rule to "Body Text" "Contains"
.
Click
Add Warning Rule
again.
Set the rule to "Body Text" "Does Not Contain"
.
Leave the Condense Whitespace and Combine Attachments checkboxes enabled.
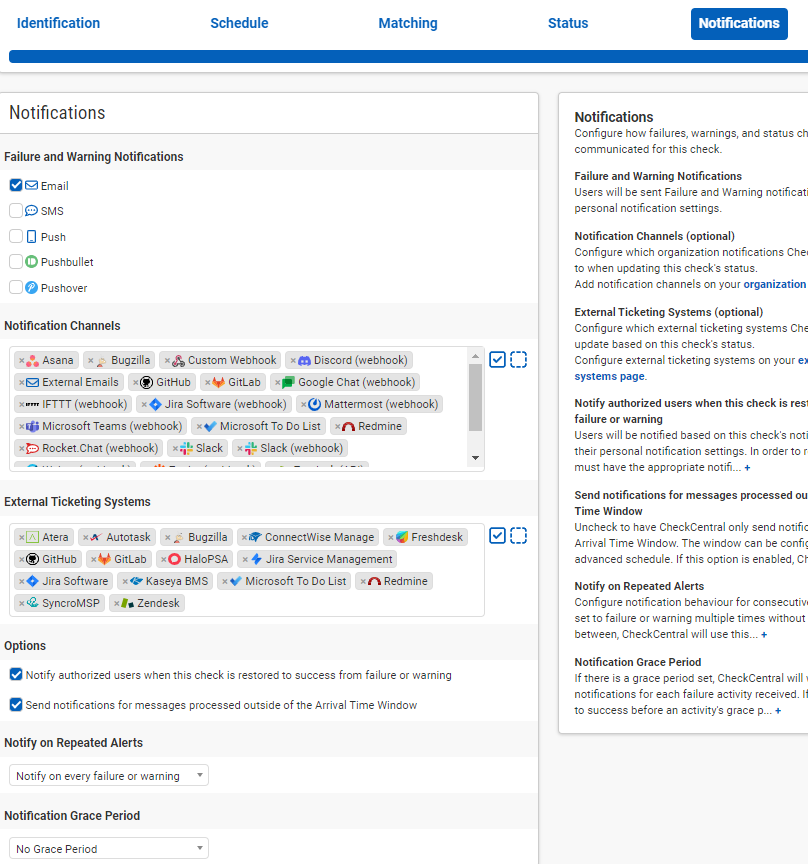
Notifications are simply how you want to be informed of Check Failures, Warnings, and some other Status changes.
Email, push, chat and other software can be integrated as well as ticketing systems, allowing for automatic ticket creation and management.
Further configuration is required for each to function and is done via the Notifications tab in the main menu. They can be configured before or after Check creation.
For more understanding of Notification setup, see the
CheckCentral Beginner's Guide (Notifications).
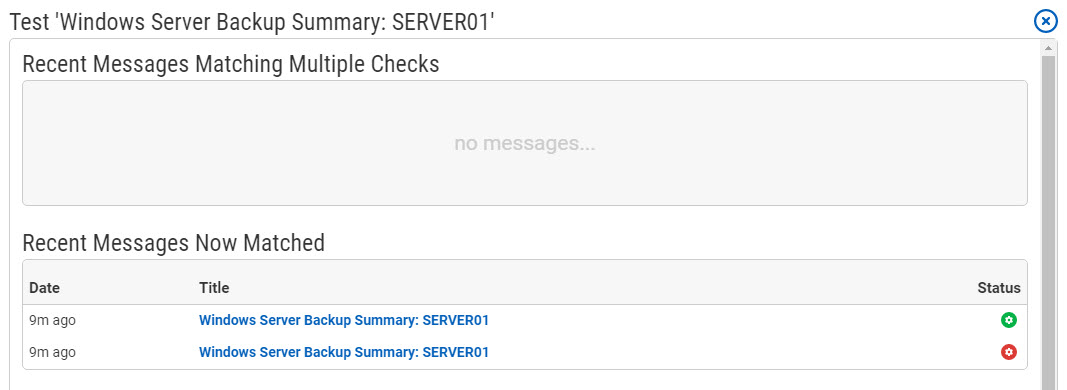
Under "Recent Messages Now Matched" your previously unmatched activity will be displayed with a green Status indicator (assuming the status was returned with no Errors or Warnings).
CheckCentral Monitoring consolidates and simplifies backup, system, and software email updates into a clean, graphical dashboard, bringing peace of mind to IT administrators of SMBs, Enterprises, and MSPs.
To learn more about CheckCentral, visit:
https://www.checkcentral.ccBinary Fortress has spent 19 years in pursuit of one goal: create software to make life easier. Our software ranges from display management and system enhancement utilities to monitoring tools and digital signage. IT administrators, professional gamers, coffee-shop owners, and MSPs all rely on Binary Fortress to make their days better, and their lives easier.
Copyright © 2007-2026 Binary Fortress Software, all rights reserved.
The Binary Fortress logo is a trademark of Binary Fortress Software.
The CheckCentral logo is a trademark of Binary Fortress Software.
Binary Fortress Software
1000 Innovation Drive, Suite 500
Kanata, Ontario, Canada
K2K3E7
https://www.binaryfortress.com