CheckCentral monitoring software consolidates and simplifies backup, system, and software email updates into a clean, graphical dashboard. This guide will take you through basic setup and configuration options to get you started.
CheckCentral requires initial Check configurations for identifying status conditions defined in your various software and system email messages. You will also need User and Notification configurations to be properly informed of Check Statuses.
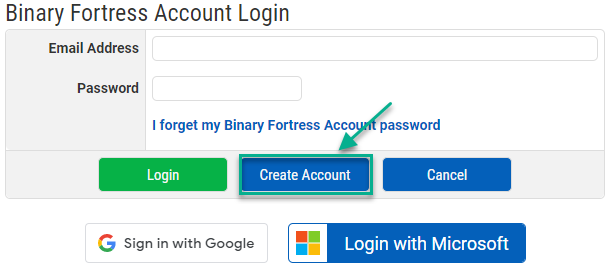
First, you'll need to create an account.
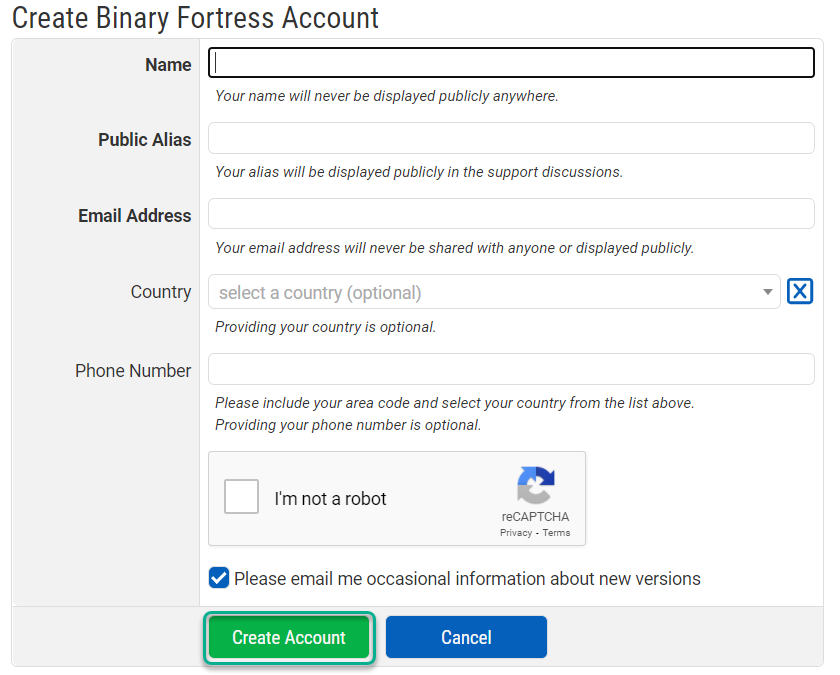
Add your name (this will be kept private), a public alias, and your email address. If you already have an account through another Binary Fortress product, use the same email address from that product account login.
Country and phone number are optional but encouraged. Finally, check the reCAPTCHA box next to "I'm not a robot," and click the "Create Account" button.
An organization is the parent account of CheckCentral Users.
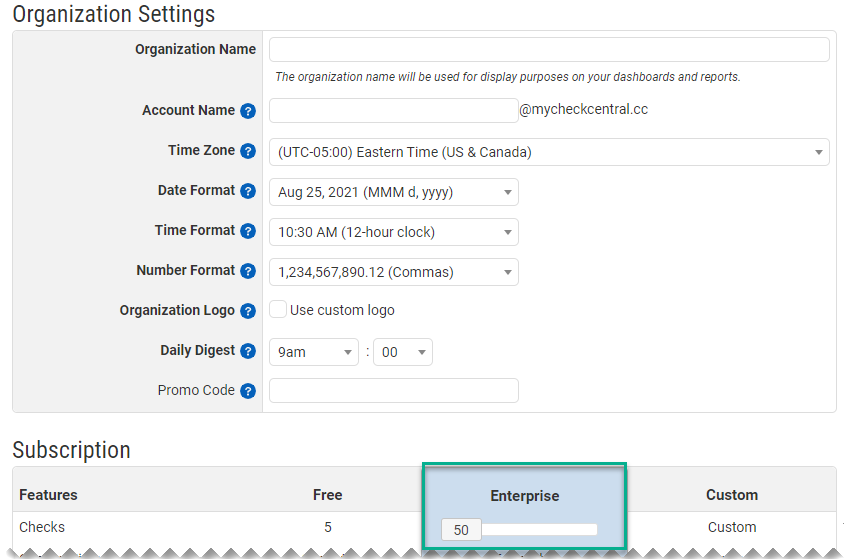
You are required to have at least one Organization to begin with CheckCentral. When you first create your account, you will see a page similar to this:
The top portion asks for an Organization Name, Account Name, and time/date/number details and preferences. The Organization Name is used for display purposes on your Dashboards and Reports. The Account Name will be prepended to "@mycheckcentral.cc" and used as the base for recipient emails for the Checks you will create.
For better understanding, see Step 3 Matching within this document.Be sure to choose the correct Time Zone as this will affect the times displayed on your Dashboard and details for Check events.
To display a Custom Logo to accompany your Organization Name, enable the checkbox by "Use custom logo," click the "Choose File" button, select your logo image from the prompted file selector window, and click "Open." JPEG, PNG, and GIFs are the allowed file types. Recommended image size is 400px by 40px.
The chosen logo image name will appear beside the "Choose File" button.
The Daily Digest is a summary report for your Organization's checks. Choose the time of day when you would like to receive this report. Enterprise Accounts can manage this later via the Reports page. To alter your Organization Settings later, navigate to Settings via the Organization tab on the main menu.
When first creating your Organization, you will choose your Subscription level and settings.
Use the slider to select the number of Checks needed for your Organization. The Checks can be increased/decreased at any point in the future with pro-rated charges automatically applied. The Free version allows for 5 Checks.
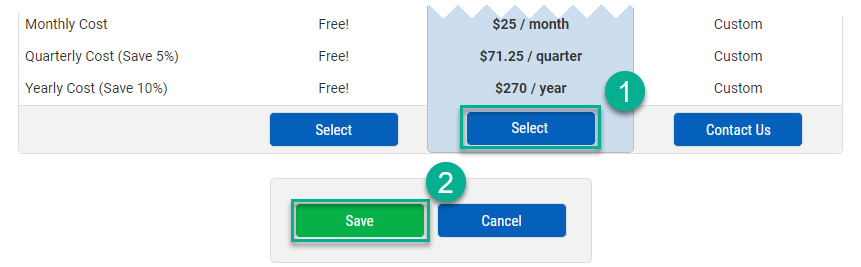
After selecting the number of desired checks, move to the bottom of the page. Select the Subscription type by clicking "Select" (1). For new accounts this button may say "Free Trial!." Then click the "Save" button to finish (2).
To update your Subscription settings later, navigate to Subscription via the Organization tab on the main menu. There you can update your Subscription type (Free vs. Enterprise), increase/decrease the number of your Checks, and update your Billing Information.
Navigate here via the Organization tab on the main menu.
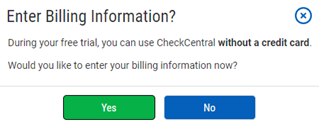
The first time you access this page, you may see this prompt for billing information:
By clicking "Yes" you'll be redirected to the Stripe payment page.
See Billing Information in this document for more detail. By clicking "No" you'll be taken to the Dashboard page.
See Dashboards in this document for more detail. Clicking the close icon
will close the prompt.
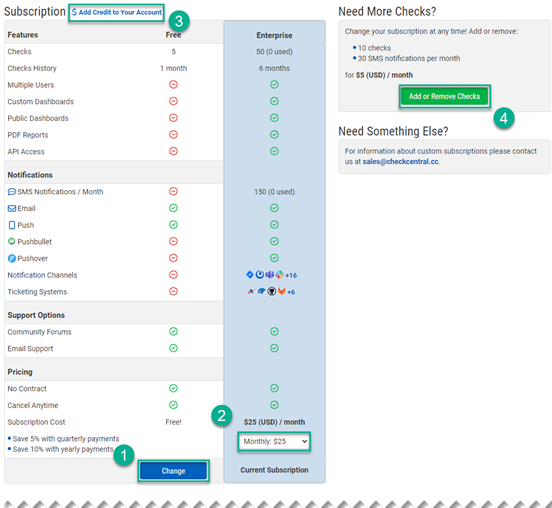
To change your Subscription type, click the "Change" button (1), choosing between "Free" and "Enterprise" (paid). Free Subscriptions are limited to 1 User, 5 Checks, 1 month of history, and have limited features and options.
On the Enterprise Subscription, you can pay at different intervals (Monthly, Quarterly, and Yearly). The price is discounted for the Quarterly and Yearly options. Click the dropdown selector (2) to choose payment intervals.
To pay in advance, click "
$ Add Credit to Your Account
" (3), enter the credit amount, and click "Submit."
To increase/decrease the number of your Checks, click "Add or Remove Checks" (4).
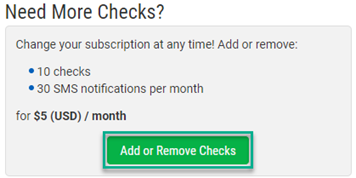
When you need to increase/decrease the Check allowance for your account, navigate to the Subscription page via the Organization tab in the main menu.
In the upper-right of the Subscription page click "Add or Remove Checks."
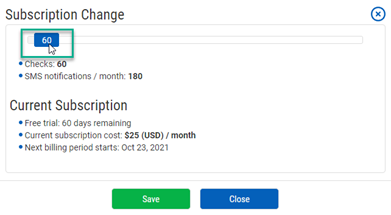
Click and drag the scroll button to increase or decrease the Check count. Increasing the number of Checks also increases the SMS notification allowance. The adjusted Subscription cost will show in the Subscription Change window.
With the desired number of Checks set, click "Save."
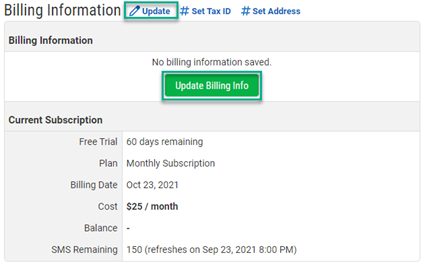
To add or update your Billing Information, navigate to the Subscription page via the Organization tab in the main menu.
Click "
Update
." If you've yet to add any billing info, you can also click "Update Billing Info."
Click "
# Set Address
" to enter your billing address.
For many of the billing information links, you will be redirected to the Stripe payment page to enter your billing details.
When your information is complete, click "Save card." To return to the CheckCentral site, click the Binary Fortress logo
in the upper left of the page.
Users are those allowed various access to your CheckCentral Organization and its Check data.
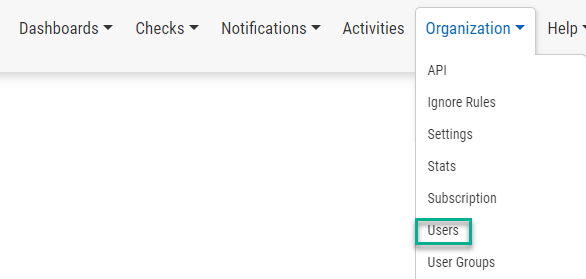
Navigate to the Users page via the Organization tab.
Your users are listed in the Users table. The table shows the User's Access privilege, User Groups, and active Notification Services.
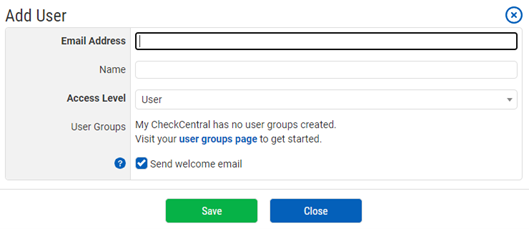
To add a User, navigate to the Users page via the Organization tab in the main menu.
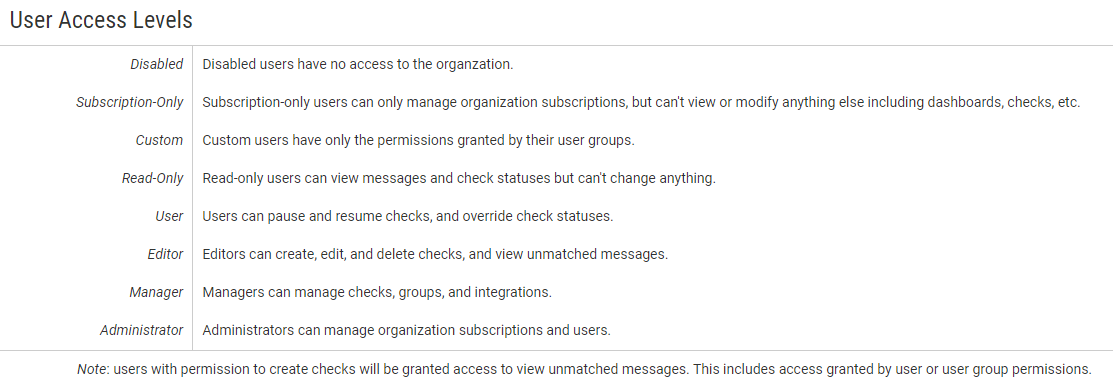
Enter the User's Email Address, Name, and choose their Access Level. Access Level descriptions are shown on the User's page (also shown below).
Access Levels assigned to Users can be overridden by User Group Permissions. A Custom User has no access on their own and relies on the Access Level provided by its User Group(s). If you have created User Groups, the User can be added to one or more groups by selecting them from the multi-select dropdown. To create User Groups, see
User Groups in this document.
To send the newly-added user a welcome email with instructions on creating their account, enable the checkbox next to "Send welcome email."
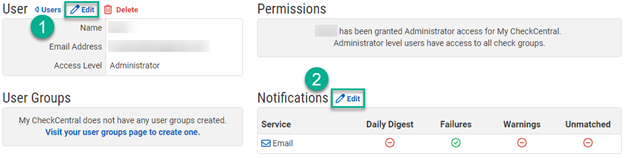
To edit or delete a User, navigate to the Users page via the Organization tab in the main menu. You cannot remove yourself from an Organization.
Click the magnifying glass icon
to access a User's details.
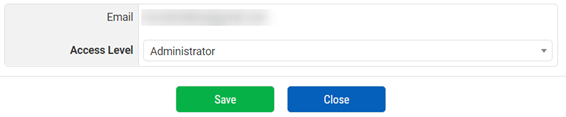
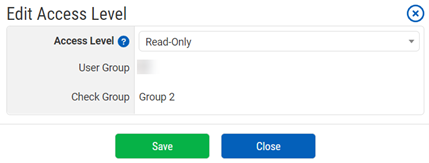
To edit the user's Access Level, click "
Edit
" (1).
Select the desired Access Level from the dropdown and click "Save."
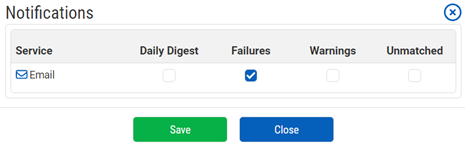
To edit the User's Personal Notifications from the Users page, click "
Edit
" (2).
Only configured Notification Services are displayed here. To learn more, see Notifications within this document.
Enable/disable the Notification options by clicking the checkboxes. Daily Digest is for receiving a summary of Checks. Failures and Warnings are for receiving Check Status Notifications. Unmatched is for Notification of email messages that fail to match preconfigured Check criteria. For more on Checks, see
Checks within this document.
Click "Save."
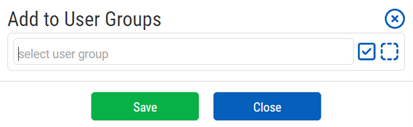
If the User is part of a User Group, the group will be displayed on the User's detail page.
To add them to another group, click "
Add
."
Users can be part of multiple groups.
In the prompt, select the User Group(s) to which you want to add the User and click "Save."
To remove the User from a group, click the Delete icon
. Click "Yes" in the prompt.
User Groups are a collection of Users that can be given blanket access levels to Check Groups. User Groups are a more efficient application of User access management.
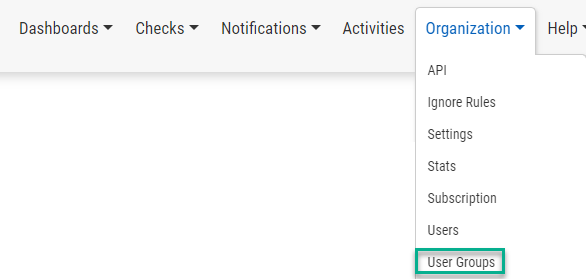
To create and manage User Groups, navigate to User Groups via the Organization tab in the main menu.
The User Groups table lists the User Groups, the number of Users in the group, and the number of Check Groups to which the User Group has access.
To create a User Group, navigate to User Groups via the Organization tab in the main menu.
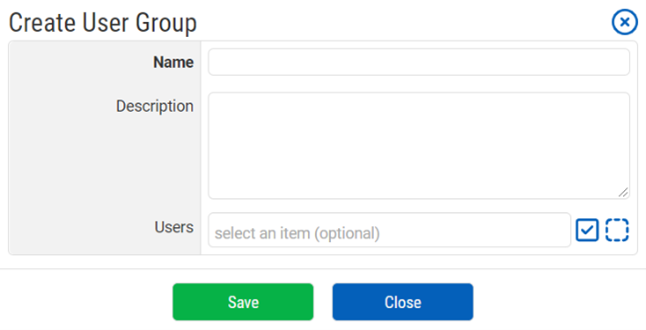
Name the group, describe the group's representation or purpose, and select which Users it will include.
Click "Save."
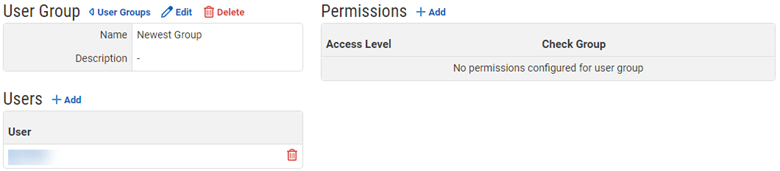
Once the group has been added, click on the name of the group. This will take you to the details page for that group.
Here you can edit the name and description, edit Access Level Permissions, and edit Users within the group.
Permissions are the Access Levels of a User Group specific to selected Check Groups. Check Groups are the collection of Checks configured for the Organization.
To learn more about Checks and Check Groups, see Checks within this document.
Permissions will apply to all the Users within the group, allowing for increased Access over the User's normal Access Level. (For example, 'User A' who normally has 'Read-Only' access can be given 'Editor' access if part of a User Group with Editor Permissions.) A Custom User has no access on their own and relies on the Access Level provided by its User Group(s).
To learn more about User Access Levels, see Adding a User within this document (Also shown below).To add Check Groups and assign Access Levels for the Users within this group, click on "
Add
" in the Permissions section on the details page for a User Group.
To navigate here, click on User Groups via the Organization tab in the main menu, then click on the User Group name.
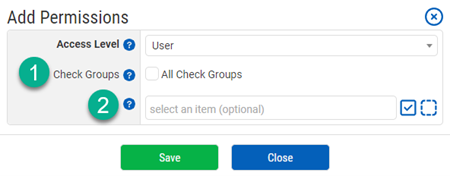
Select the Access Level for the group. This will be applied to all Users within the group and applied to selected Check Groups. To apply to all Check Groups, select the checkbox next to "All Check Groups" (1). To choose specific Check Groups, de-select "All Check Groups" and choose the individual Check Groups from the multi-select field (2).
Click "Save."
To edit User Group Permissions after they've been added, click on the edit icon.
Select the new desired Access Level for the Check Group. Click "Save."
To delete a Check Group Permission from the User Group, click the Delete icon
. Click "Yes" in the prompt.
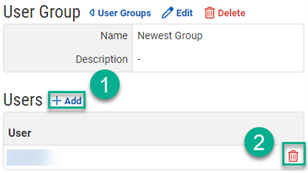
To navigate here, click on User Groups via the Organization tab in the main menu, then click on the User Group name.
To add a User to the User Group, click "
Add
" (1), select the User from the prompt and click "Save."
To delete a User from the User Group, click the Delete icon
(2). Click "Yes" in the prompt.
To edit or delete a User Group, navigate to User Groups via the Organization tab in the main menu.
Click on the name of the group you want to edit or delete.
Click "
Edit
" to update the name and description of the group. Click "Save" in the prompt.
To delete the group, click the Delete icon
, and click "Yes" in the prompt.
The core of CheckCentral is Checks. These are configurable, automated programs used to set a system/software Status based on details provided from incoming email messages. (For example, when a backup service sends an email to report the successful run of a backup process, a Check scans that email and sets a visual status indicator to mark the Success.)
This guide covers the basics of Checks. For a more detailed guide with examples, see the
Check Creation Guide.
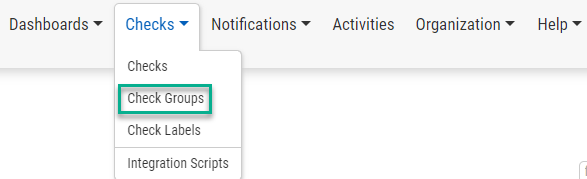
Checks can be added via the Dashboard, the Checks page, and within the Check Group details page.
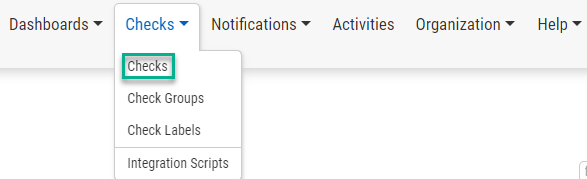
For general Check management, navigate to the Checks page via the Checks tab in the main menu.
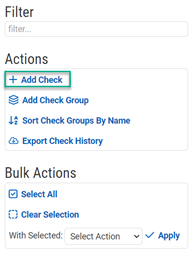
On the Checks page, click "
Add Check
" under the Actions section.
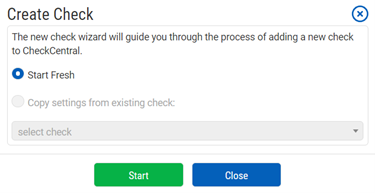
A prompt will display for the Check wizard, which will walk you through the steps of Check creation. If you have already created a Check, you can select "Copy settings from existing check:" and select the Check from the dropdown.
For your first Check, or any Check with unique configurations, you can select "Start Fresh."
Click "Start."
There are 6 steps to creating a Check, represented at the top of the page.
To navigate through the process, use the buttons at the bottom of the page. Clicking "
Switch to Advanced Mode
" offers a long-form view of the same process.
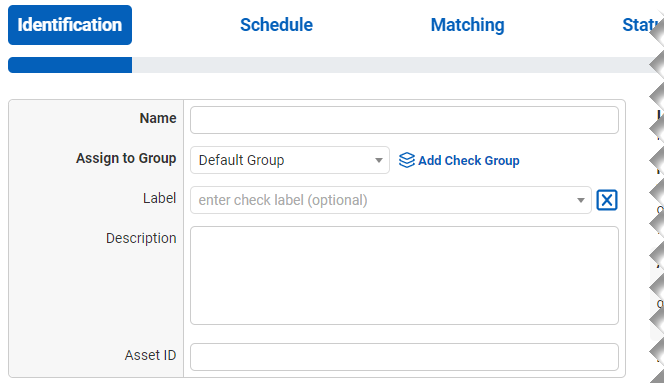
Name the Check.
Assign it to a Check Group by choosing the group from the dropdown menu.
All Checks are organized within a Check Group. At the start, "Default Group" is the only group available. To create a new Check Group, click "
Add Check Group
." From the prompt, Name the group and add a Description.
To rename the "Default Group" or manage others, go to Check Groups from the Checks tab in the main menu. To learn more about Check Groups, see Check Groups within this document.
Choose a Label or type in a new Label in the Label field. Labels are used to further organize Checks within a Check Group. While they are optional, Labels can give quicker detail as to the Check's purpose or source. (For example, all your California-based Checks might be organized under the "West Coast" Check Group then given Labels according to their backup service software: "Veeam," "Acronis," "Rubrik.") Those sharing the same Label will be grouped as well.
Add a description for better understanding.
The Asset ID is used exclusively with certain ticketing systems and is not required for Checks. Asset ID details and ticketing systems are more fully covered by other documents (e.g.
Halo Integration (asset ID).)
Checks are run against incoming email messages. Regularly-scheduled jobs send regularly-scheduled emails. A primary feature of CheckCentral is its ability to mark when expected emails do not arrive on time, and should be considered Overdue. The Check Schedule is what helps establish those arrival time windows.
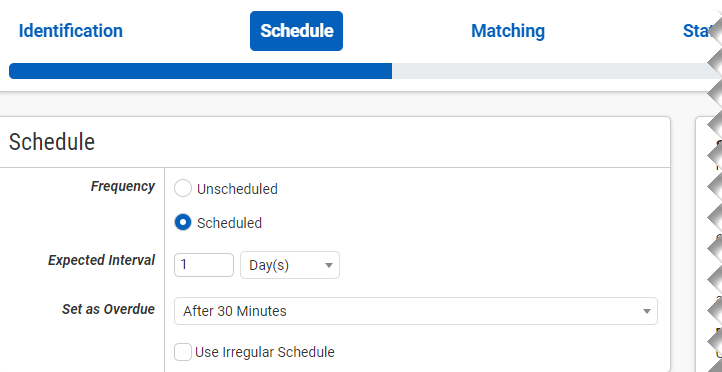
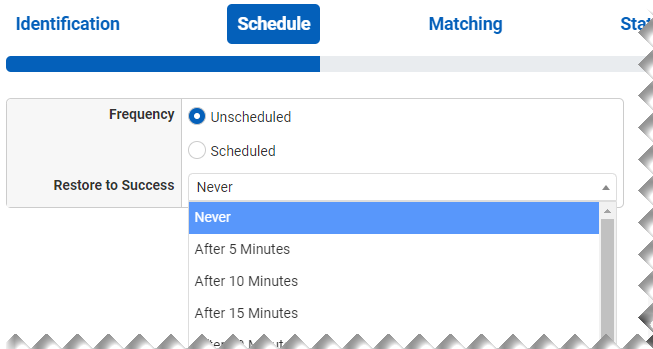
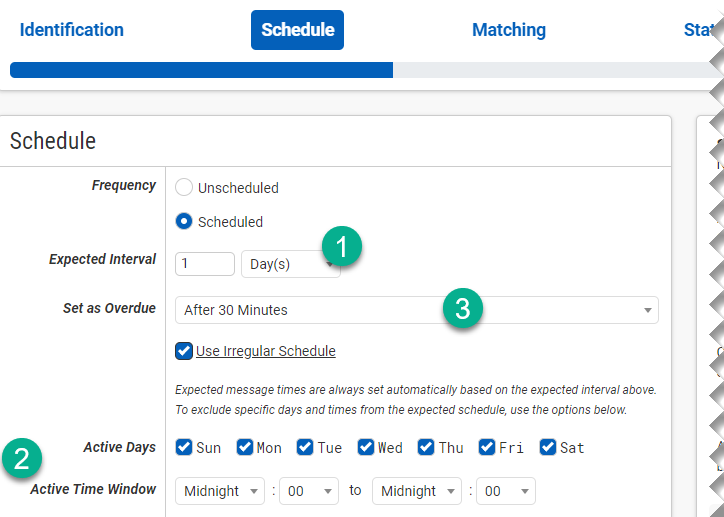
To begin creating the Check Schedule, set the Frequency for the Check. If your notification email is normally received once a day, or at any other regular interval, choose the "Scheduled" option. If your emails arrive randomly, choose "Unscheduled." This selection alters the subsequent options in this step. Unscheduled Checks will never be considered Overdue.
Unscheduled Checks have a "Restore to Success" option. If an email is received setting the Check Status to Failure or Warning, the Check can be set to Success after any of the time limits from the dropdown. The "Never" option will leave the Status as set by the Check.
For Scheduled Checks, Expected Intervals can be set with varying detail.
You can set the expected interval for receiving emails to preset minutes, hours, days, weeks, and months. Choose the time interval from the dropdown and adjust the interval by the number field (1). (For example, if you expect an email every half hour you would type "30" and select "Minute(s).")
The initial expectation time is set by the first email message that is received and processed by its Check. (For example, if a notification email arrives at noon and its Check is set for every half hour, it will expect another notification email at 12:30.)
With the "Use Irregular Schedule" option, you can narrow the days and times (2) when the Check is actively expecting emails. (For example, if you don't expect email messages on the weekends then you would de-select "Sat" and "Sun." If emails are received during that time, this Check will still run, but will not alter time expectations for future emails.)
"Set as Overdue" allows for variation in expected receipt time of emails using preset intervals, from 5 minutes to 1 Week (3). (For example, if you expect an email at 1PM and the Check is configured with Set as Overdue for "After 30 Minutes," the email could arrive at 1:30PM and still be considered on time. At 1:31PM, if the email still has not arrived, it is considered Overdue.) Choose "Immediately" to have it reported as Overdue immediately after its expected arrival time.
The expected time for Scheduled Checks (not using a Custom Schedule) will adjust with each new arrival time for emails. With Use Custom Schedule, emails received outside the Active Time Window will not adjust arrival time expectations.
Each Check is configured around receiving emails. The destination address for those emails can be one central collection address composed as "[YourOrganization]@mycheckcentral.cc," or Checks can use a unique variation of that address for easier matching.
Because the example Organization name is "My CheckCentral," the main destination email address is:
The latter part of the email address will always be "mycheckcentral.cc," regardless of the Organization name.
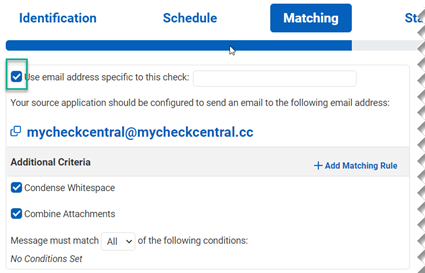
To continue using the main destination email address, disable the checkbox beside "Use email address specific to this check:."
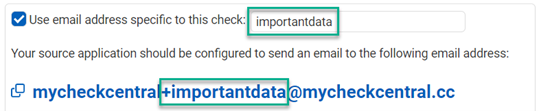
For more controlled Check matching, however, leave the checkbox enabled and type keywords related to the Check you're configuring. The addition of keywords will then alter the destination address (as shown below). By default, the name of the Check is already inserted into the email address, but can be changed by replacing the text.
In the example above, the keyword "importantdata" is appended into the email address as "+importantdata." This check will now monitor "mycheckcentral+importantdata@mycheckcentral.cc" for incoming emails.
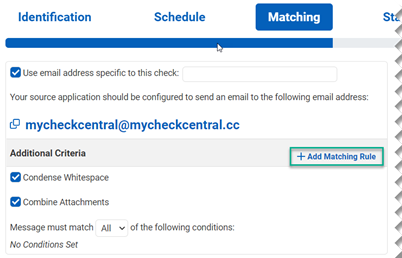
To better match incoming emails, further details can be provided via Matching Rules. A Matching Rule can be used with either the main email address or the keyword-altered versions.
To use Matching Rules, click "
Add Matching Rule
."
The "Condense Whitespace" and "Combine Attachments" options will enhance Check matching efficiency and are best left selected.
For every click on "
Add Matching Rule
," a new row of configurable matching conditions is added (1).
Conditions can be set on "Subject," "Body Text," "To," "From," "CC," "Originally To," and "Attachments" (2), with matching options "Contains," "Does Not Contain," "Exactly," "Is Empty," "Is Not Empty," "Complex Match," and "Matches Regex" (3) for the keywords written in the text field (4).
When using more than one Matching Rule, an "and/or" approach is achieved with the "All/Any" dropdown selector (5). (In the example above, both rules must match, with the keyword "backup" appearing in the email subject and "database" appearing in the body text.)
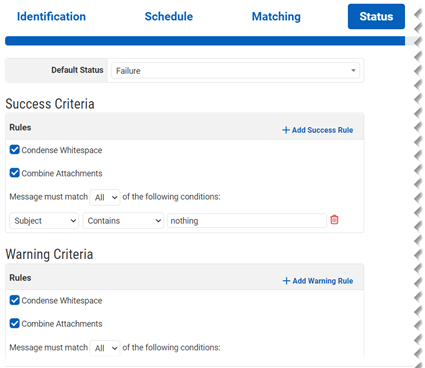
A Check Status is the representation of conditions as expressed and matched upon for incoming emails. The Status can be set to "Failure," "Success," and "Warning," represented on the Dashboard with these respective icons:
A Check's "Default Status" is its state until matched against other Status criteria. If you set a Check's Default Status to "Failure" and the criteria for "Success" or "Warning" do not match the email's contents, the Check will set the Status to "Failure."
If the Check is Scheduled and an email is not received when expected, the Check will be marked Overdue and considered a Failure (once Set as Overdue time has expired), regardless of the Default Status set in this step.
To learn more about Check Status icons, see Dashboards within this document.Set the Default Status to "Failure," "Success," or "Warning."
The criteria set for other Statuses will be responsible for altering that Status.Whichever Status you set as the default will adjust the other two Status criteria sections for this step.
To set matching criteria for the other two Statuses, go to the relevant section and click "
Add [Status] Rule
."
Exactly like Step 3 Matching, your conditions use presets and keywords to create matching rules. Select from the presets, enter your keywords, and add additional rules to use as alternates or in conjunction with other rules in that section.
See Step 3 Matching within this document for more details.Matching criteria for the non-default Statuses must not conflict.
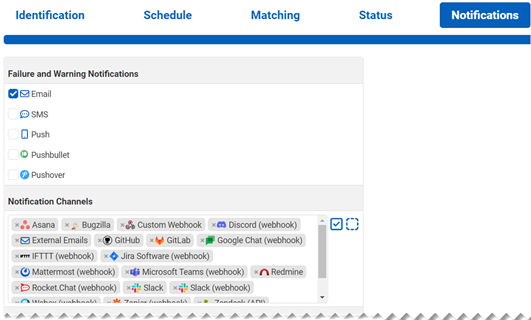
To be notified of Failures and Warnings outside of the CheckCentral Dashboard, there are many options. Email, SMS, and an assortment of Push options are the main features, but Channels like Asana, Discord, Slack, and GitLab are also available.
In addition, CheckCentral can be integrated into External Ticketing Systems for Notification and initializing response procedures. Notifications are set for each Check, with further control settings allowed at a Personal and Organization level via the Notifications tab on the main menu.
This top portion of the page is for choosing basic Personal Notification options (i.e. Email, SMS, Push) and Organization Notification Channels (e.g. External Emails, GitLab, Microsoft Teams). Click the checkbox to enable the basic Personal Notification options.
To learn more about these Notification options, see Personal Notifications within this document.
Notification Channels and External Ticketing Systems that are set as default for the selected Check Group will show here. You can add and remove them as needed in this section.
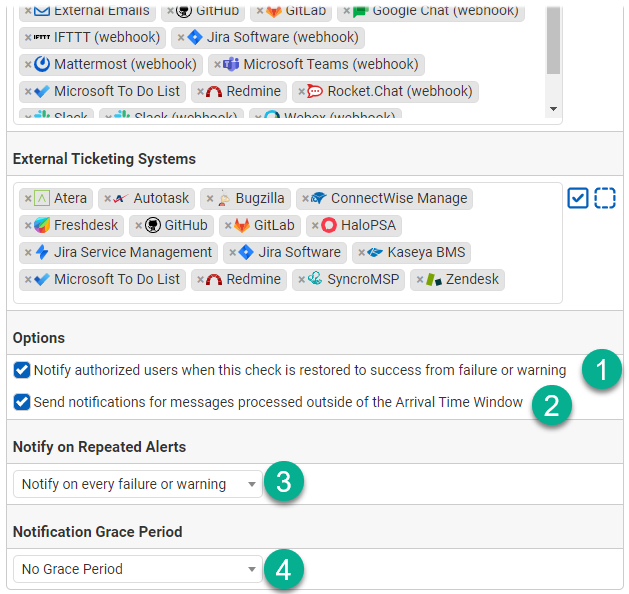
To learn more, see Notifications within this document.The bottom portion of this page (Step 5) is for External Ticketing Systems to be notified with Status changes, as well as more specific options. Similar to Notification Channels, only configured External Ticketing Systems will be used.
Notifications are limited to Warnings and Failures, but a Success Status Notification can be sent when restored from a previous Warning or Failure. To receive these notifications, enable the first checkbox under Options (1).
When the Advanced Schedule Type is used (see Step 2 Schedule), emails may be received and processed outside the expected time windows (set via the Active Days and Active Time Window options in the "Schedule" step). If you wish to be informed of these events, enable the second checkbox in the Options section (2).
For consecutive Failure Statuses on the same Check, you may wish to limit notifications. In the dropdown for Notify on Repeated Failures (3), you can select "Notify on every failure," "Notify on first failure," "Notify on every failure after…," and "Notify on every…," with the last two options requiring numerical specifications. (For example, you can select Notify on every 2 consecutive failures.)
The Notification Grace Period (4) lets you delay Failure notifications, allowing time for the Check to be restored to Success by a subsequent email. This can be set from 15 minutes to 1 day. For immediate notification of Failures, select "No Grace Period."
The Save step has options and helpful features for the Check.
The new Check you've created can be run against emails that have already been received, whether they have conditions matching existing Checks or not. To process this Check against unmatched and/or matched emails, select the relevant checkboxes. Processing is limited to the most recent 100 messages.
Incoming emails not matching any Check conditions and criteria will be labeled as "Unmatched." Unmatched messages will be noted in the "Current Issues" section of the Dashboard and detailed in the Activities page. To learn more on Dashboards, see
Dashboards within this document.
To Test the Check prior to saving, click the "Test" button at the bottom of the page. This will display lists of email messages for several conditions: "Recent Messages Matching Multiple Checks," "Recent Messages Now Matched," "Recent Messages Would No Longer Match," "Recent Messages Still Matched," or "Recent Messages Not Matched." You can go back and adjust matching conditions and repeat the Test until satisfied. Clicking the close icon
will close the prompt.
When satisfied with your Check settings, click "Save Check."
There is also the option to view the JSON of the Check. This is useful when writing API scripts for more efficient Check creation. For further documentation on the CheckCentral API and Check structures, see
API DocumentationCheck Groups are used to group Checks. Check Groups can be added during Check creation or on both the Checks and Check Groups pages. To manage your Check Groups, go to the Check Groups page.
Navigate to the Check Groups page via the Checks tab in the main menu.
All Checks are organized within a group, even with only a single Check in the group. "Default Group" is the only group available with a new Organization, until others are created.
Each Check Group is listed in the table on the Check Groups page, along with the number of Checks included in the group, the number of Users within the group, the group's active Organization Notifications, and its active, integrated External Ticketing Systems.
The Organization Notifications and External Ticketing Systems channels are represented by their logos. If there are too many to fit the column, a "+ #
" will identify additional channels are in use. Click the "+ #
" for more details.
Check Groups can be added via the Checks and Check Groups pages.
To create a new Check Group on the Check Groups page, click "
Add Check Group
." From the prompt, Name the group and add a Description. Click "Save."
You can edit Check Groups via the Checks and Check Groups page.
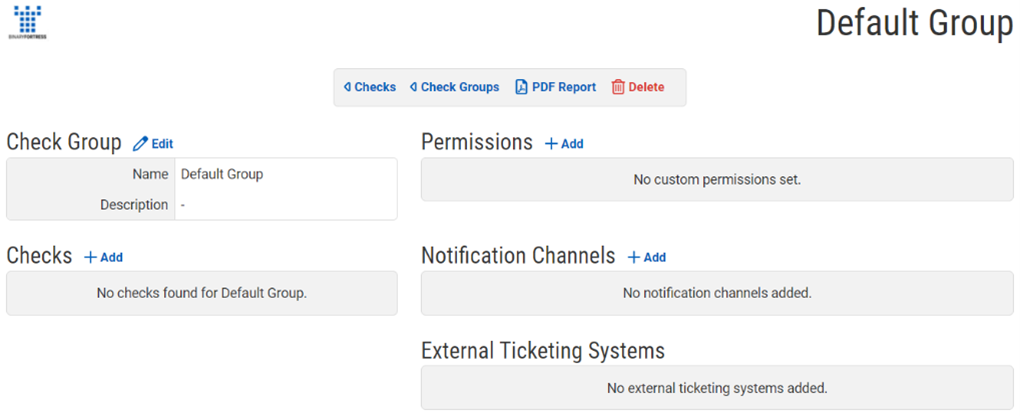
On the Check Groups page, click the group name in the table.
On this page you can edit the group name and description and add User and User Group access via Permissions.
Permissions are for granting access to this Check Group and its Checks. Managers and Administrators will already have full access and won't be listed.
Users with Custom or low-access levels can be given equal or higher access here, allowing for increased Access over the User's normal Access Level. (For example, 'User A' who normally has 'Read-Only' access can be given 'Editor' access if given permission for a Check Group with Editor Permissions.)
To learn more about Users and User Groups see Users within this document. To learn more about User Access Levels, see Adding a User within this document. (Also shown below)On this page you can also add new Checks within the Check Group.
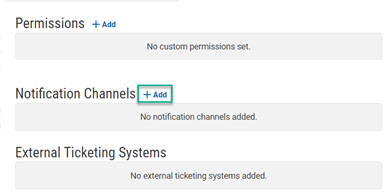
Haven't created Checks yet? See Adding Checks within this document. To manage Checks within a Check Group, go to the Checks page.Additionally, the Check Groups page lets you select which Notification Channels the Check Group should use when sending Organization Notifications.
To add a Notification Channel, click "
Add
" above the Notification Channels section.
To learn more on Notifications, see Notifications within this document.External Ticketing Systems already associated with the Check Group will be listed in the External Ticketing Systems section. To add more and manage these associated channels, go to the External Ticketing Systems page via the Notifications tab on the main menu.
To Delete a Check Group, click "
Delete" at the top of the page. You can also do this via the Checks page.
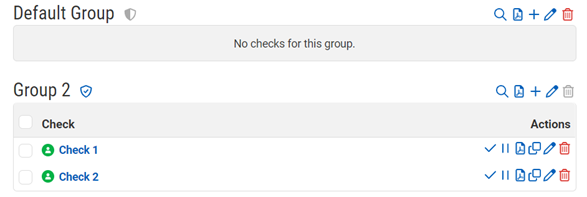
Navigate to the Checks page via the Checks tab in the main menu.
Your Checks are grouped within Check Groups, shown in the above example as "Default Group" and "Group 2."
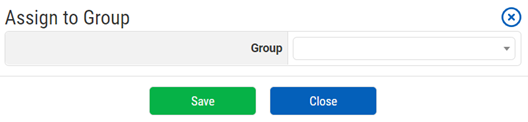
To move a Check from one group to another, select the checkbox of the Check(s) to be moved (1). In the Bulk Actions section, select "Assign to Group" from the dropdown (2). Click "
" (3).
Select the destination group from the dropdown in the prompt and click "Save."
When Checks are run or expected to run on incoming emails, a Status is the result.
The Notification of that Status can be sent to Users via Personal Notifications and Organization Notifications as well as through creating tickets in External Ticketing Systems.
In most cases, the Notifications will be for "Failure" and "Warning" Statuses, though a "Return to Success" Notification can also be sent. Other options, like "Unmatched" messages and the Daily Digest are also available.
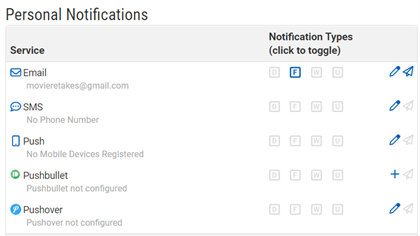
Personal Notification services consist of Email, SMS, and an assortment of Push options.
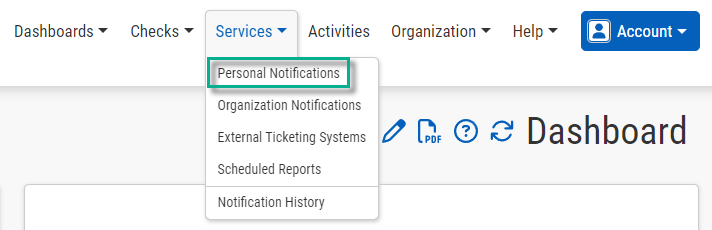
To navigate here, go to Personal Notifications via the Services tab on the main menu.
Email Notifications are active for each User as they're added, given a valid email address. As a default, the Failure Status
is the only type of Notification each User will receive.
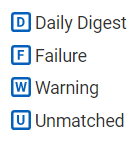
To enable/disable Notifications for any configured Personal Notification Service, click the icon for each type: "Daily Digest," "Failure," "Warning," "Unmatched."
A Daily Digest is a statistical summary of the events for your Organization's Checks. If this option is enabled, you will receive a Notification with information similar to what is shown below.
Failure, Warning, and Success statistics, as well as the number of incoming email messages processed is provided for the previous 24 hours. Unmatched Notifications are for incoming emails that do not match any configured Checks.
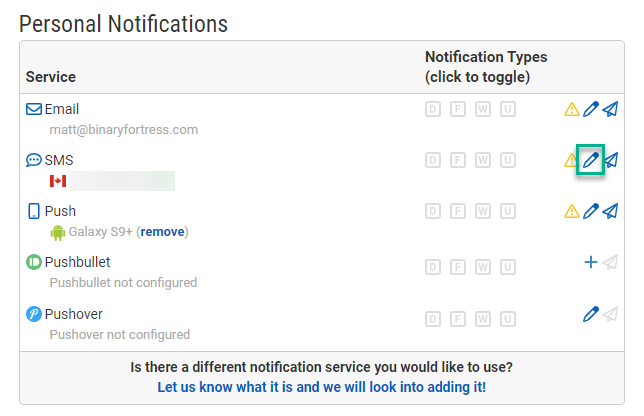
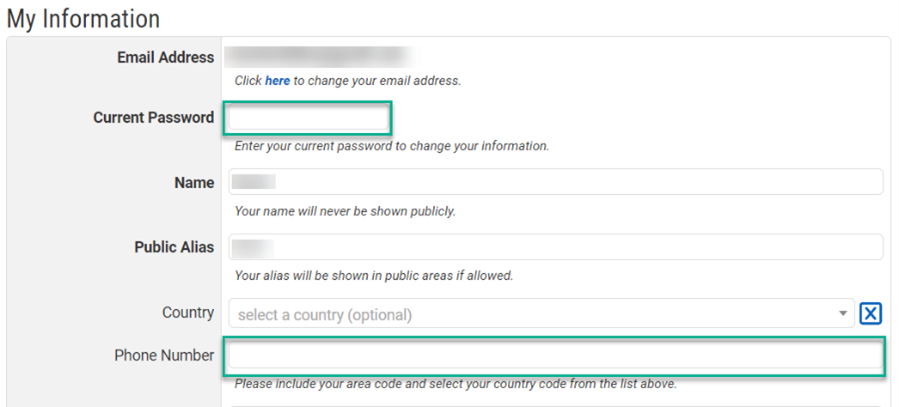
For SMS notifications, a phone number is required. To add or edit a phone number, click the edit icon
in the SMS row of the Personal Notifications table.
You'll be taken to the My Information page. Enter your phone number and current password, then click "Save."
For Push, a mobile device with push software must be installed and registered. This includes Pushbullet, Pushover, and the CheckCentral mobile app. Download the CheckCentral mobile app here:
https://www.checkcentral.cc/Apps/ or in your mobile app store. Device registration occurs on login for the push software.
Organization Notifications are Notifications sent outside the individual User-based services (i.e. User Email, SMS, Push). Each Organization-level Notification option is called a Channel. Examples include Asana, Discord, Slack, and GitLab.
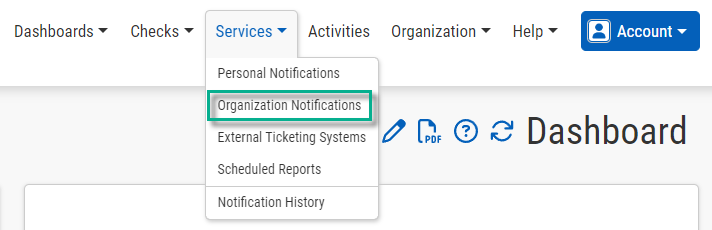
To navigate here, go to Organization Notifications via the Services tab on the main menu.
Existing Organization Notification channels will be listed on the left side of the page. This listing does not guarantee proper configuration.
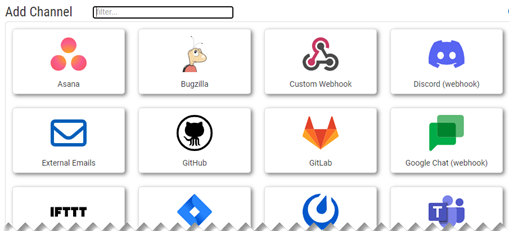
A message stating "This channel is not properly configured. Click the icon above to configure it." will display for non-configured channels.To add a channel, click "
Add Channel
" on the right side of the page.
Select the desired channel from the prompt. Channels may change over time.
Each channel will have its own requirements for proper use. They may consist of API Keys or Tokens, URLs, and/or Usernames, etc.
Instructions are provided within the prompt for each channel selection.
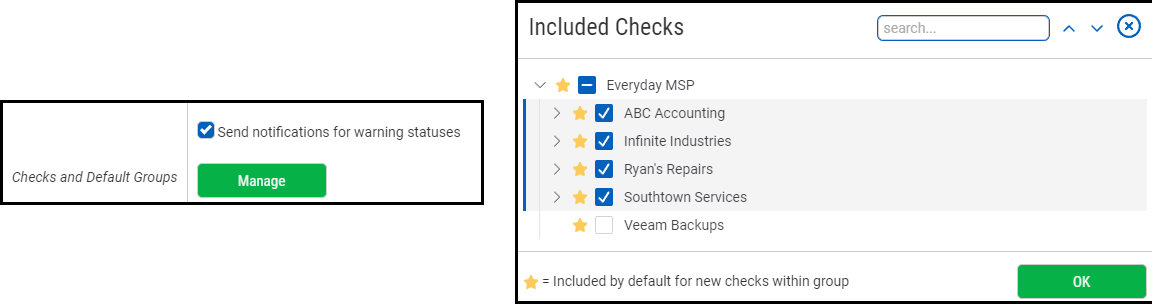
At the bottom portion of each channel's detail prompt is a green "Manage" button for Checks and Default Groups. Click this button to open the dialog that allows you to choose which Checks this channel should send notifications to.
Click "Save."
Once a Notification Channel has been added, it will appear on the left side of the page. This listing does not guarantee proper configuration.
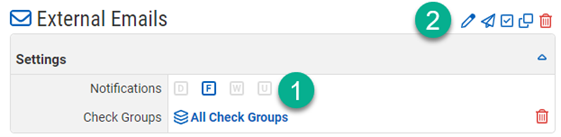
A message stating "This channel is not properly configured. Click the edit icon above to configure it." will display for non-configured channels.There are several actions that can be carried out from the Organization Notifications page. To select which Notifications should be sent, enable them by clicking on the relevant icon in the Settings section of the channel (1).
The available Notification types are the same as those available for Personal Notifications: "Daily Digest," "Failure," "Warning," and "Unmatched."
To edit the channel's configuration, click the Edit icon
above the Settings section of the channel (2). Other options are to "Send Test Message
," "Enable for All Selected Checks
," and "Copy Channel
."
To Delete the channel, click the Delete icon
.
Organization Notifications can also be integrated into External Ticketing Systems for Status awareness and initializing response procedures. These, like Organization Notifications, are Notifications sent outside the individual User-based services (i.e. User Email, SMS, Push). External Ticketing Systems are also added as Channels. Examples include Autotask, Zendesk, and ConnectWise.
When an External Ticketing System is configured, Checks can open and close tickets based on Status. Tickets are opened when the Check status is set to Warning or Failure. If the Check status is returned to Success, the ticket will automatically be closed.
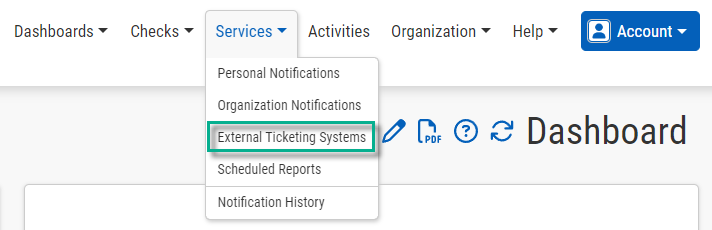
To navigate here, go to External Ticketing Systems via the Services tab on the main menu.
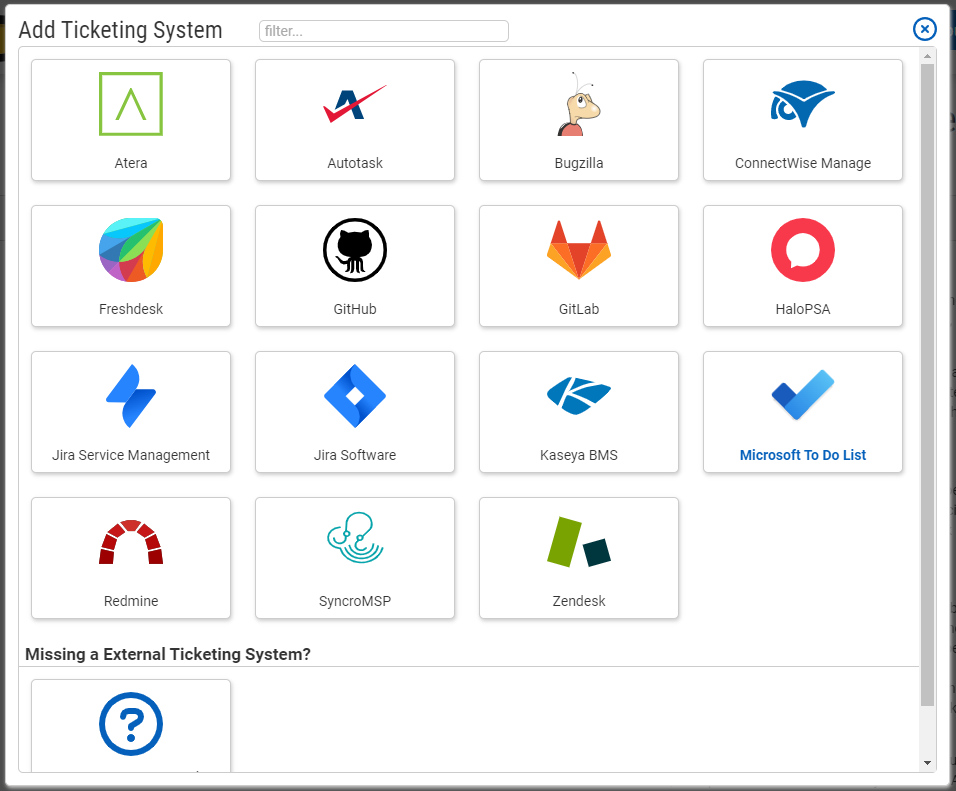
To add a Ticketing System, click on "
Add Ticketing System
" on the right side of the page. Existing Ticketing Systems are listed on the left side of the page.
Select the desired Ticketing System from the prompt. Ticketing System availability may change over time.
Each Ticketing System will have its own requirements for proper use. They may consist of API Keys or Tokens, URLs, and/or Usernames, etc. Detailed account, resource, and role information may also be needed.
Instructions are provided within the prompt for each channel selection.
The bottom portion of each Channel's detail prompt consists of the Check Groups options and a general enablement of the Ticketing System. To use this Notification for every Check Group and their Checks within, enable the "All Check Groups" checkbox.
If you will only use this Notification Channel for certain Checks or Check Groups, disable the "All Check Groups" checkbox and choose the desired Check Groups from the multi-select field. To enable the use of the Ticketing System, make sure the checkbox is enabled. To disable it, de-select that checkbox.
Click "Save."
Existing Ticketing Systems will appear on the left side of the page. This listing does not guarantee proper configuration. Testing is recommended to finalize settings.
If a System (Channel) has been disabled, a message will display: "This channel has been manually disabled. Edit the channel settings to re-enable it."
To edit the configuration details of the External Ticketing System, click the Edit icon
. Other options are to "Send Test Message
," "Enable for All Selected Checks
," and "Copy Channel
."
If the option is available, an "Import Customers" icon
will appear, allowing you to import the customers from your Ticketing System as Check Groups in CheckCentral. For see more details on this, see
HaloPSA (import customers). To break the links from imported Check Groups and customers in the Ticketing System, click the "Remove Links" icon
.
To Delete the Ticketing System, click the Delete icon
.
Dashboards are the visual display and consolidation of your Checks, Check Groups, and related Statuses. You can have multiple Dashboards configured for display to specific Users and User Groups, as well as the option of being publicly viewable.
The three main sections of a Dashboard are the Overview (1), the Current Issues (2), and the Checks (3).
The Overview summarizes the current collective Statuses of all your running Checks and displays the number of Paused Checks.
Green indicates Success.
Yellow indicates Warning.
Red indicates Failure. A Paused Check will have no other Status until Resumed.
Current Issues lists recent Checks with Failure and Warning Statuses as well as any Unmatched Messages and important account information. Issues may be grouped as a number when there are too many to fit the section.
Checks are the bulk of the Dashboard, listed below the Overview and Current Issues sections. Each Check is beneath its Check Group header. Checks in the same Check Group may be put into subgroups using Labels.
To learn more about Labels, see Step 1 Identification within this document. Example below:
Every Check has a Last Updated time, a Status History (consisting of a rolling window of the most recent ten Check Statuses), and actions for Setting the Check Status
, Pausing/Resuming
/
, and creating a PDF Report
of that Check's statistics/recent activity.
In the Status History of a Check, several possible icons will be used. The legend below explains each:
To learn more about Overdue Check settings, see Step 2 Schedule within this document.
To manually set a Check Status, click the check icon
to the right of the Check's Status History.
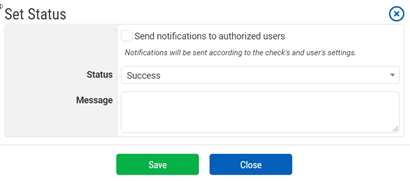
From the prompt, select the desired Status ("Success," "Warning," "Failure," "Paused," "Resumed") from the dropdown selector. Type a message to detail the reason for the manual setting and enable the checkbox at the top if a Notification should be sent to Users configured to receive Notifications for the chosen Status.
Click "Save."
To directly Pause Checks from the Dashboard, Click the Pause icon
. If a Check is already Paused, the Resume icon
will display. Click that icon to Resume the Paused Check.
Your default Dashboard cannot be modified, but you can create custom Dashboards with variations of display and User access.
At the top of the Dashboard page are these options: "Custom Dashboard View
," "Save PDF Report
," and "Refresh
." To create a new Dashboard, click on the Custom Dashboard View icon
.
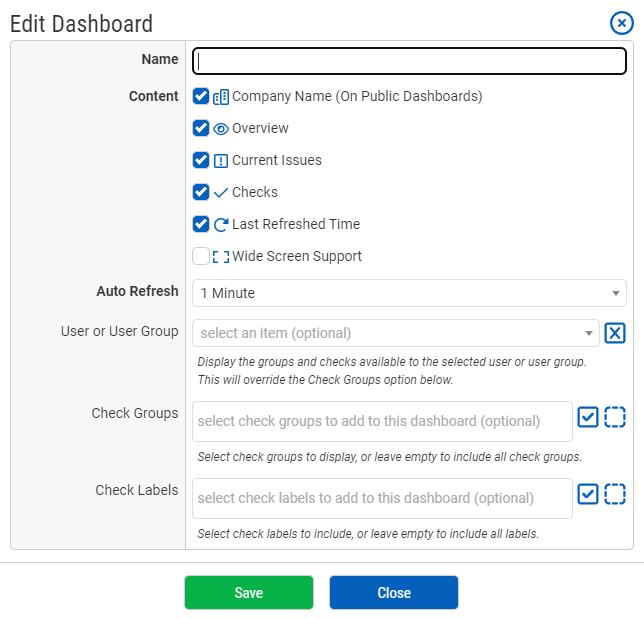
Name your new Dashboard. The majority of the checkboxes are for displaying/hiding various sections of the Dashboard: "
Overview," "
Current Issues," "
Checks," and "
Last Refreshed Time" (shown at the bottom of the Dashboard).
Wide screen displays may alter the layout (resizing is restricted by default). To allow for wide screen resizing, enable the checkbox "
Wide Screen Support."
Choose a refresh time interval via the Auto Refresh dropdown selector.
Using the multi-select field, select which Users and/or User Groups can have access to this Dashboard. The Checks and Check Groups to which the selected Users/User Groups have access will display. If they lack access to certain Checks and Check Groups, those will not be displayed in the Dashboard.
To filter the display for specific Check Groups or Check Labels, select those from the multi-select fields. Your User/User Group choices will override any of these Check Group selections based on the User/User Group access settings.
Click "Save."
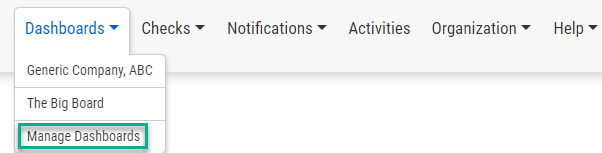
Once you have created a custom Dashboard, it will be listed in both the Dashboards menu (see image below) and on the Manage Dashboards page. Only those with access to a Dashboard will see it listed in the Dashboards menu.
To navigate to a particular Dashboard, select it from the Dashboards tab on the main menu. For the Dashboard management page, click on Manage Dashboards.
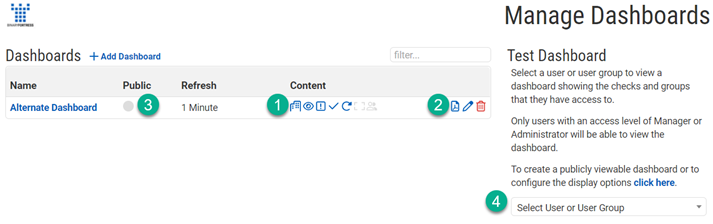
The Dashboard's display configuration options and User Groups are shown as icons in the Content column (1). Hover over the icon to see more detail. To edit these settings, click the Edit Dashboard icon
(2).
To make a Dashboard publicly visible (Public Dashboards are viewable by anyone with the link), click on the gray dot (3). It will turn green with an icon link to the dashboard URL, like this:
.
To test a User or User Group's access to the main Dashboard, select them from the dropdown selector (4). A link will be generated below which displays the main Dashboard from the perspective of that selected User or User Group.
To add another Dashboard from this page, click "
Add Dashboard
" above the Dashboards table.
To Delete a Dashboard, click the Delete icon
on the row of the specific Dashboard.
CheckCentral Monitoring consolidates and simplifies backup, system, and software email updates into a clean, graphical dashboard, bringing peace of mind to IT administrators of SMBs, Enterprises, and MSPs.
To learn more about CheckCentral, visit:
https://www.checkcentral.ccBinary Fortress has spent 19 years in pursuit of one goal: create software to make life easier. Our software ranges from display management and system enhancement utilities to monitoring tools and digital signage. IT administrators, professional gamers, coffee-shop owners, and MSPs all rely on Binary Fortress to make their days better, and their lives easier.
Copyright © 2007-2026 Binary Fortress Software, all rights reserved.
The Binary Fortress logo is a trademark of Binary Fortress Software.
The CheckCentral logo is a trademark of Binary Fortress Software.
Binary Fortress Software
1000 Innovation Drive, Suite 500
Kanata, Ontario, Canada
K2K3E7
https://www.binaryfortress.com